In-Season Programming
 By: Eric McGinnis, CSCSDirector of SSP Swim
Rollins College Strength & Conditioning Coach
Sports Performance SpecialistSpectrum Sports Performance
High school swimming is underway here in Florida. One of the biggest hurdles swim coaches face is how to keep their swimmers strong and fit out of the water during the season. Many teams may have access to a weight room and a strength coach, but what about for teams that don’t? Here is a simple in-season guide to keeping your swimmers strong with minimal equipment.
Equipment:
Medicine Balls: 6-12 lb.
Kettlebells: 4-16 kg, or 9-35 lb.
Exercise Bands: Various thicknesses
SHOES!!! : Swimmers often neglect shoes on the pool deck. Make sure you have them!
The Program:
You will perform two training sessions per week using the exercises listed below. The exercises are divided into 7 different categories. Make sure to have at least one recovery day in between these workouts. The layout of your workout should look as follows:
Day 1
1 Upper Pressing exercise
1 Upper Pulling exercise
1 Shoulder Stability exercise
1 Lower Pull- knee dominant exercise
1 Lower Push- linear exercise
Day 2
1 Upper Pressing exercise (same as day 1)
1 Upper Pulling exercise (same as day 1)
1 Shoulder Stability exercise (same as day 1)
1 Lower Pull- hip dominant exercise
1 Lower Push- lateral exercise
Exercise List:Upper Pressing (in order from easiest to most difficult)
Push-up
1 Hand Medicine Push-up
2 Hand Medicine Ball Push-up
Upper Pulling (in order from easiest to most difficult)
Rows
Alternating Pull-downs
Straight Arm Pull-Downs
Shoulder Stability
Waiter Carry
Pull-apart: Underhand Grip
Lower Pull- Knee Dominant (in order from easiest to most difficult)
MB Leg Curl: 2 legs
MB Leg Curl: 1 Leg
Falling Hamstrings
Lower Pull- Hip Dominant (in order from easiest to most difficult)
RDL
RDL: 1 leg
Lower Push- Linear (in order from easiest to most difficult)
Goblet Squat
Split Squat
Forward/Backward Lunge
Lower Push- Lateral (in order from simplest to most difficult)
Lateral Lunge
Cossack Squats
Progressing the Program:
There are three factors to consider when progressing a program: volume (sets and reps), intensity (i.e. weight lifted), and exercise selection (difficulty of exercise). In a typical weight-training program we would increase intensity throughout the season. However, since we have limited equipment to increase our load, we will focus on volume and exercise selection instead.
Exercise Selection
All of the exercise categories except shoulder stability are listed in order from easiest to most difficult. When picking your exercises, you want to start with the simplest and make sure your athletes have mastered that particular variation before progressing to the next. This program will progress in three-week cycles. You will perform the same exercises each week for three weeks before deciding if the athletes are ready to advance.
Volume
The way we will progress volume is very simple. Working within our three-week cycles, we will begin week one with three sets of eight repetitions on each exercise (3×8). Week two will increase to 3×10, and week three will be 3×12. After week three you will progress to a more advance exercise (assuming the athletes are ready) and go back to 3×8, starting a new three-week cycle.
* Sets and reps for the shoulder stability exercises will be different. Keep the sets and reps for pull-aparts at 3×12, and the waiter carry at 3x 25 yards each arm.
Sample Program:Cycle 1: Week 1, 2, 3
Day 1:
Push-ups- 3×8, 3×10, 3×12
Rows- 3×8, 3×10, 3×12
MB Leg Curls- 2 legs- 3×8, 3×10, 3×12
Goblet Squat – 3×8, 3×10, 3×12
Pull-aparts – 3×12, 3×12, 3×12
Day 2:
Push-ups- 3×8, 3×10, 3×12
Rows- 3×8, 3×10, 3×12
RDL- 3×8, 3×10, 3×12
Lateral Lunge- 3×8, 3×10, 3×12
Pull-aparts- 3×12, 3×12, 3×12
Exercise Descriptions:Push-up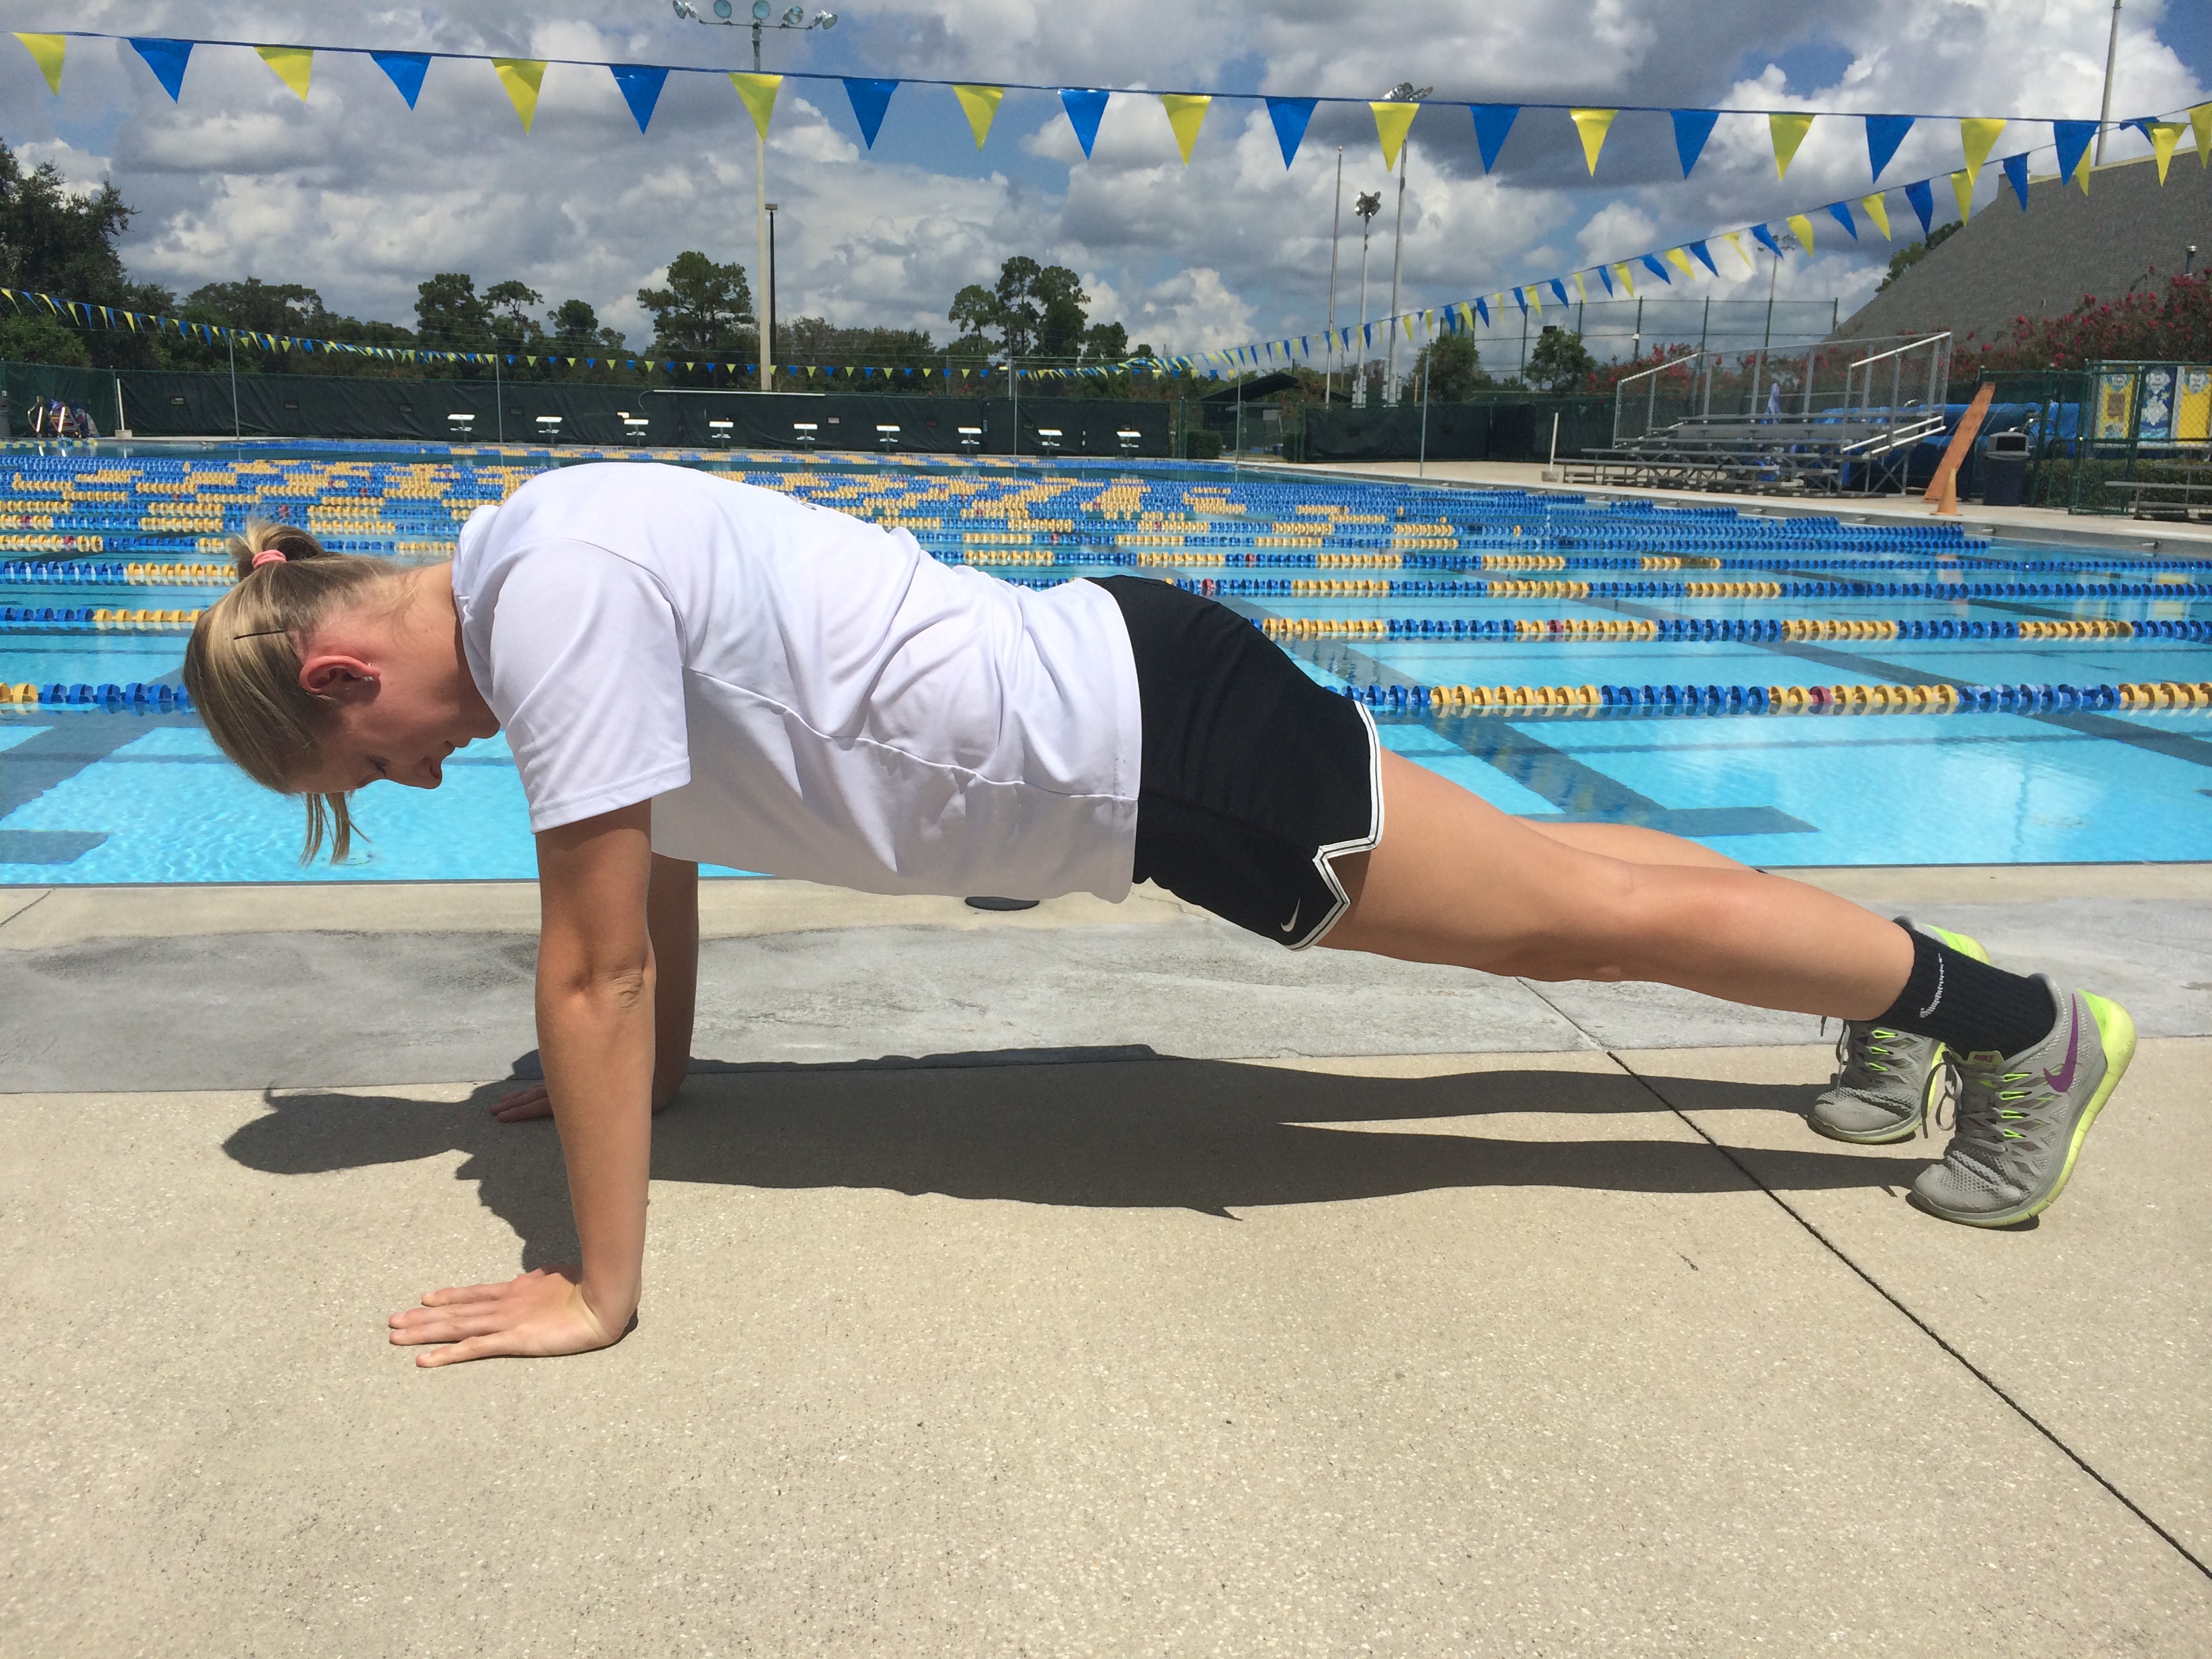
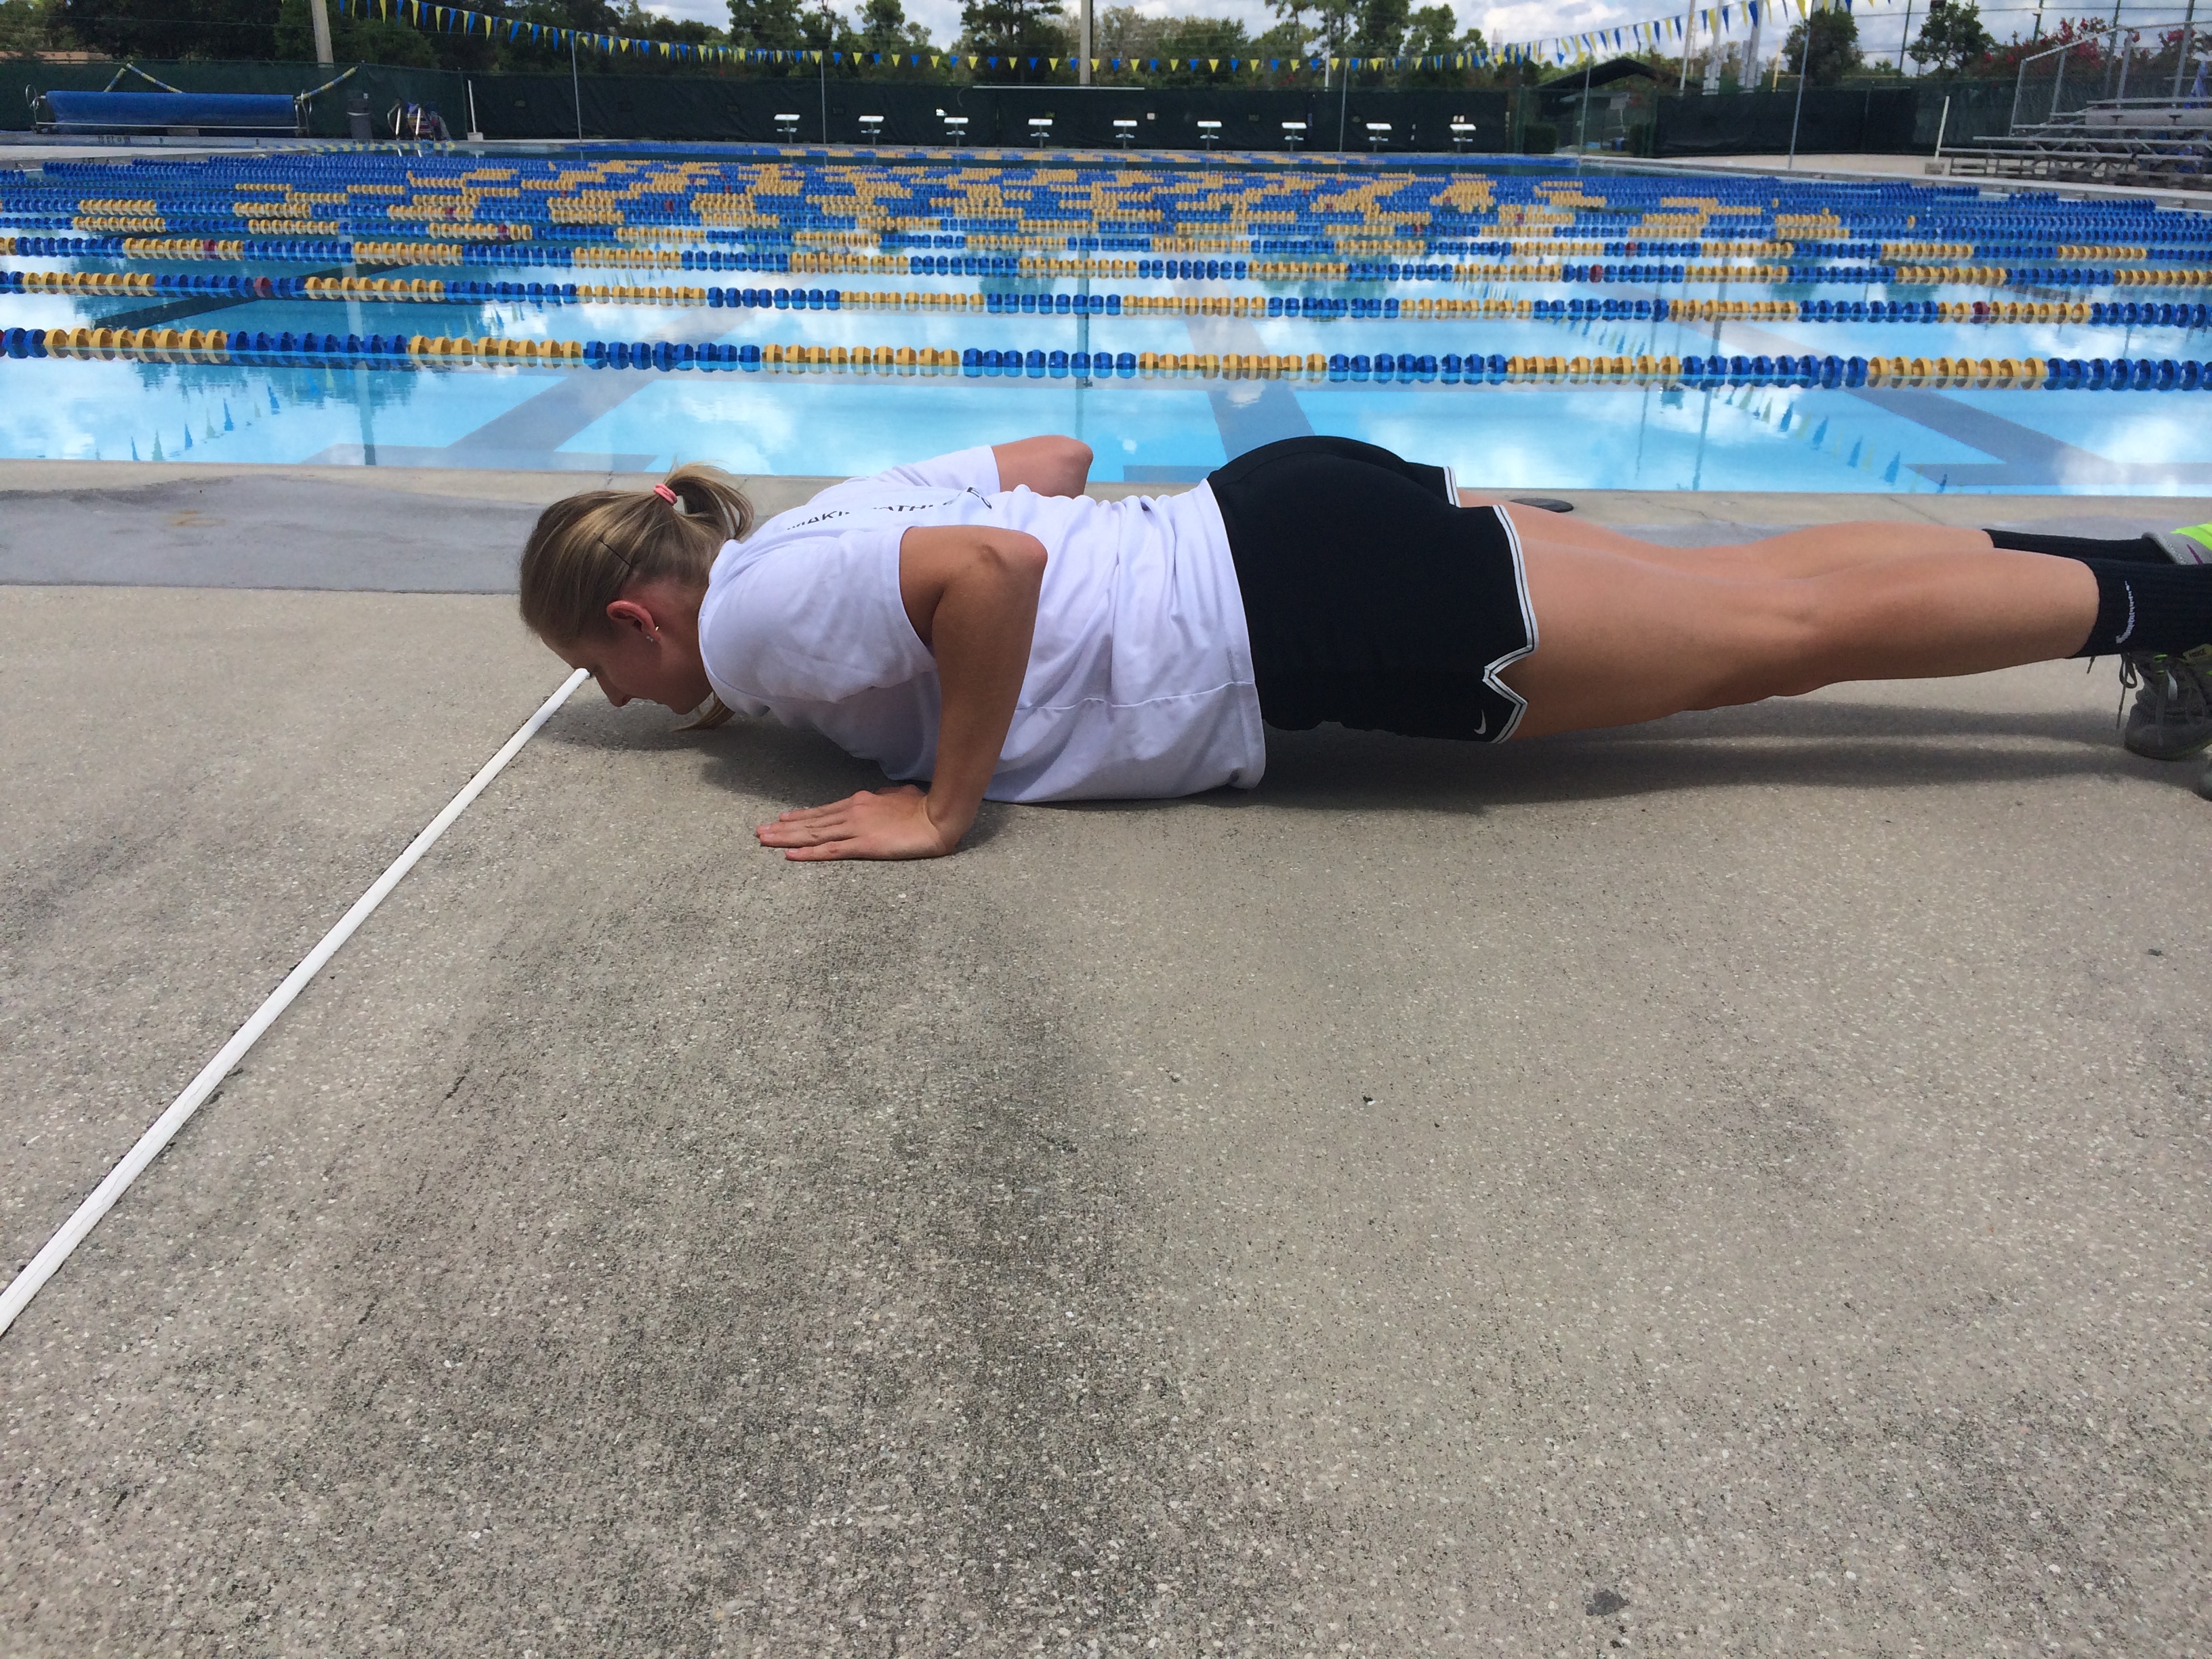
Begin in a push-up position forming a straight line from head to heel. Your glutes and core should be engaged as you lower down until your chest touches the floor. Think about making the pits of your elbows face forward as you lower down.
1 Hand Medicine Push-up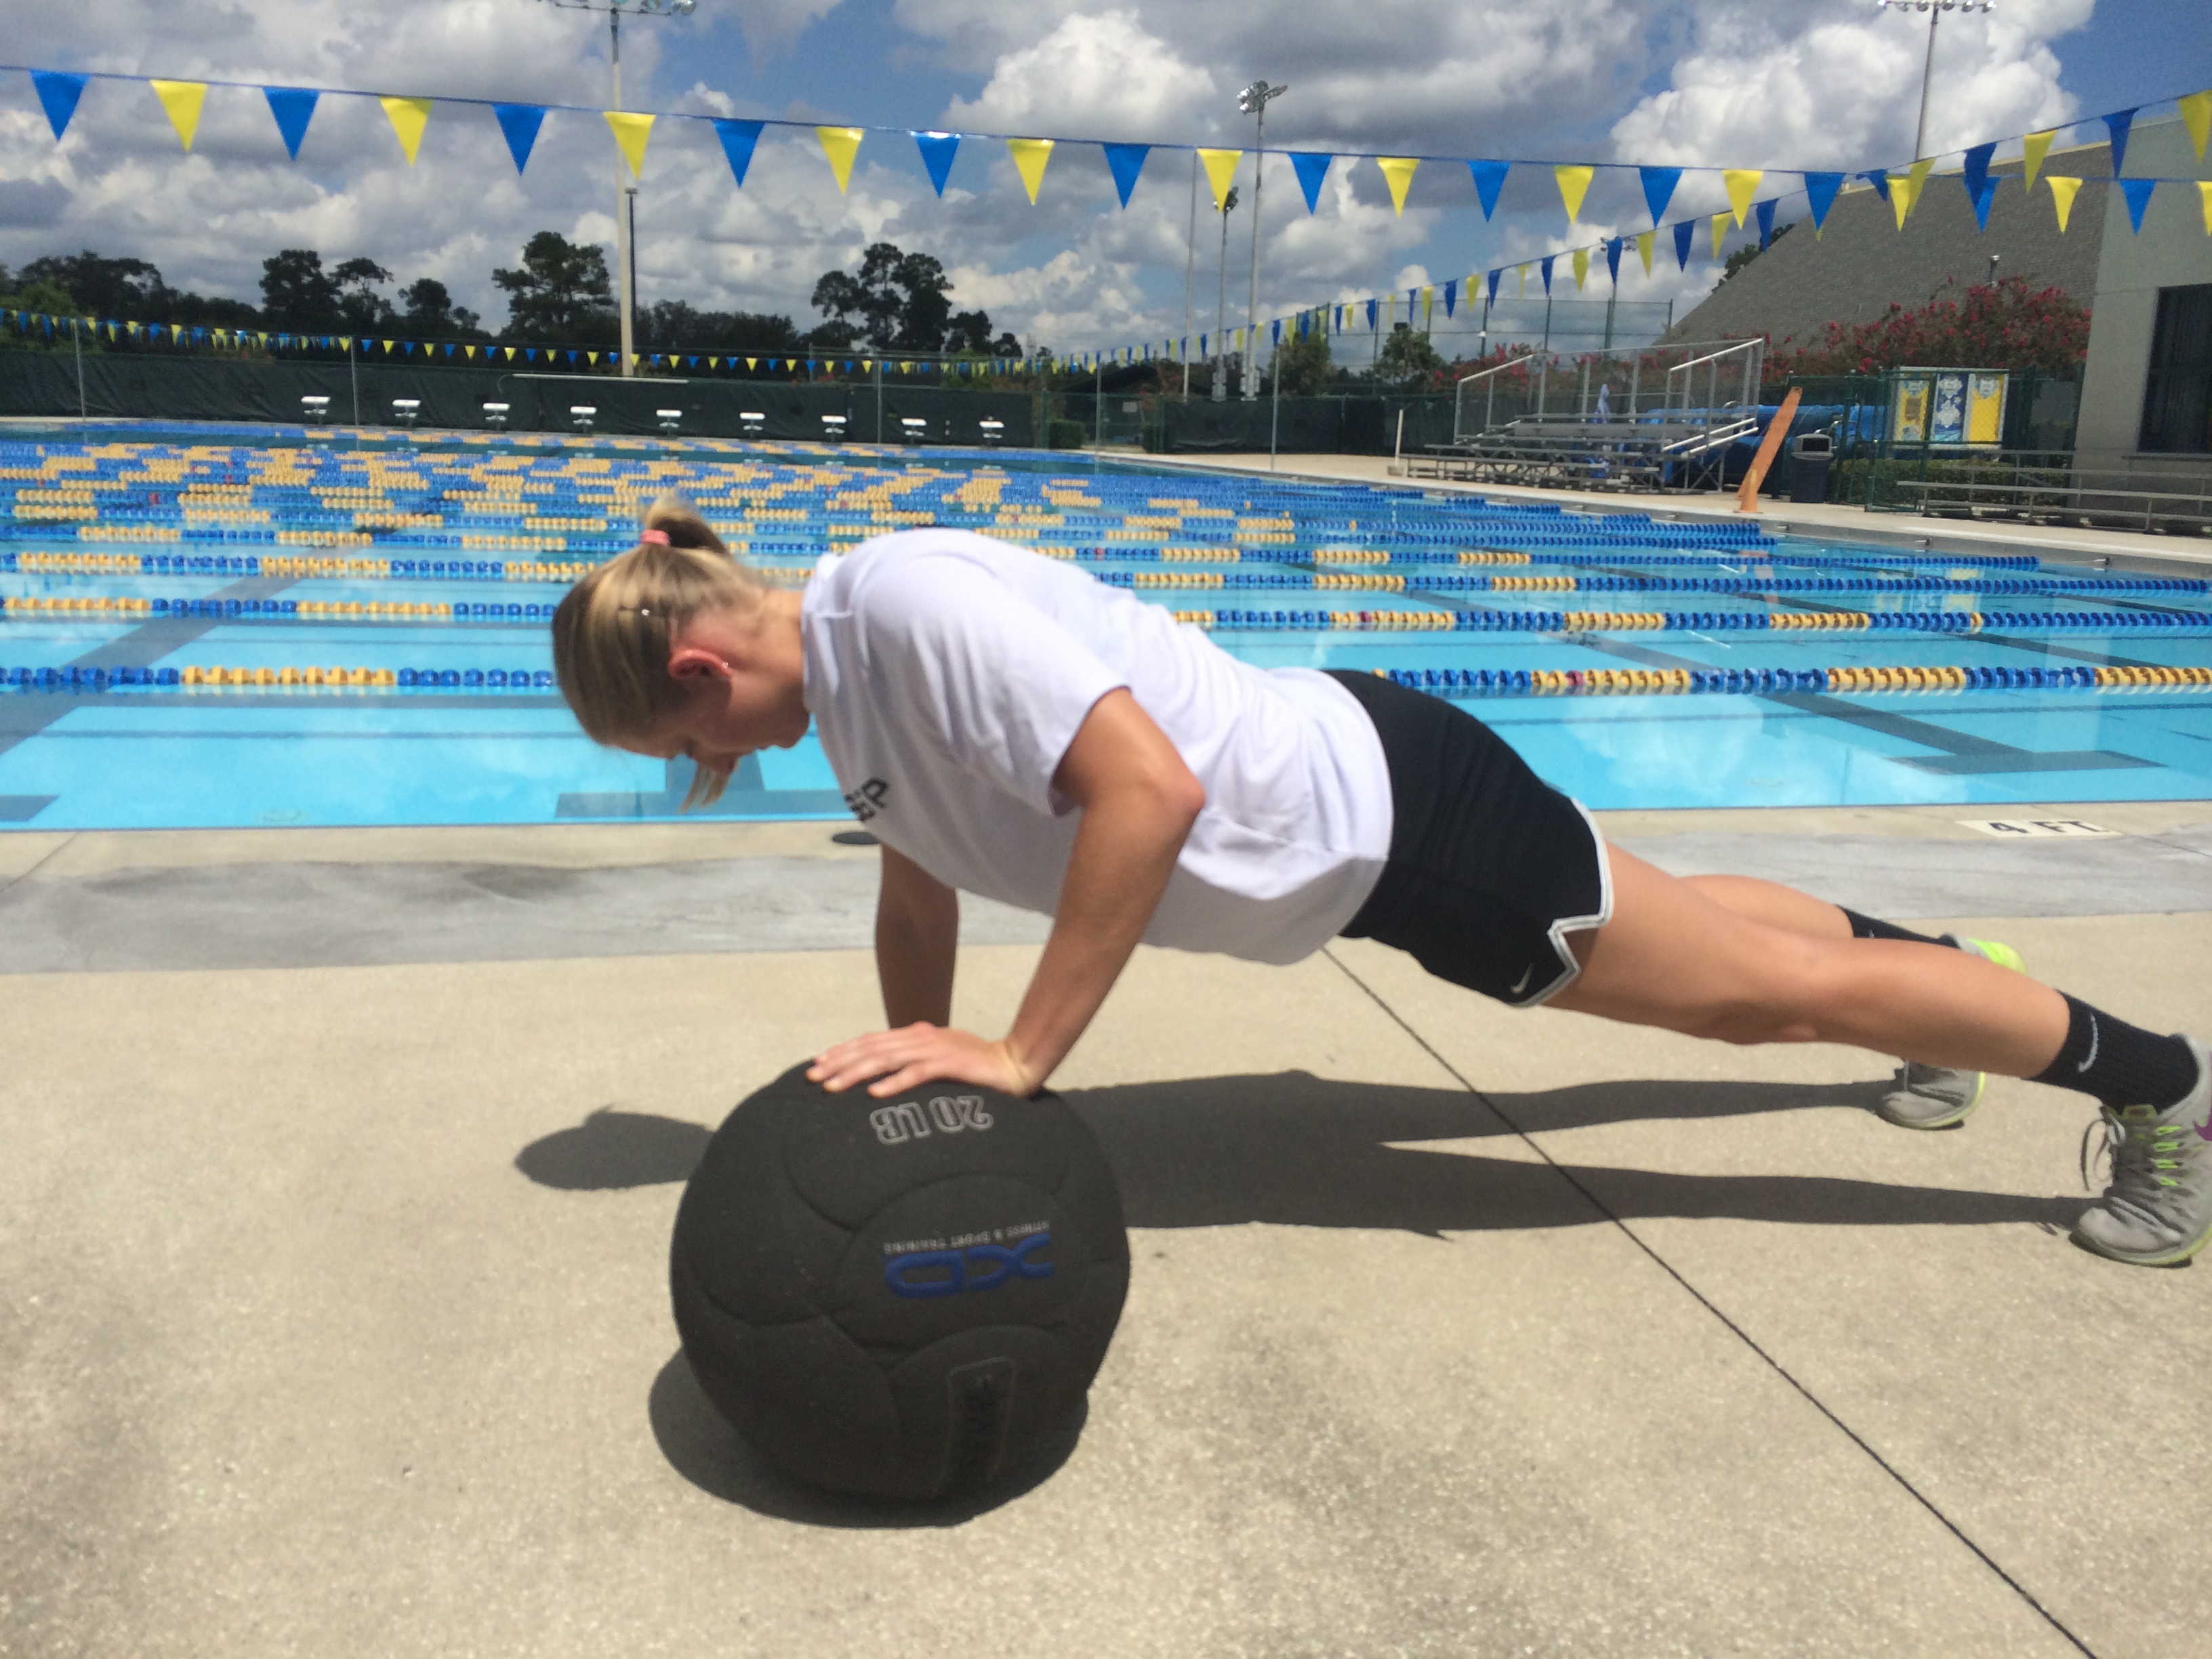
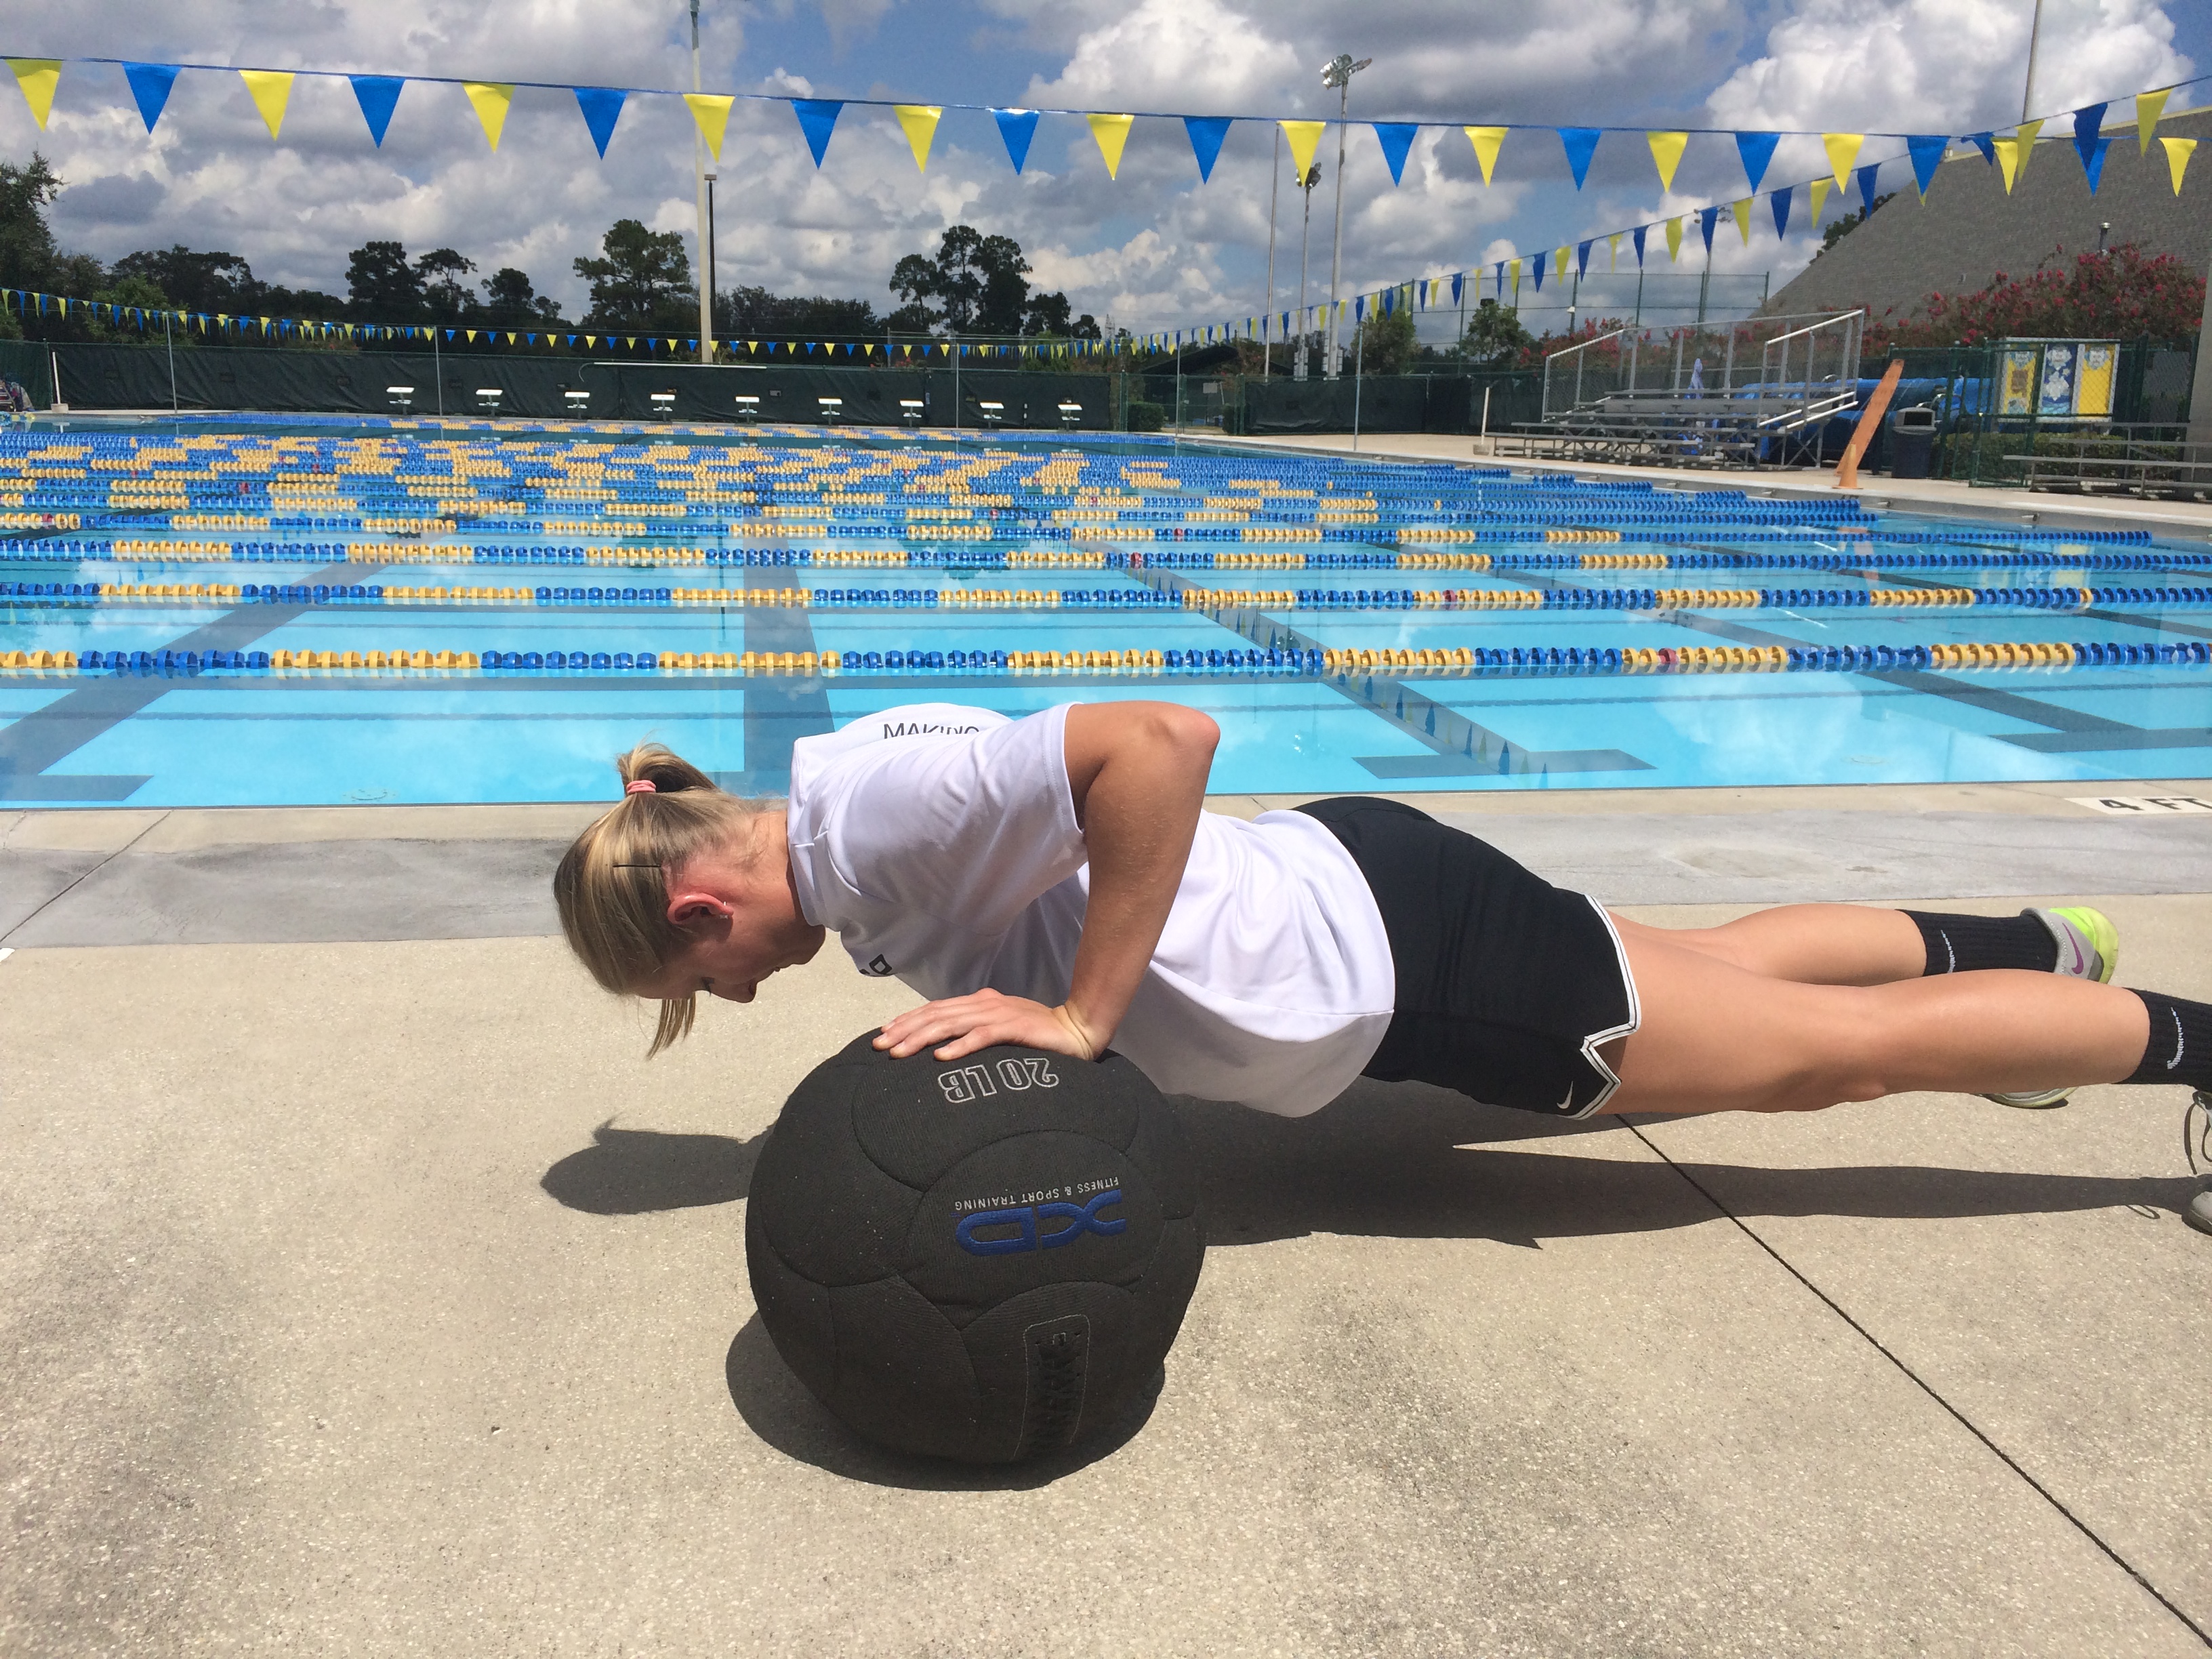
The same rules apply here as they do on a regular push-up, but with one hand directly on top of the medicine ball.
2 Hand Medicine Ball Push-up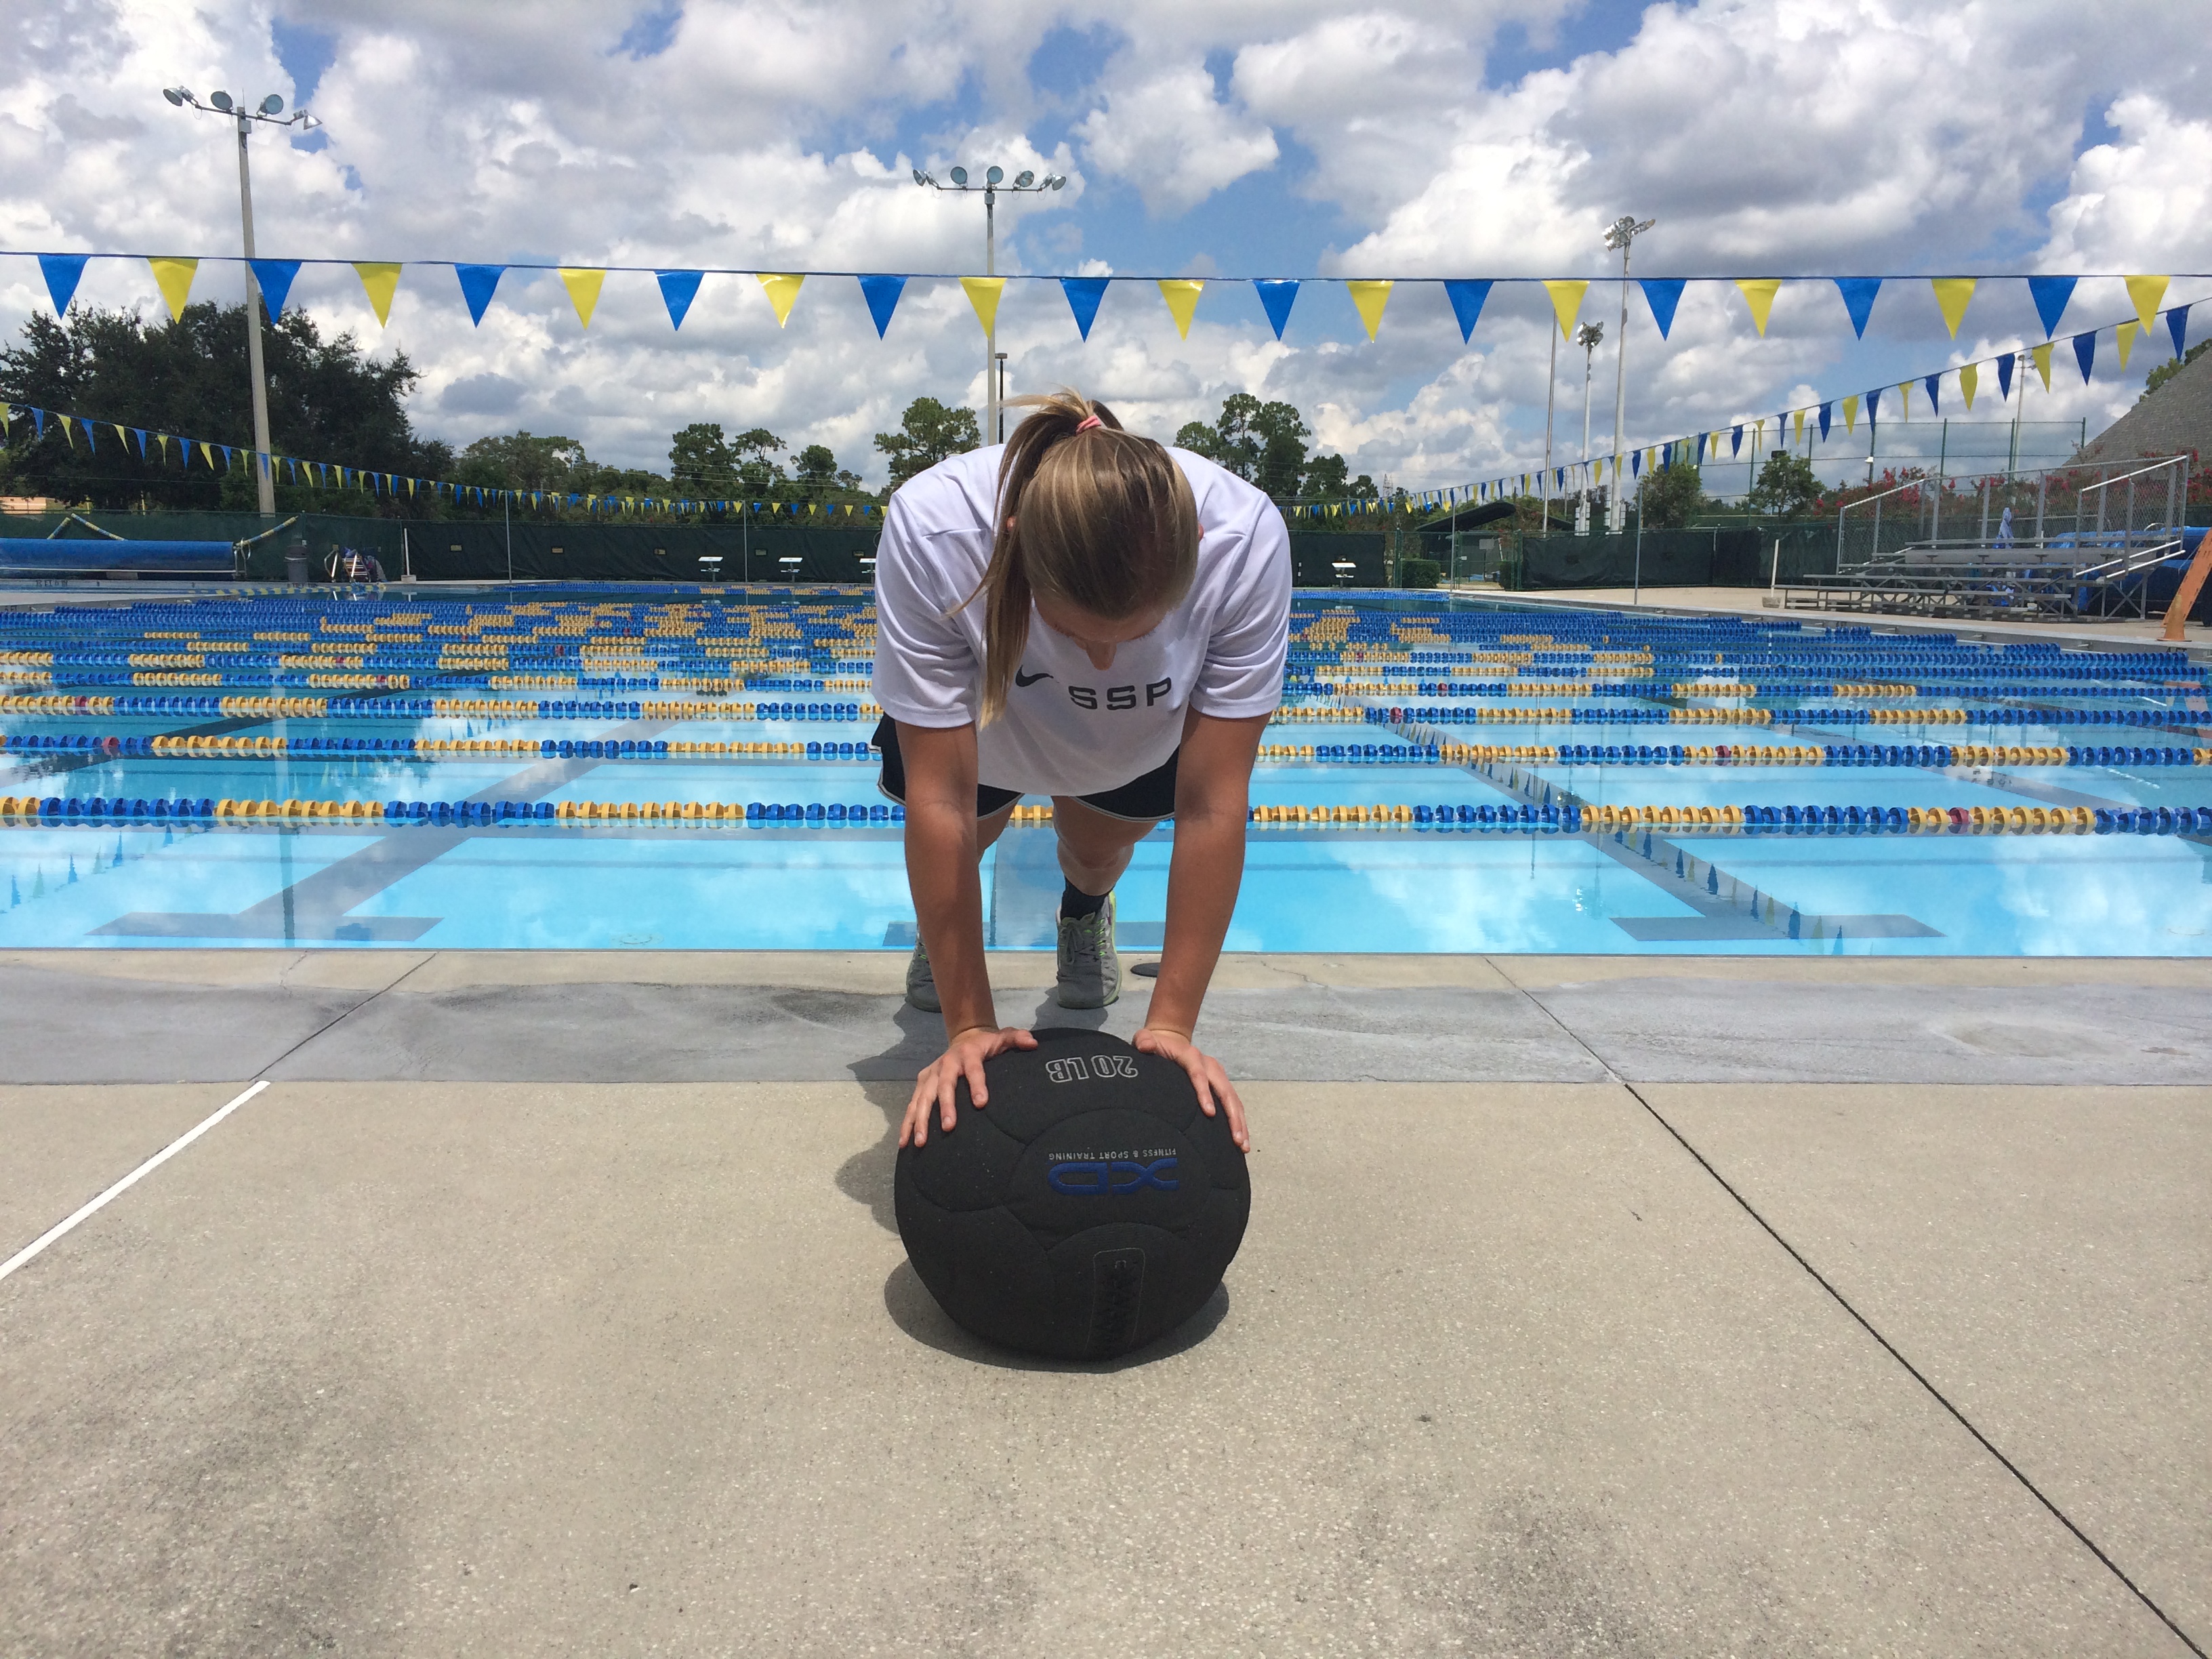
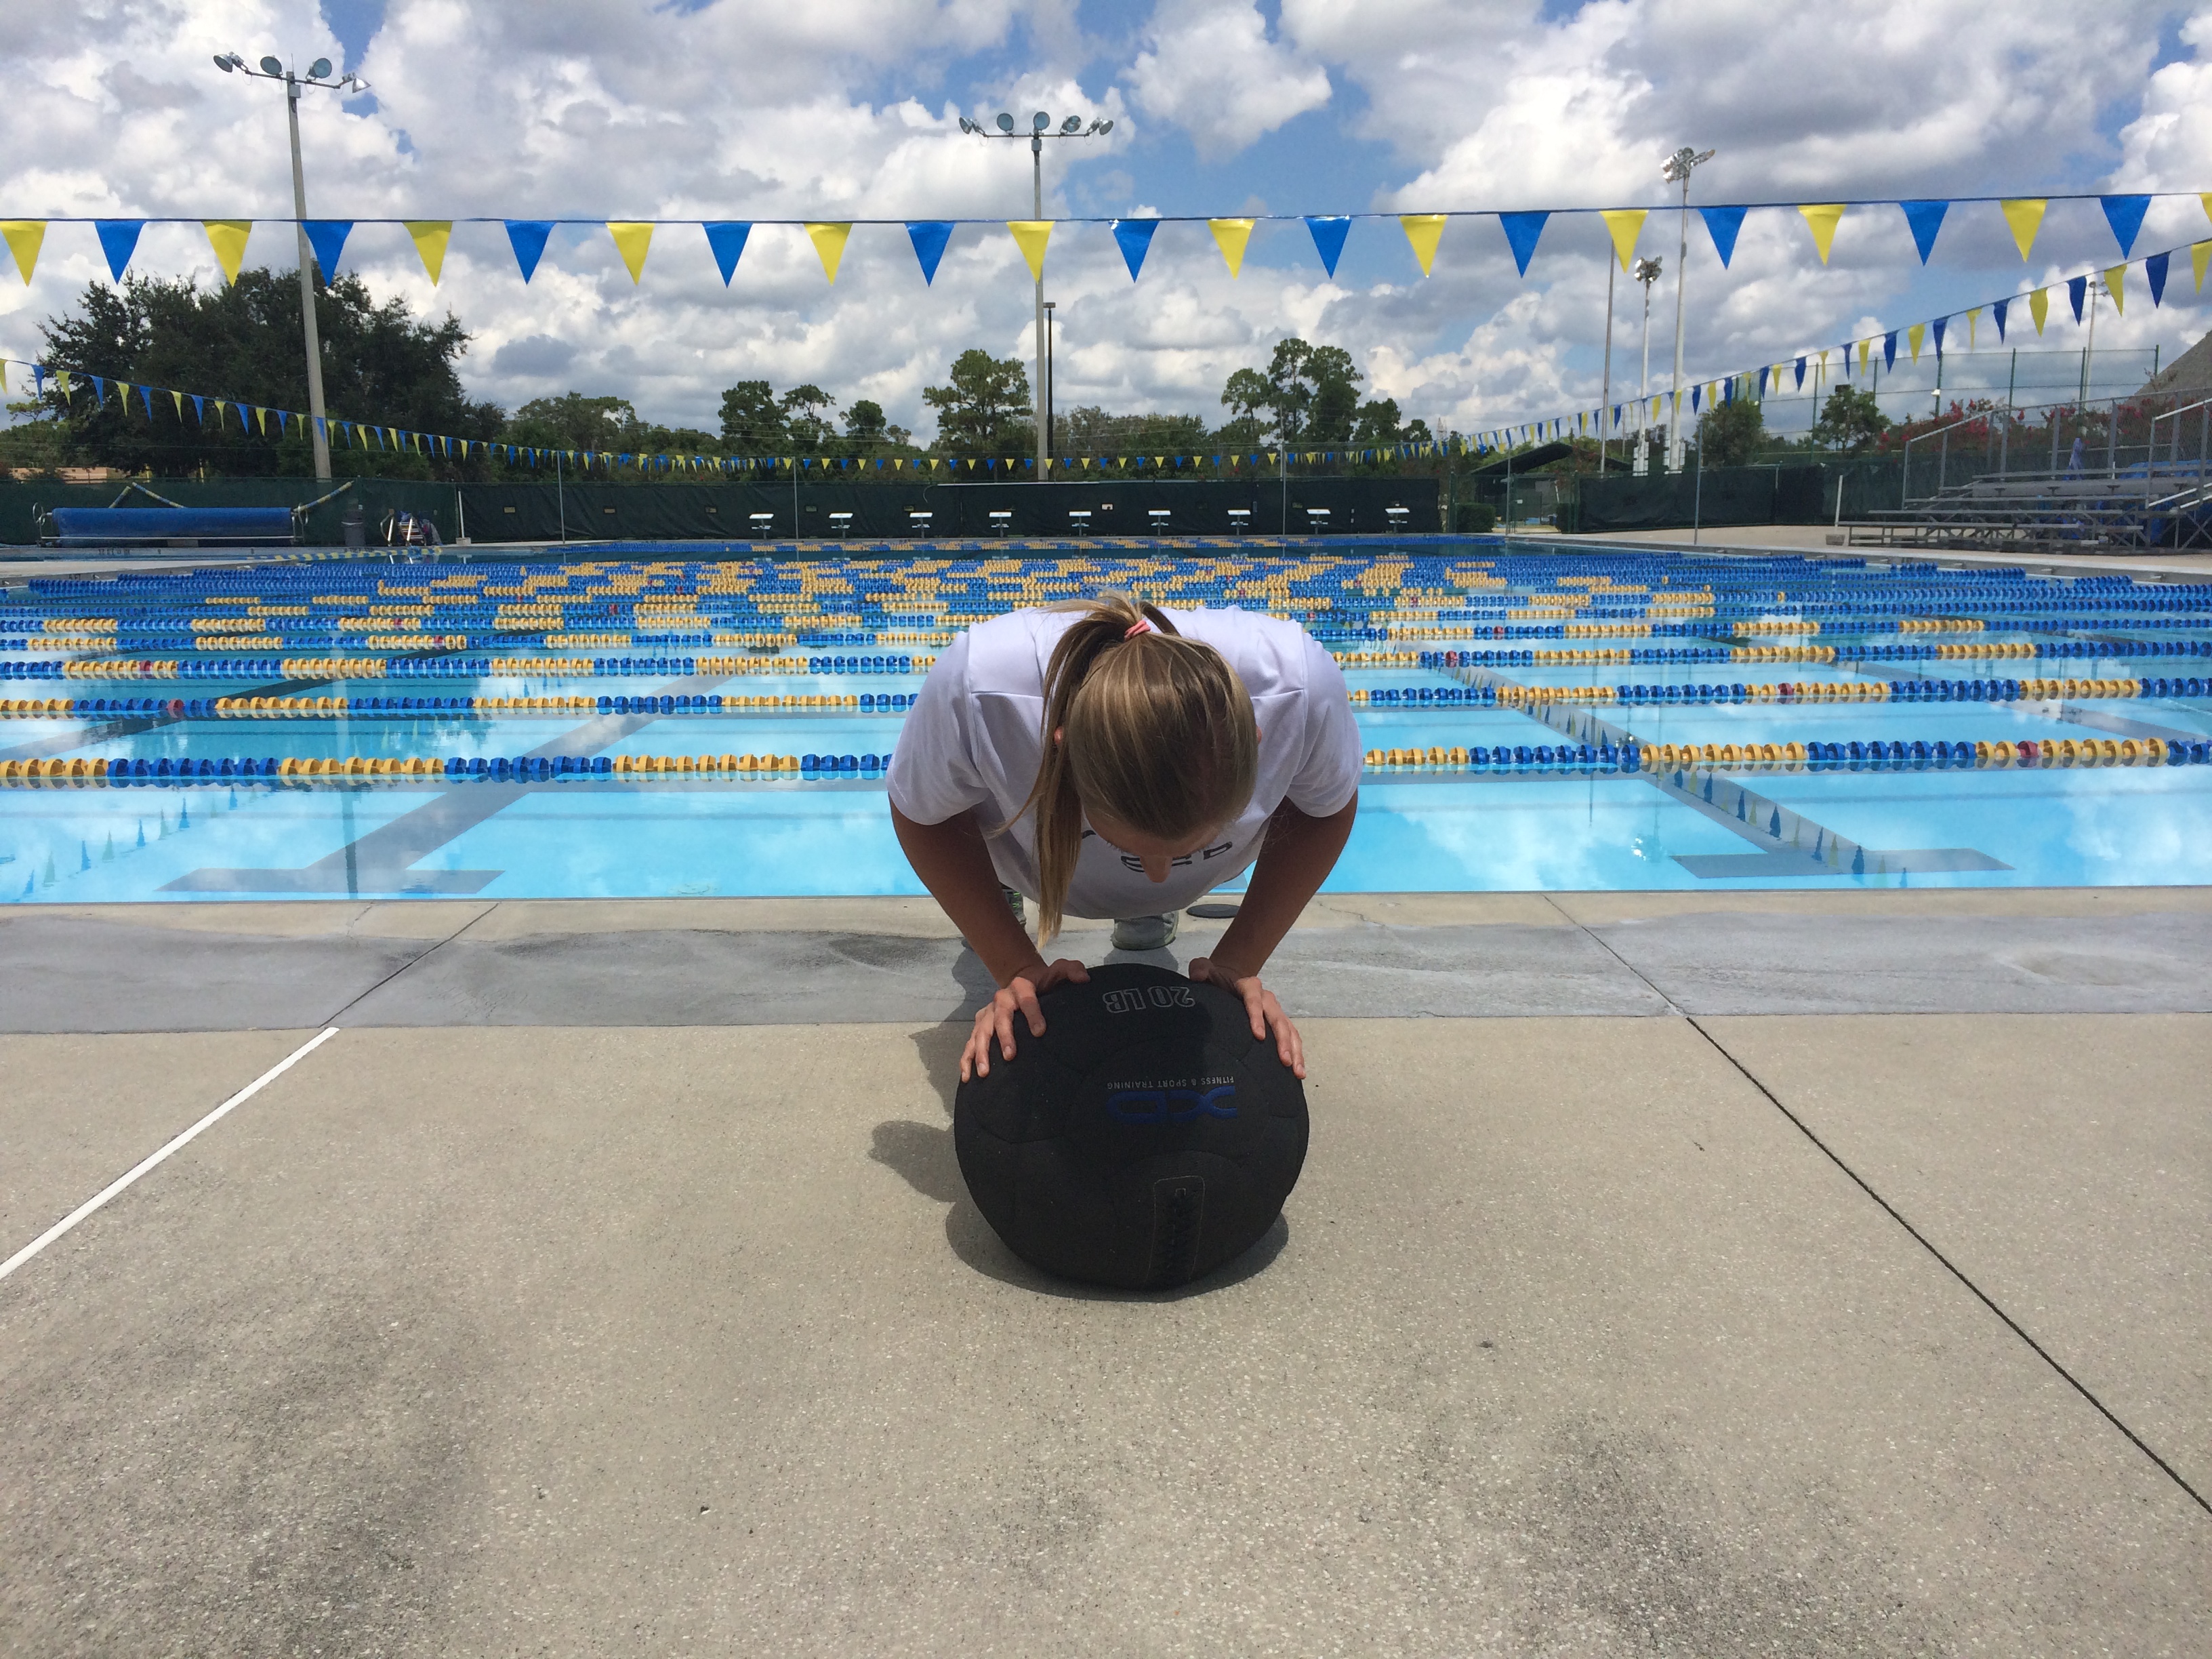
Place both hand on the medicine ball and begin in push-up position. Try to keep the elbow tucked on the way down. This exercise will put more emphasis on the triceps while also adding a stability component to a standard push-up.
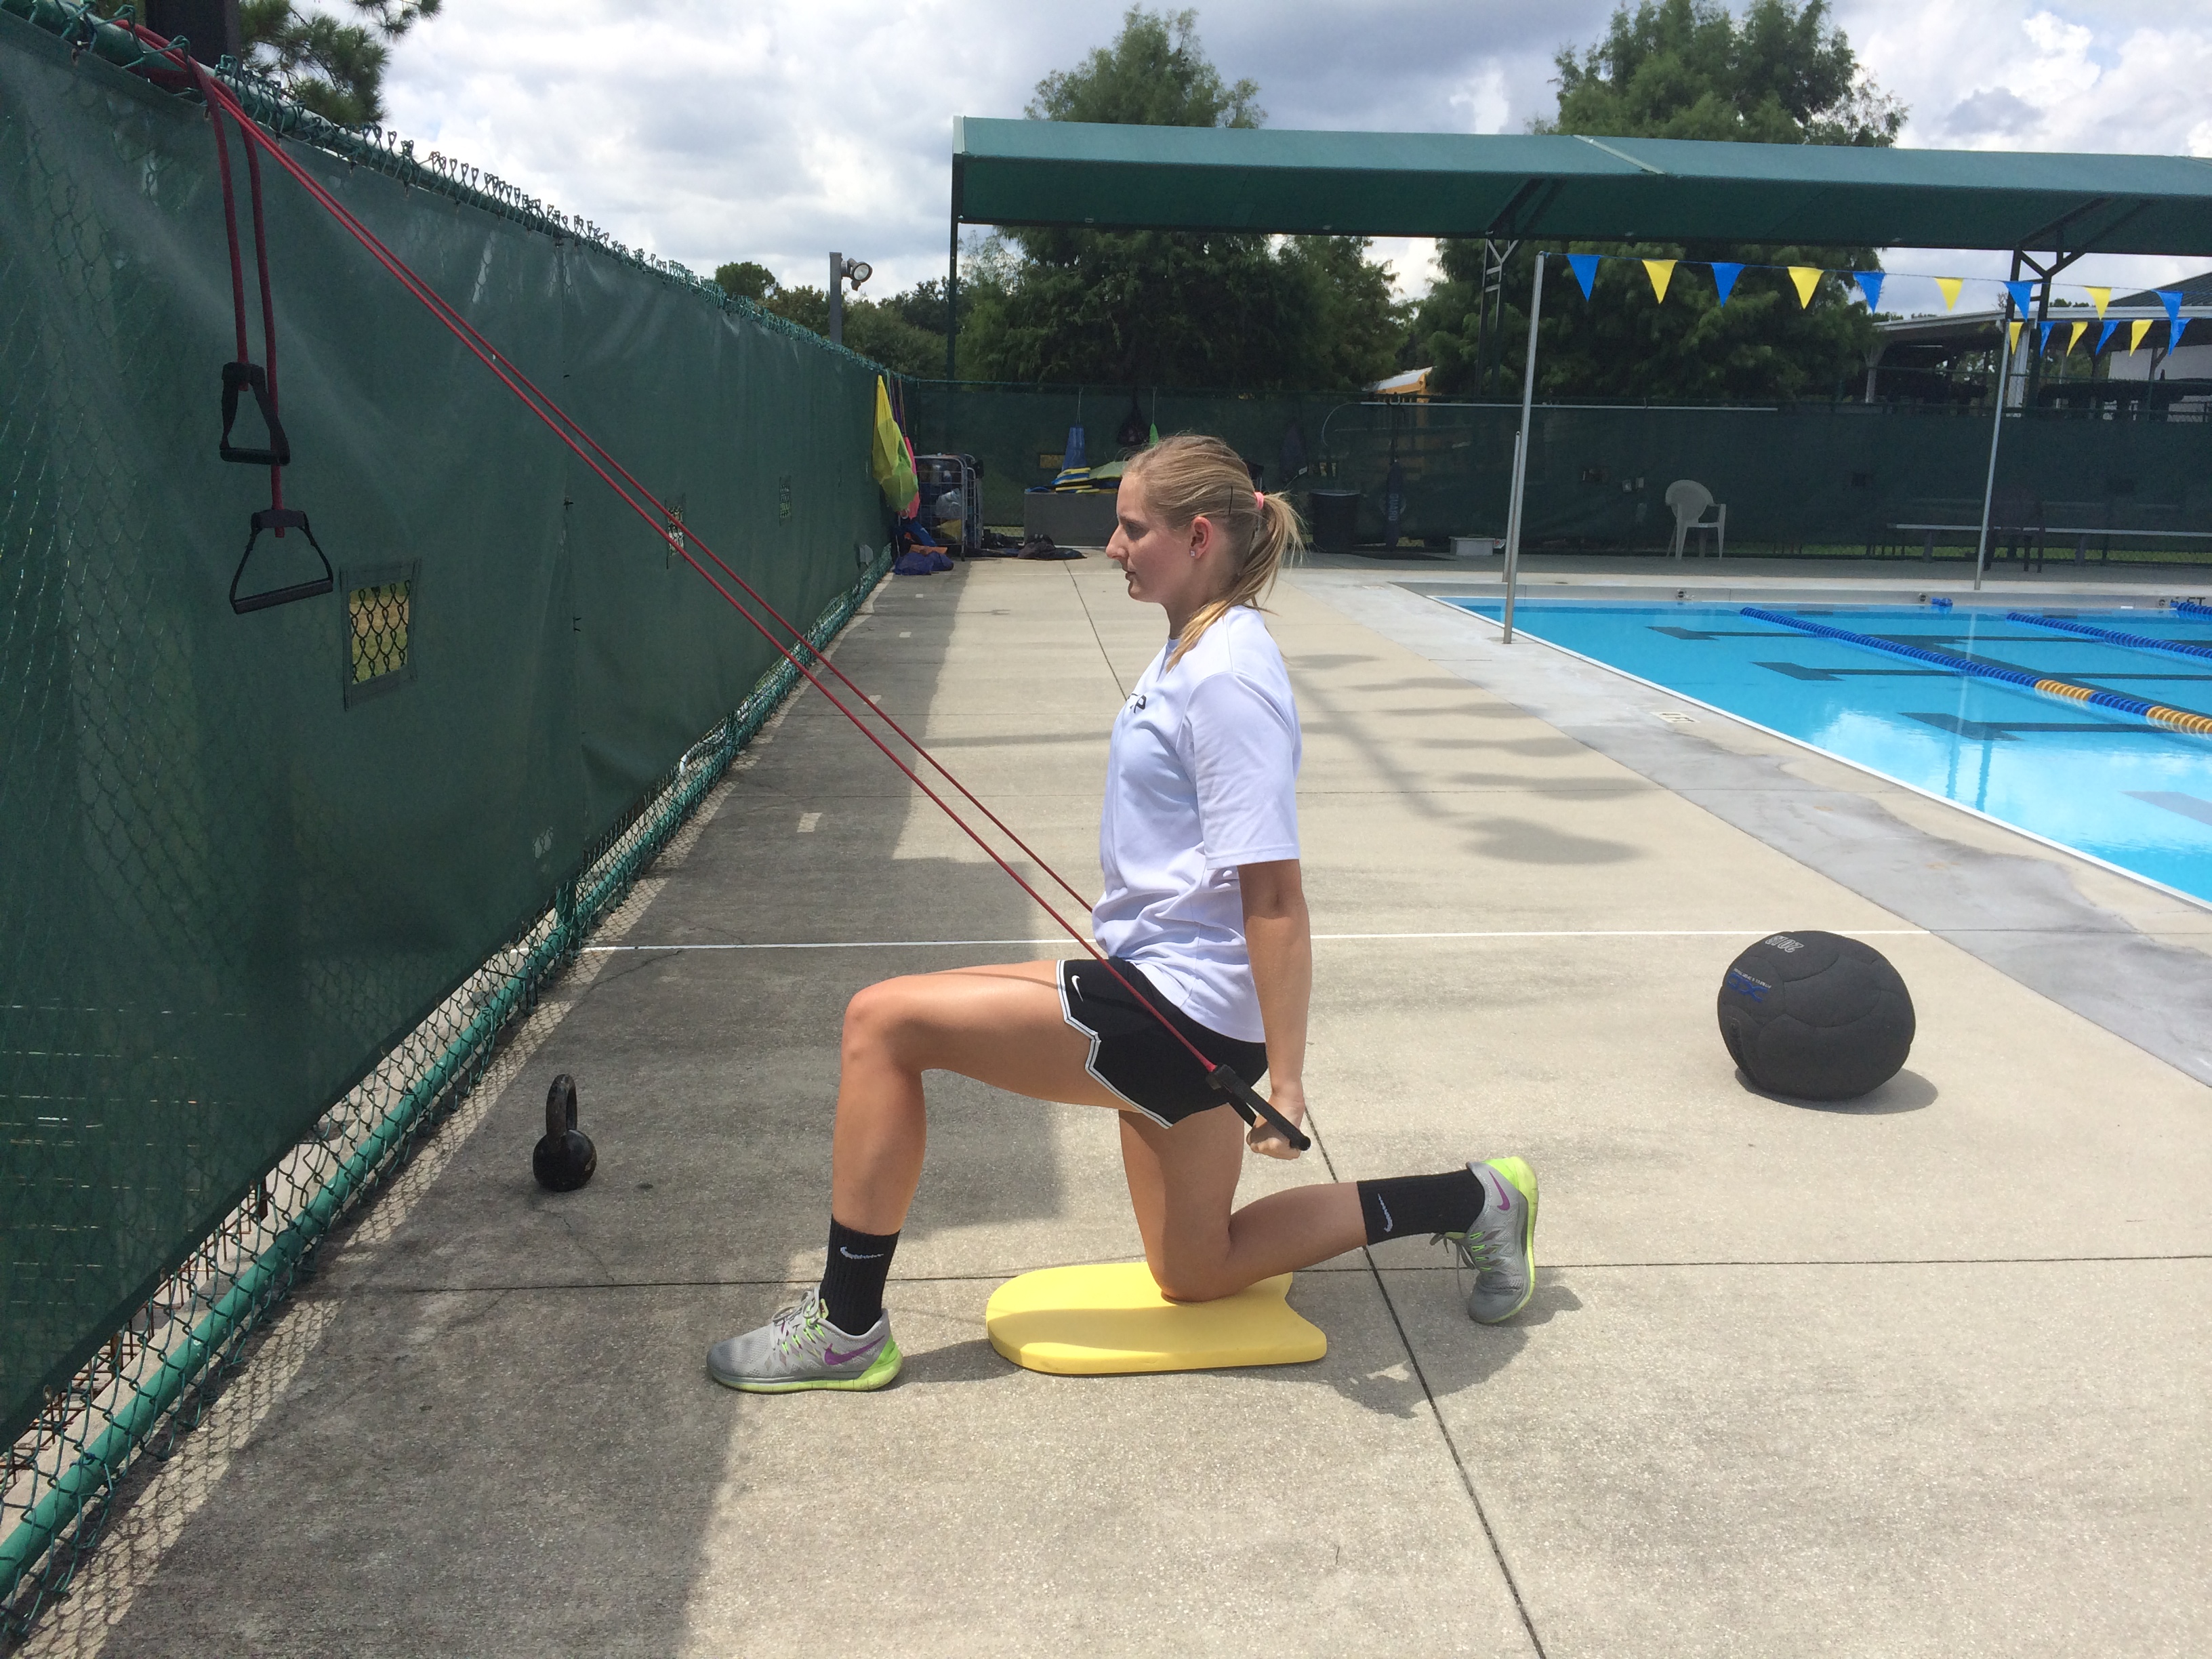
Rows
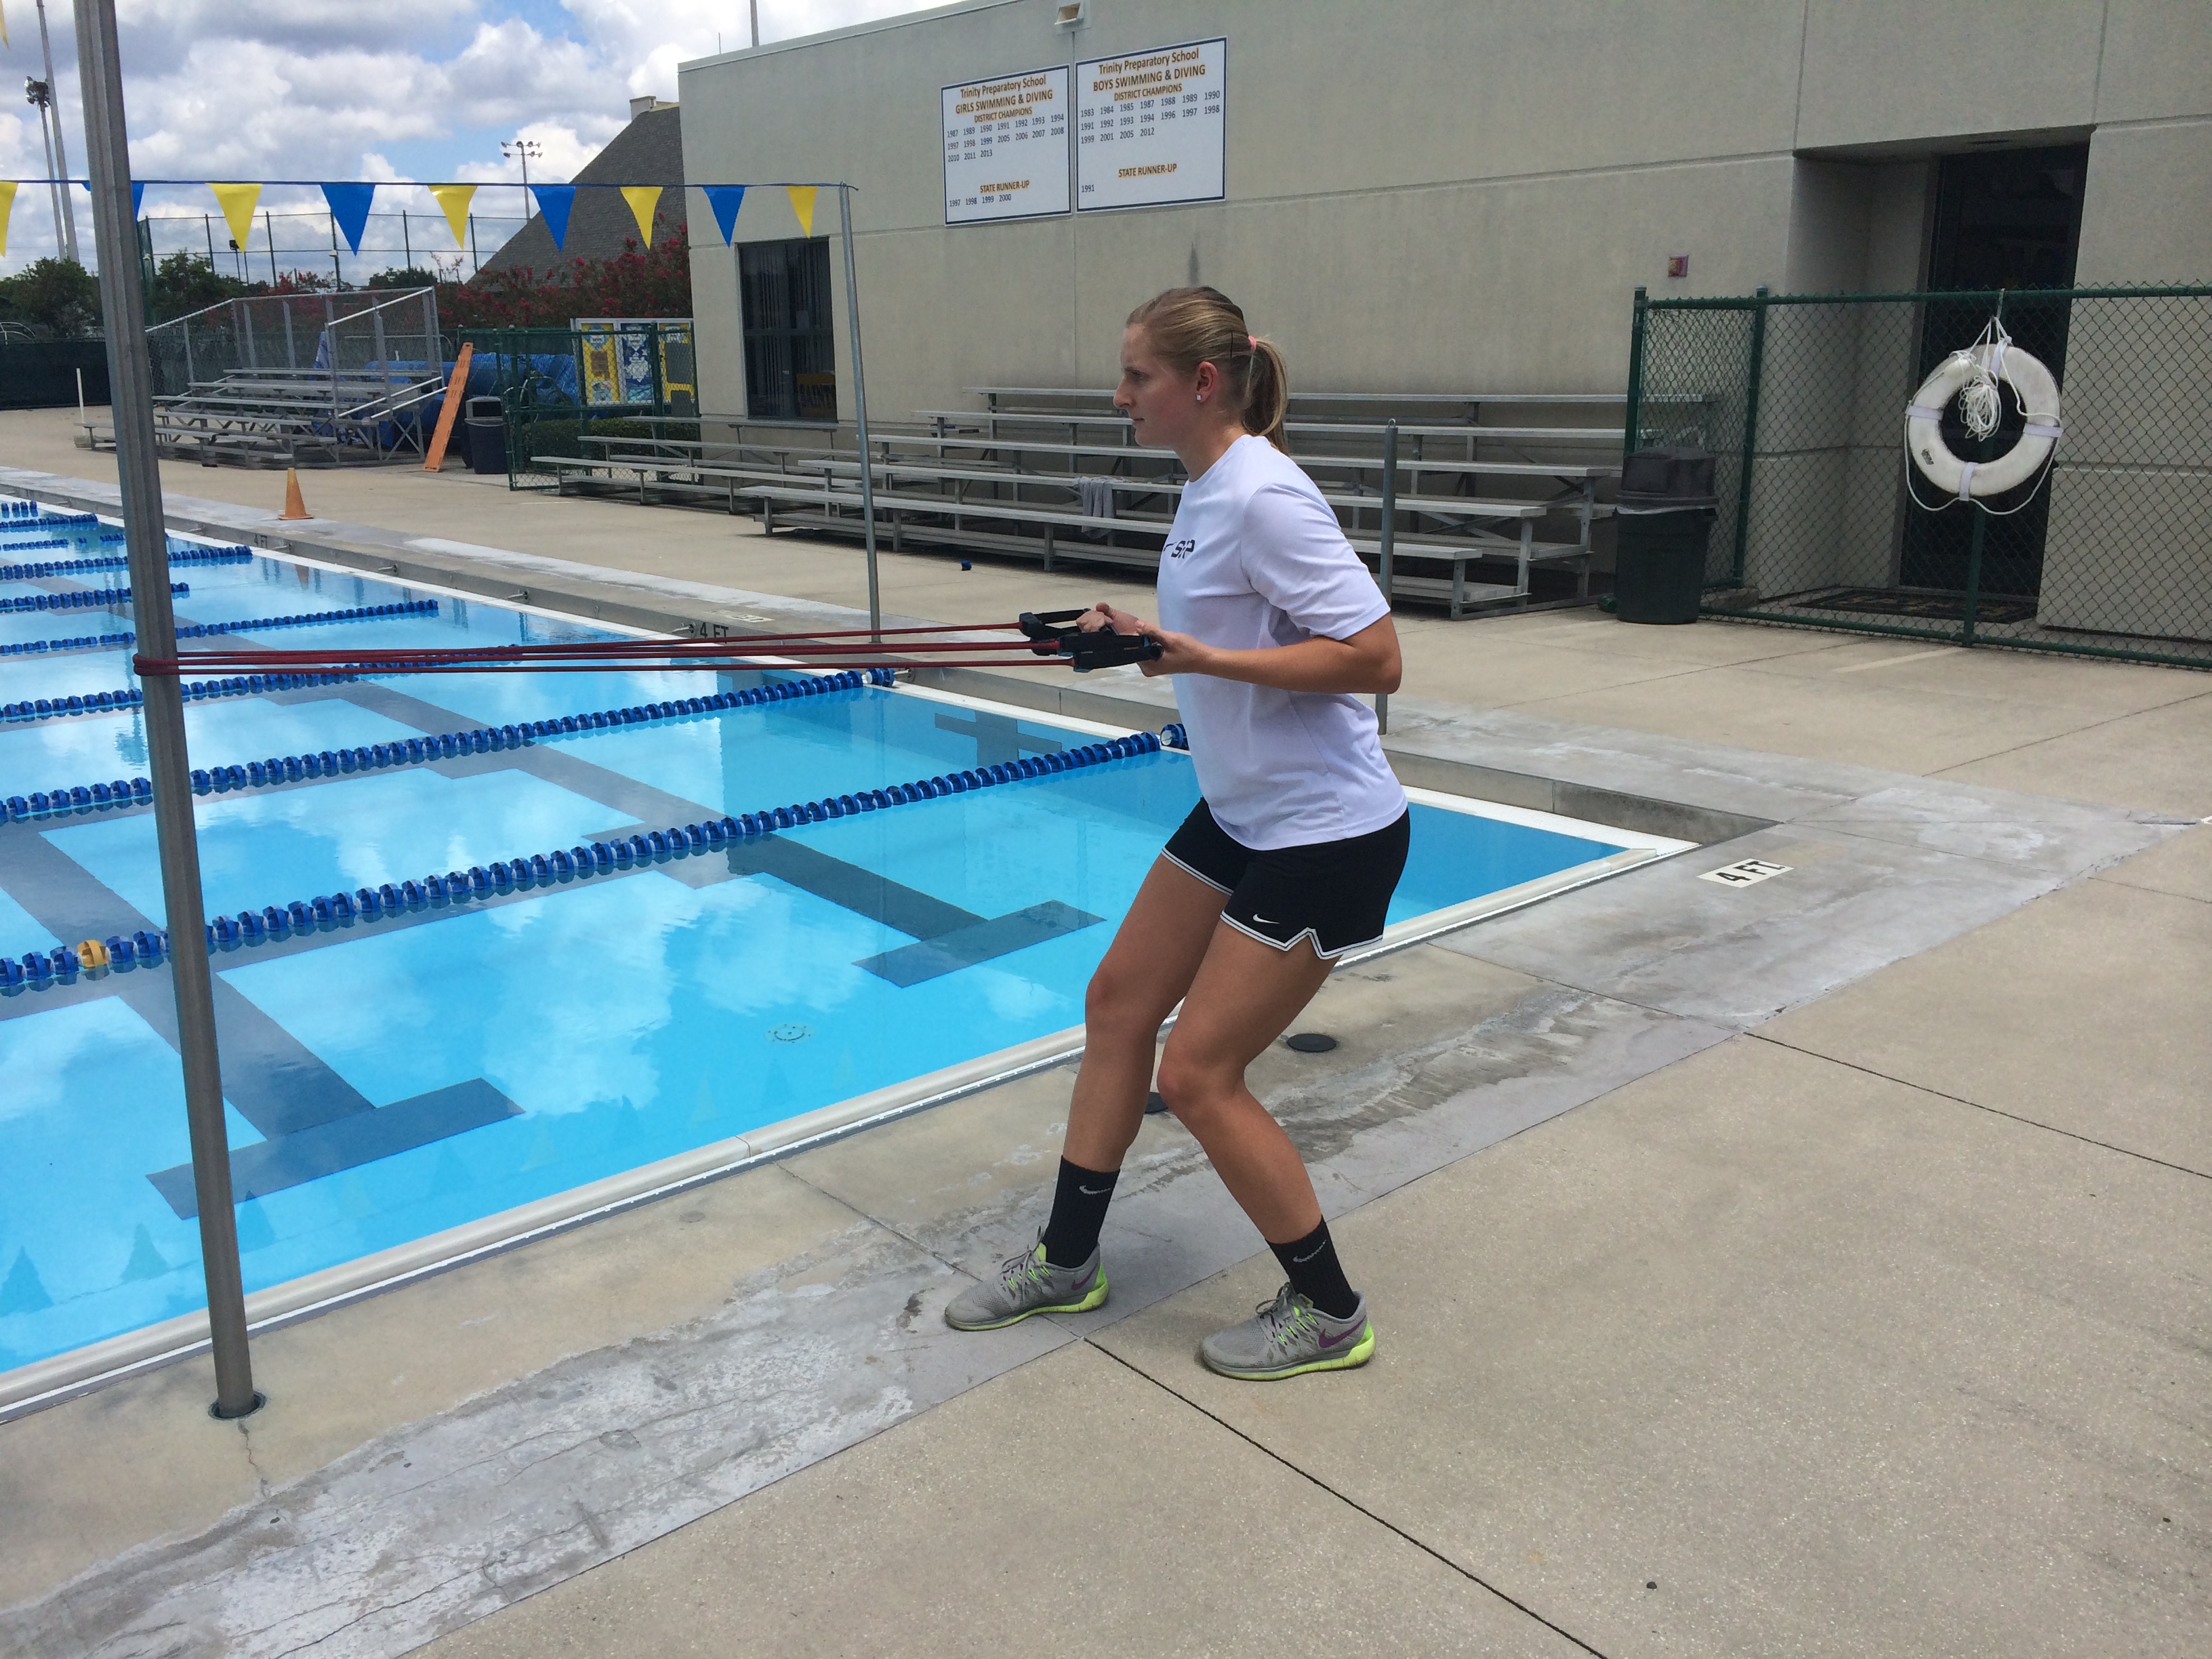
Loop 1 or 2 bands (depending on the strength of the athlete) around a fence for flag pole. Step back far enough to have tension in the bands with arms extended. Stagger your stance for balance while keeping your chest up, and then pull your elbows straight back while keeping them tucked in at your sides.
Alternating Pull-downs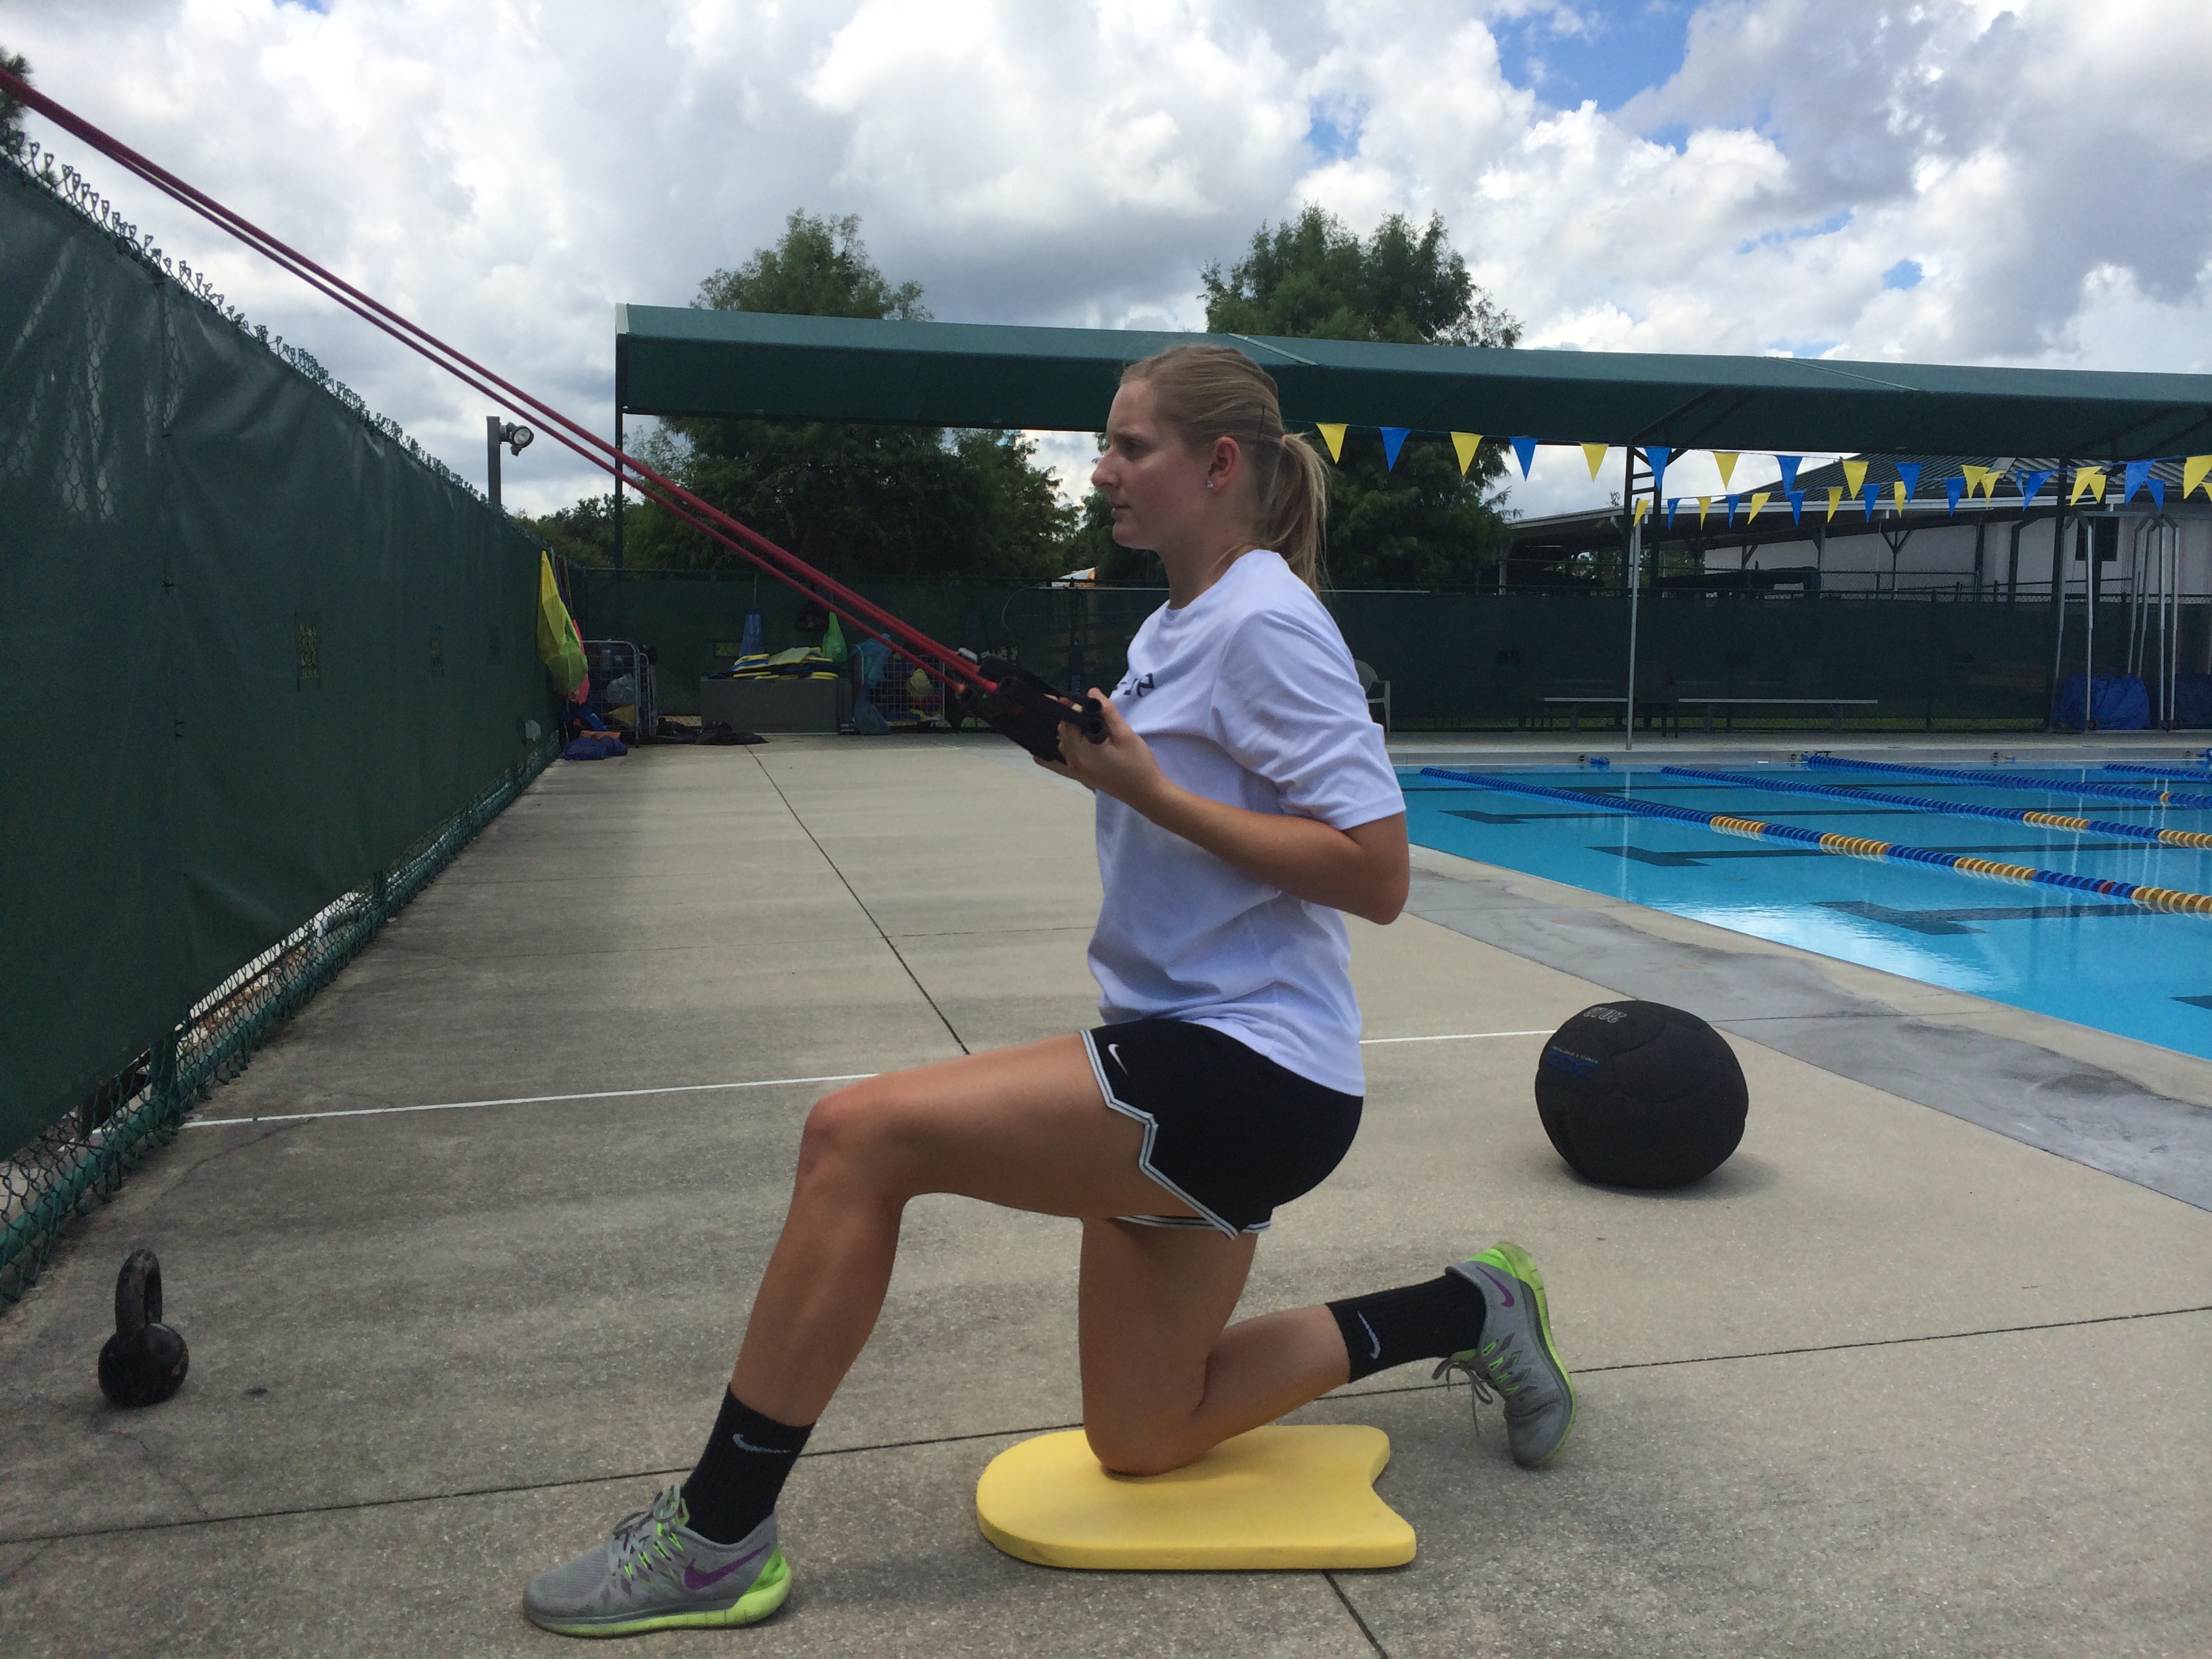
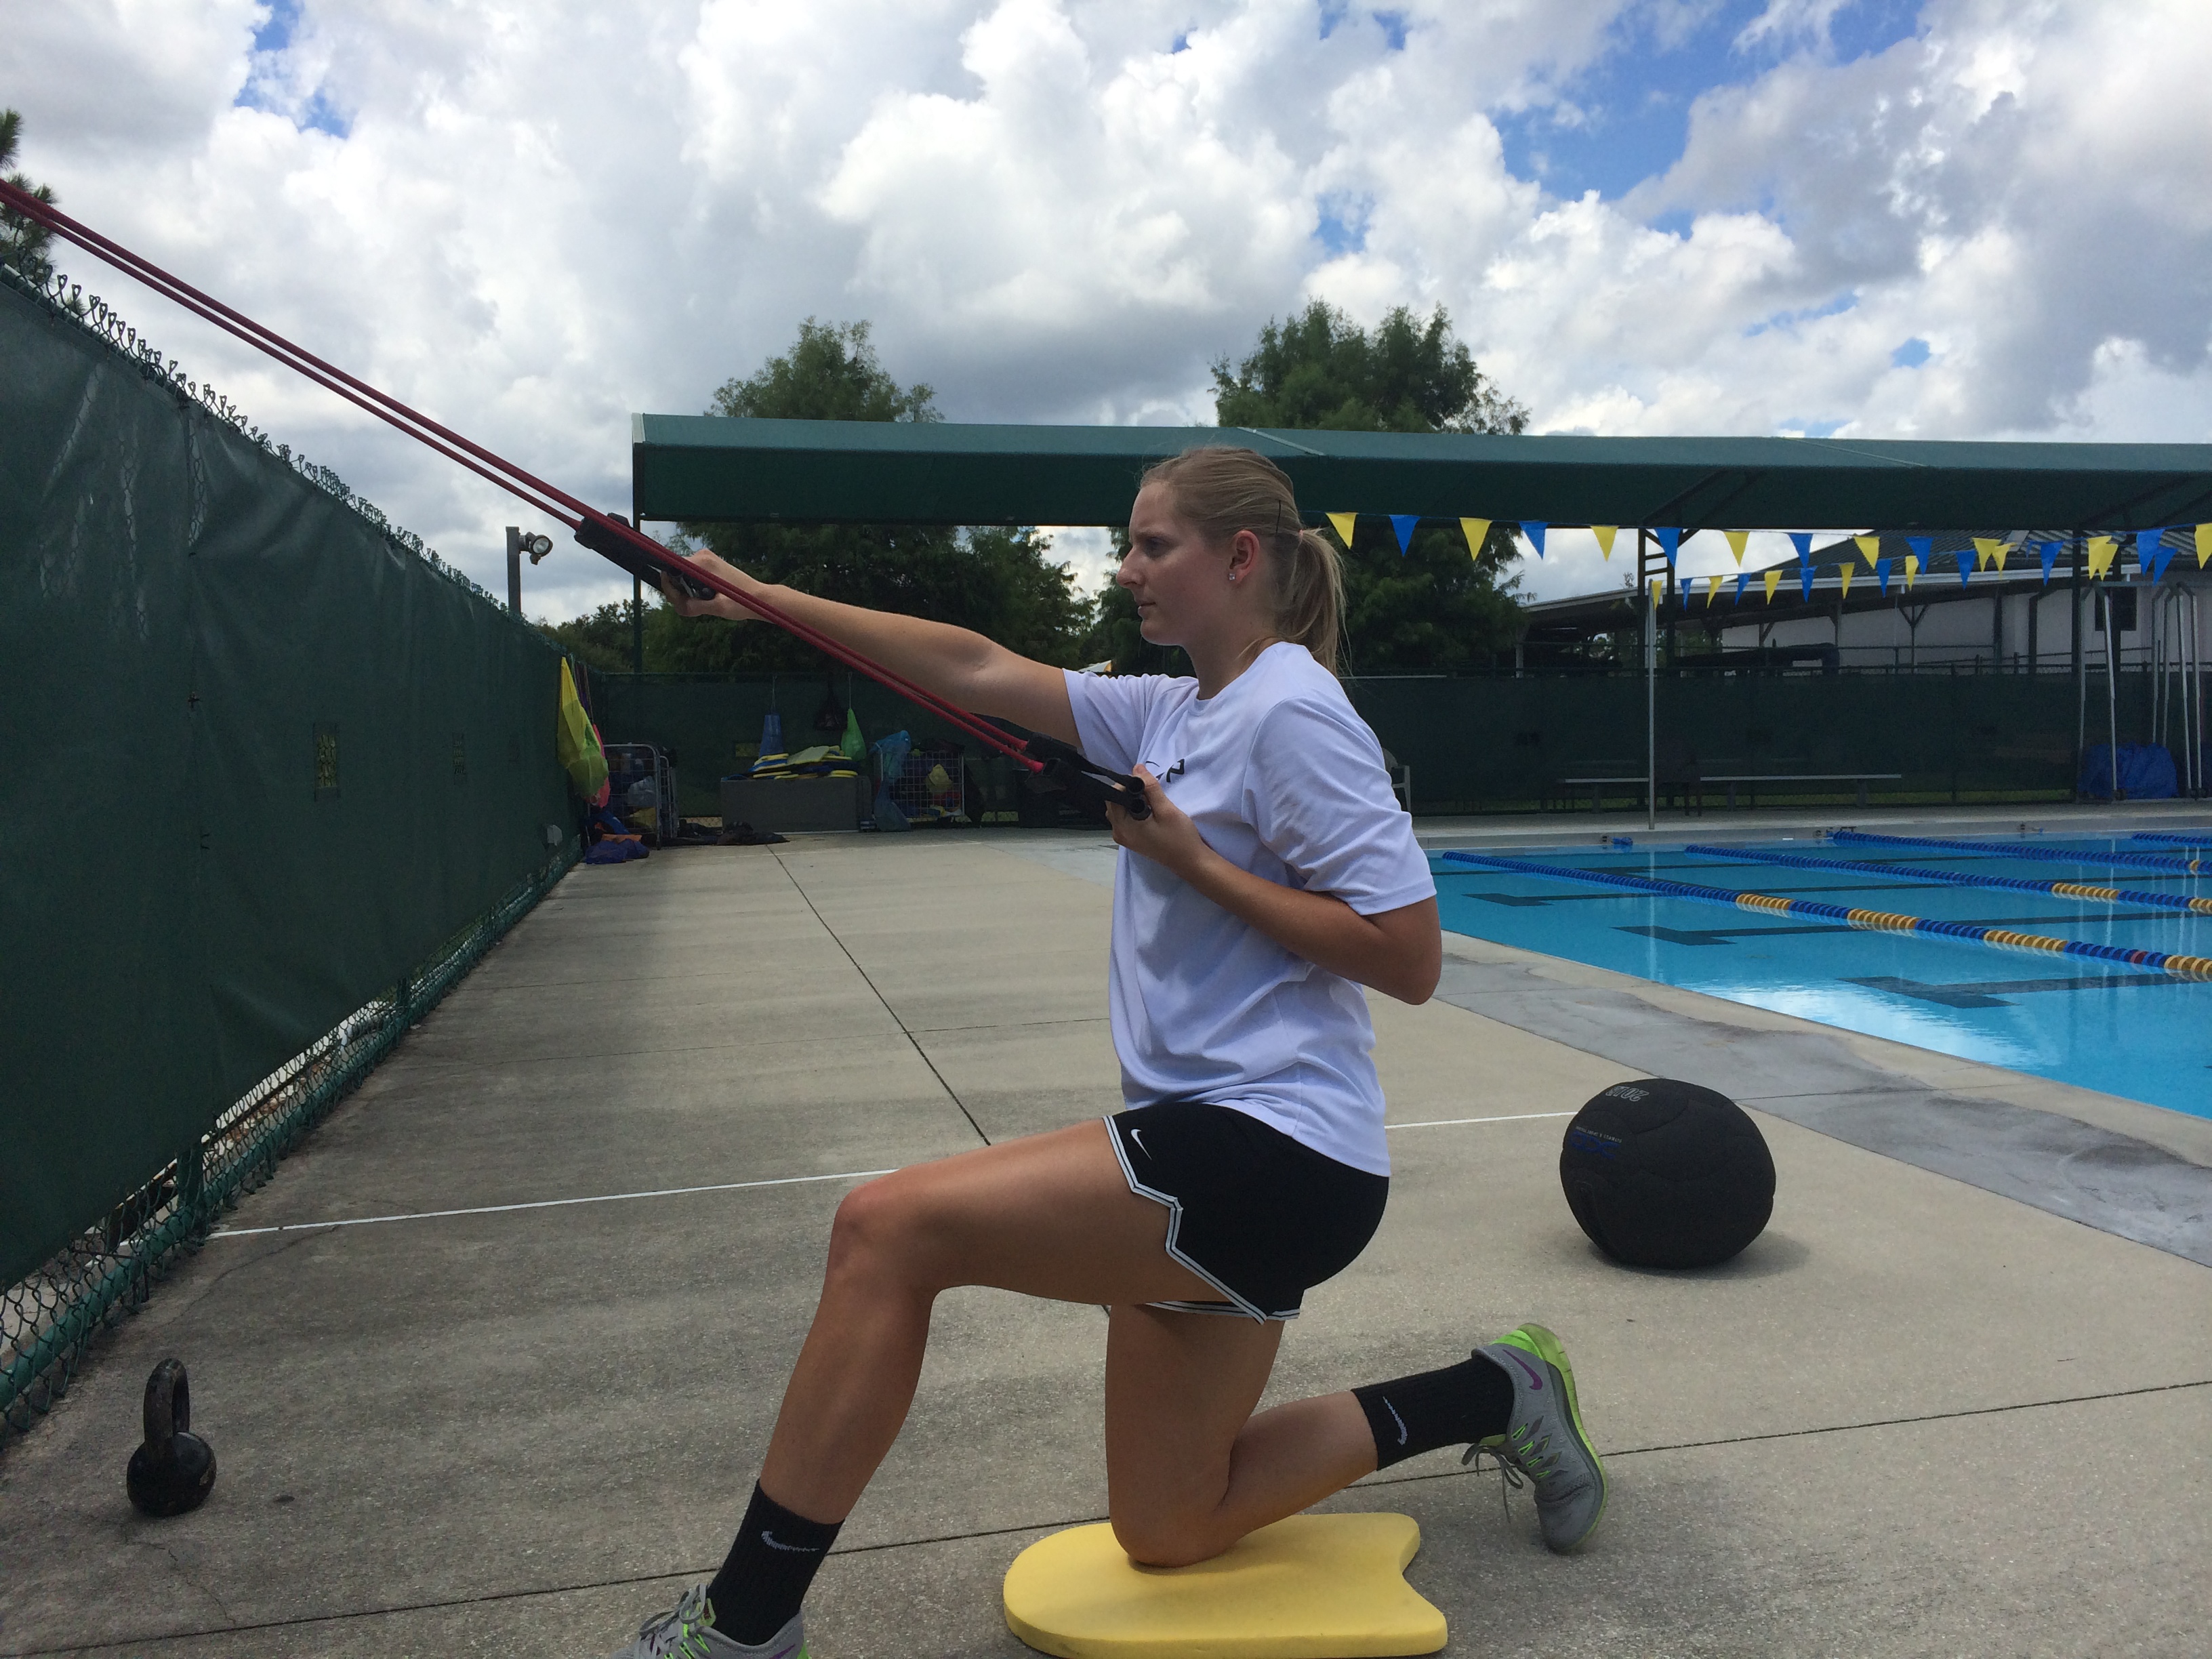
Like the rows, you can use 1 or 2 bands for this exercise. You’ll want to make the direction of the bands as vertical as possible, so hook them around the top of a fence or something else that is high and sturdy. Take a half-kneeling position on the ground and pull both arms down keeping your elbows in at your sides. Keeping your left elbow pulled down, extend your right arm up, then pull it down again. Switch arm on the next rep, alternating which arm is pulling each time.
Straight Arm Pull-Downs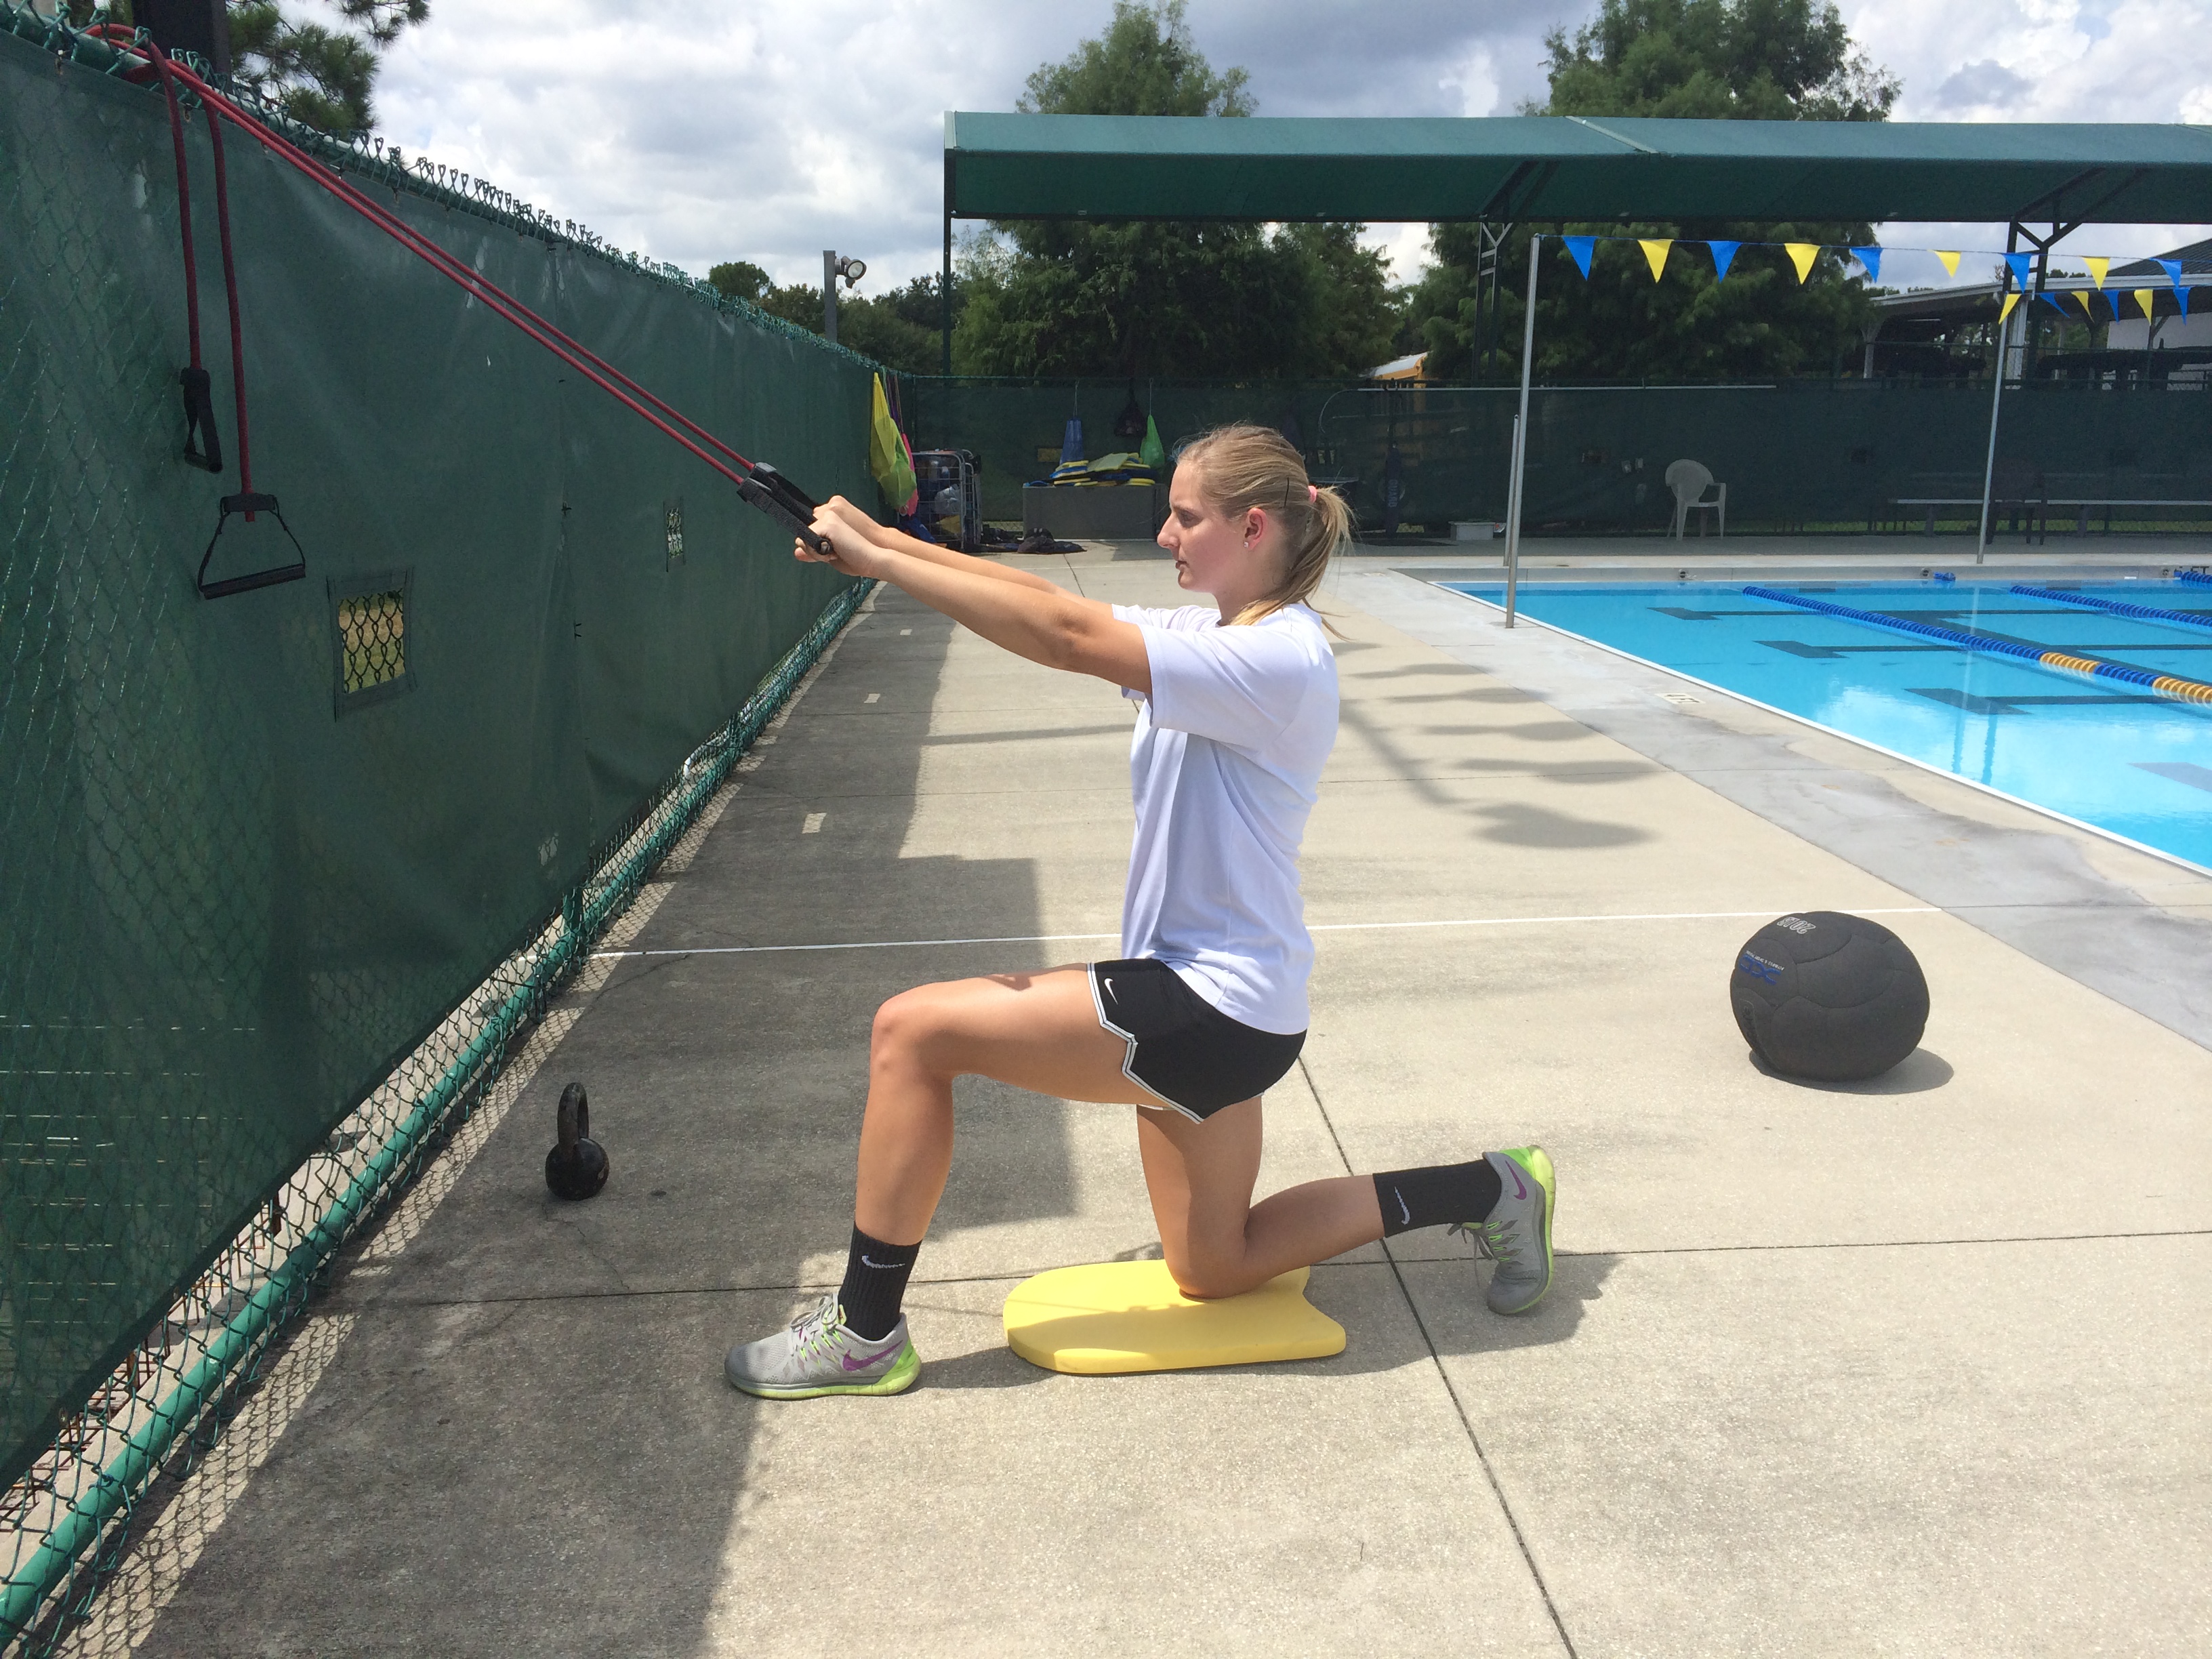
Use the same set-up as you did for the alternating pull-downs but with only 1 resistance band. From the half-kneeling position, begin with arms extended, and then pull the handles down to your hips while keeping your arms completely straight. You should feel this exercise not only in your lats but in your core as well.
Waiter Carry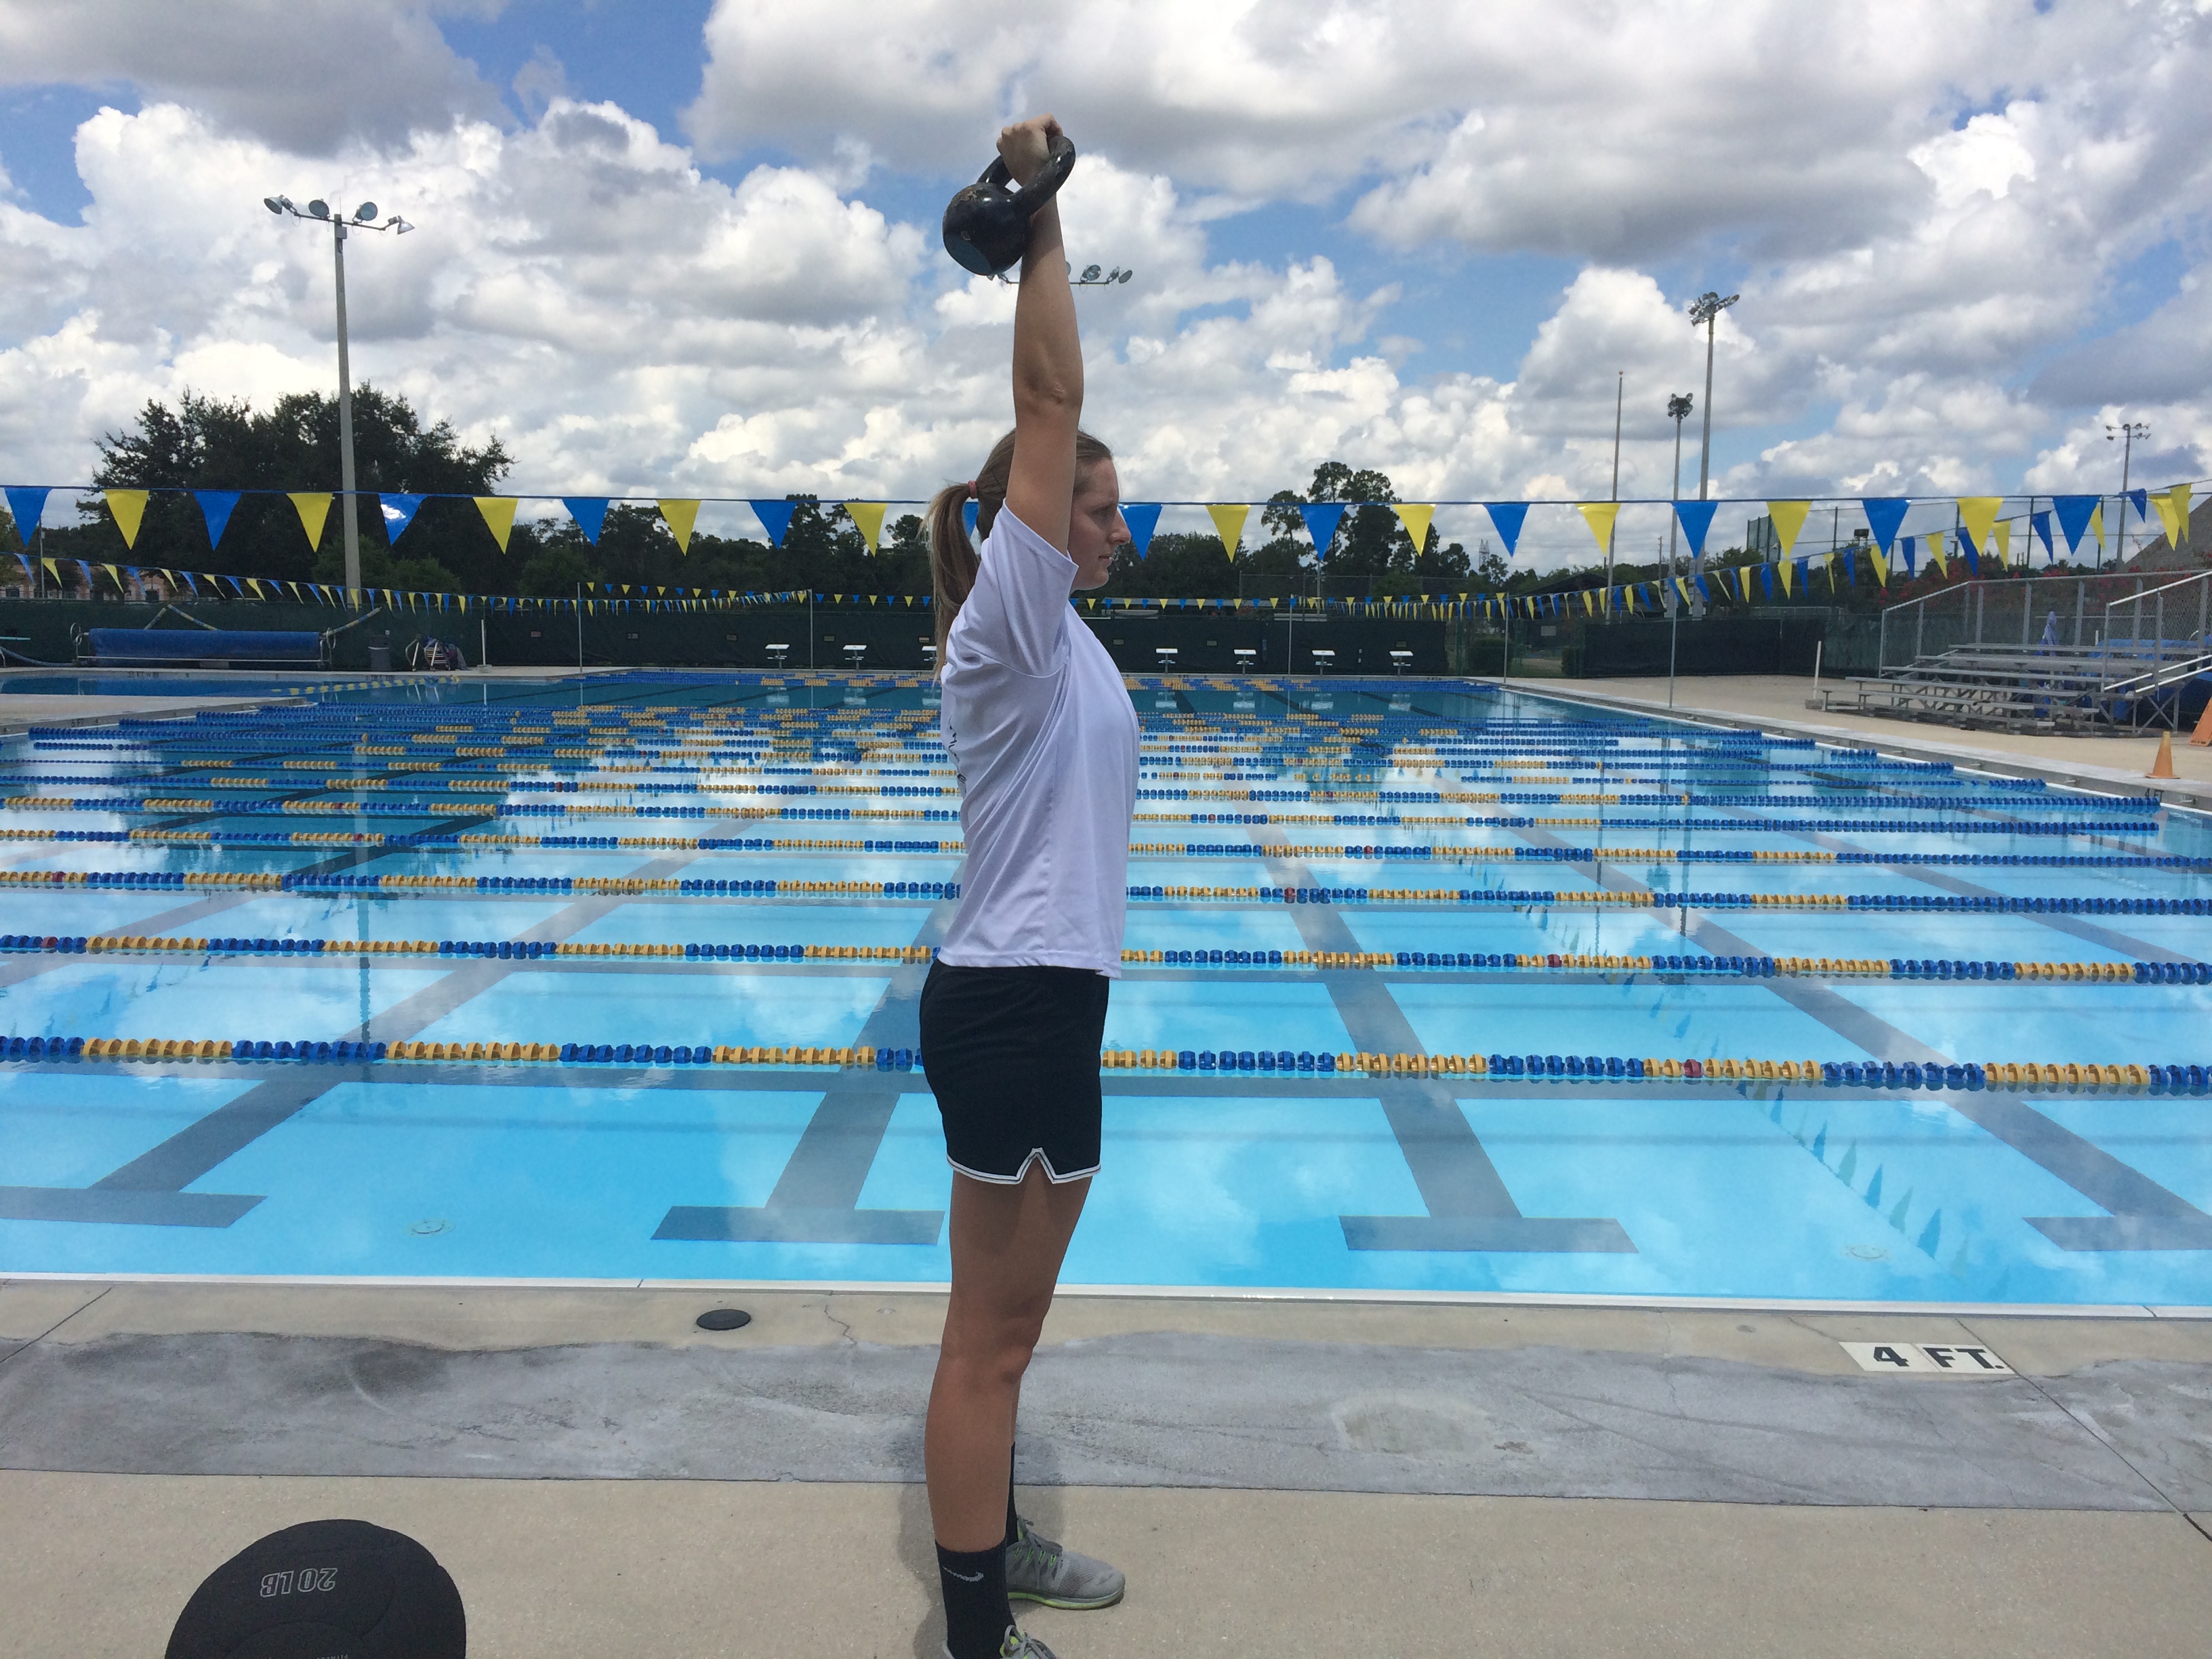
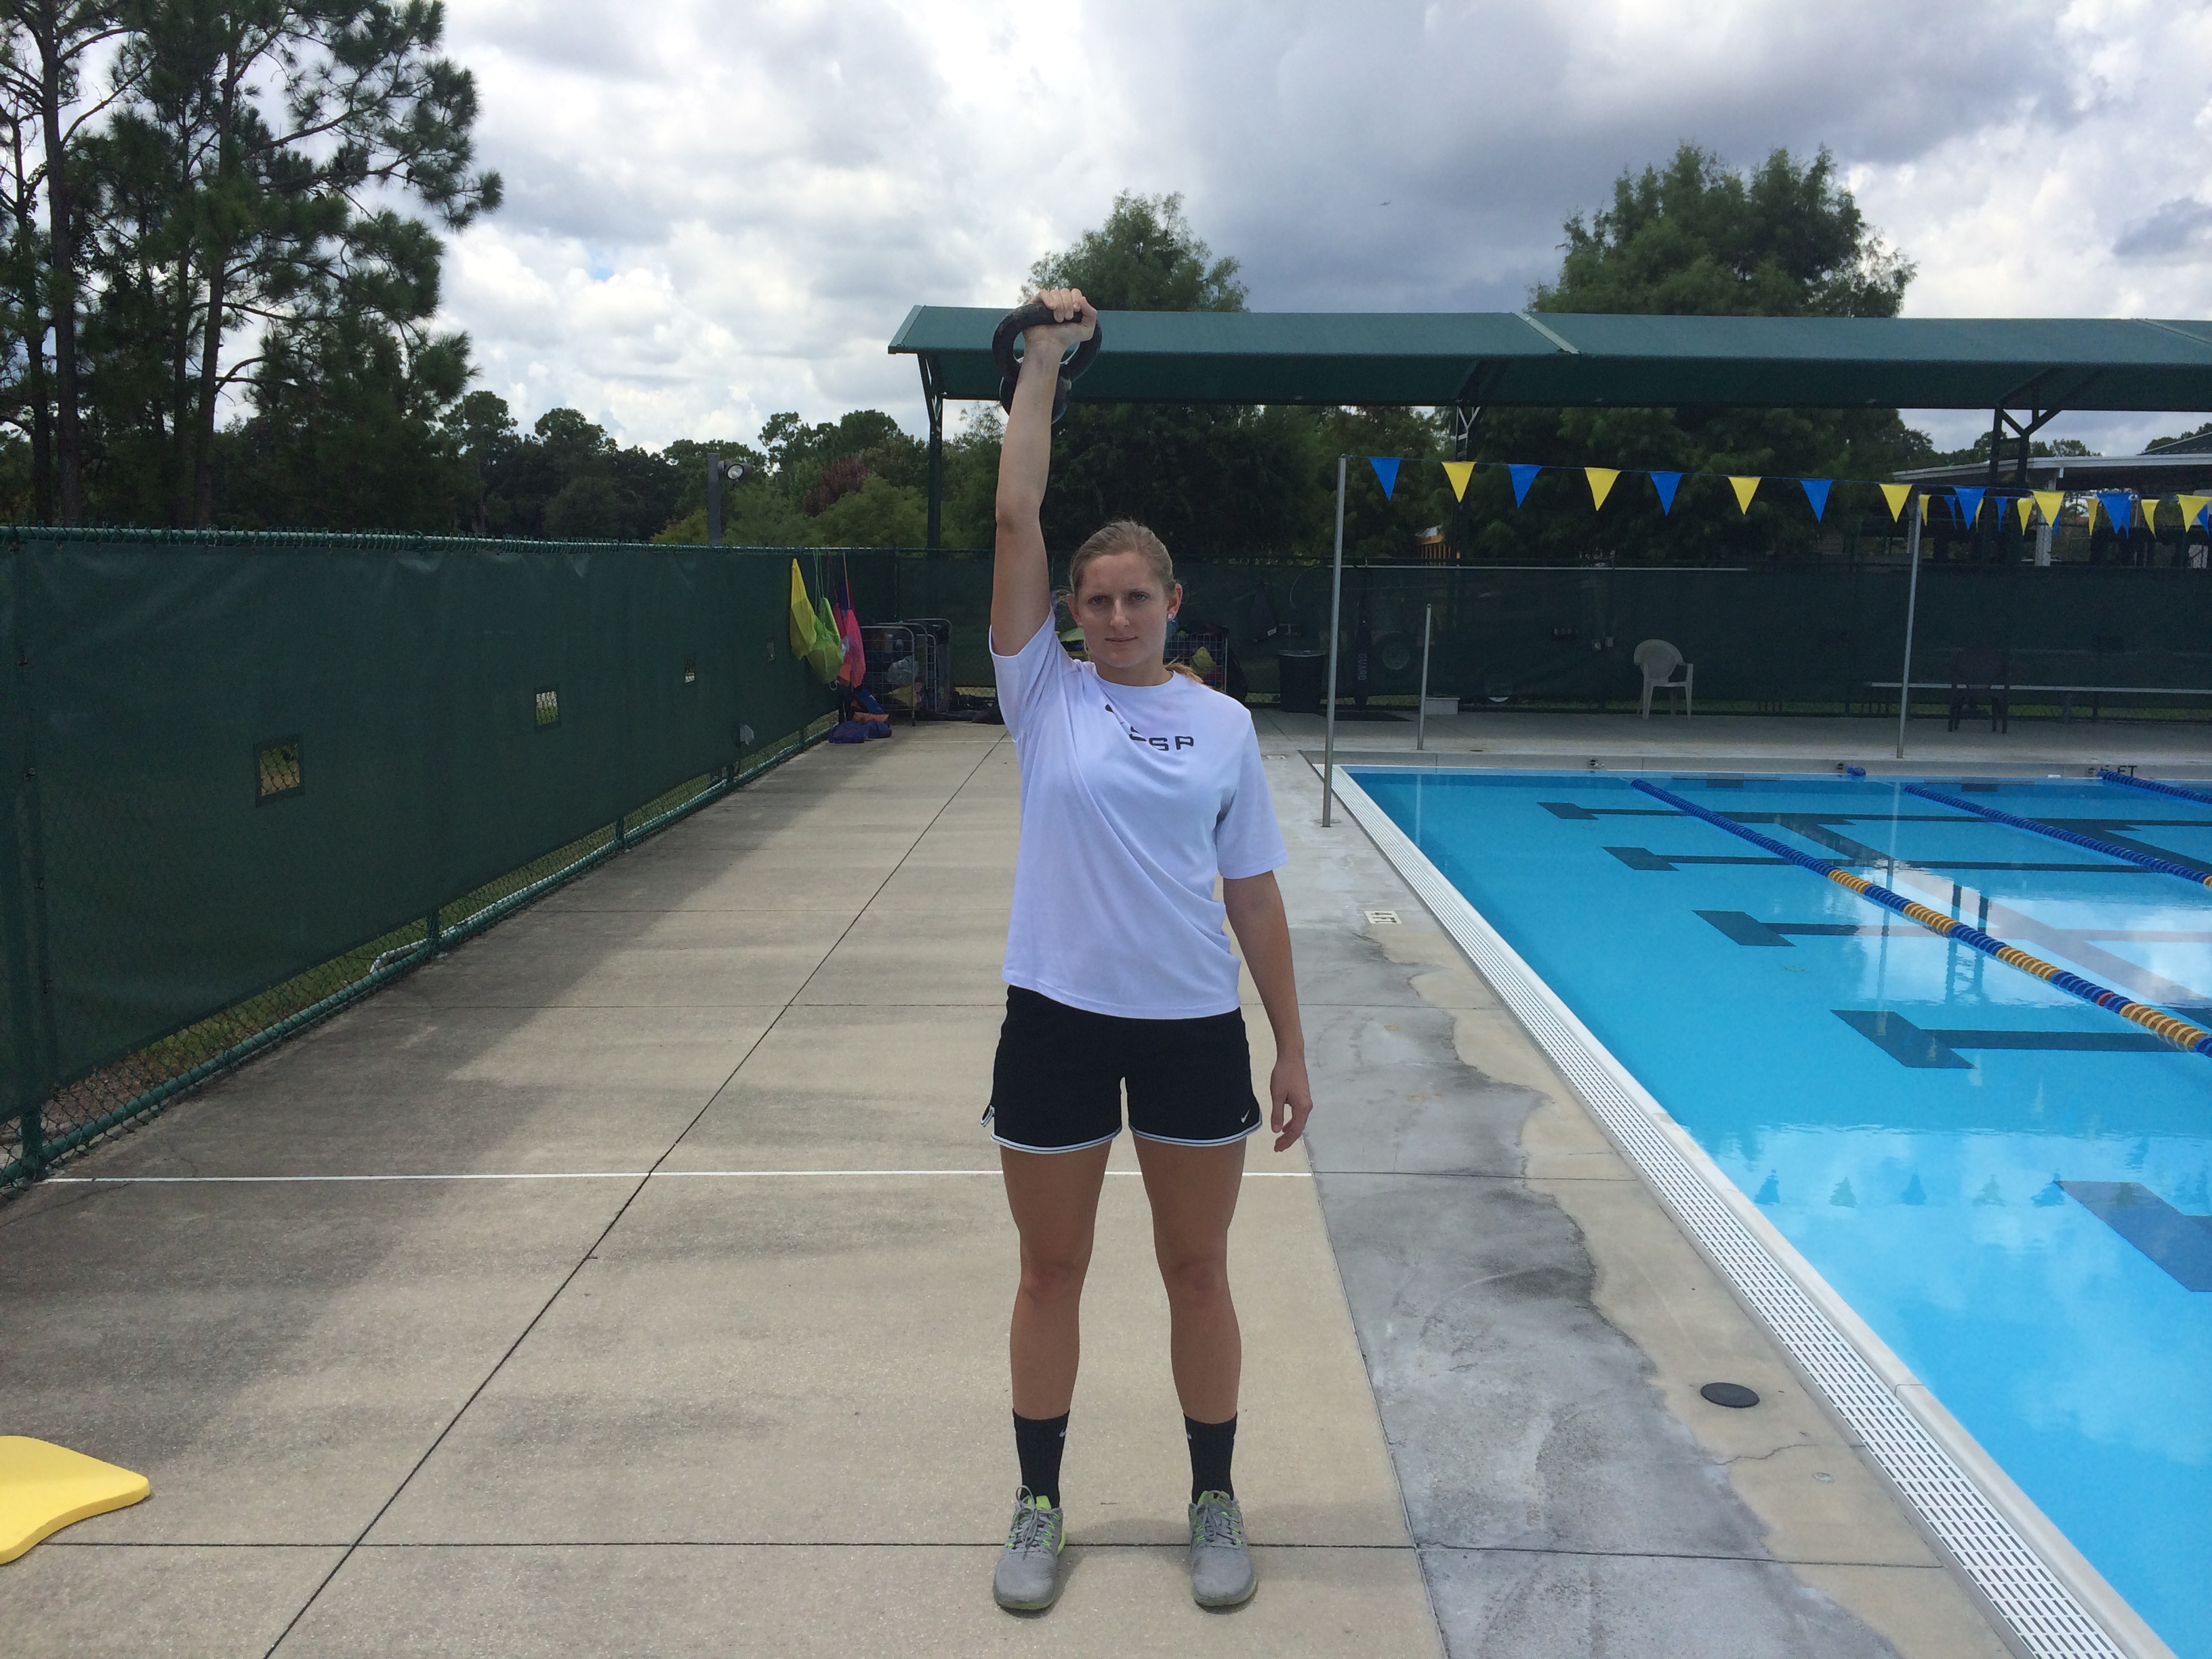
For the waiter carry you’ll want to start with a light kettlebell (9-20 lbs.). Grab the handle so that the bell is positioned laying against the back of your wrist and forearm. Next, press the kettlebell overhead keeping your knuckles up toward the sky. Make sure your arm is completely locked out, and your shoulder is packed down (not shrugged up) with space between your arm and ear. When looking at the athlete from the side you should see the kettlebell directly over the shoulder, slightly behind the head. From this position you simply need to walk in a straight line while maintaining stability overhead.
Pull-apart: Underhand Grip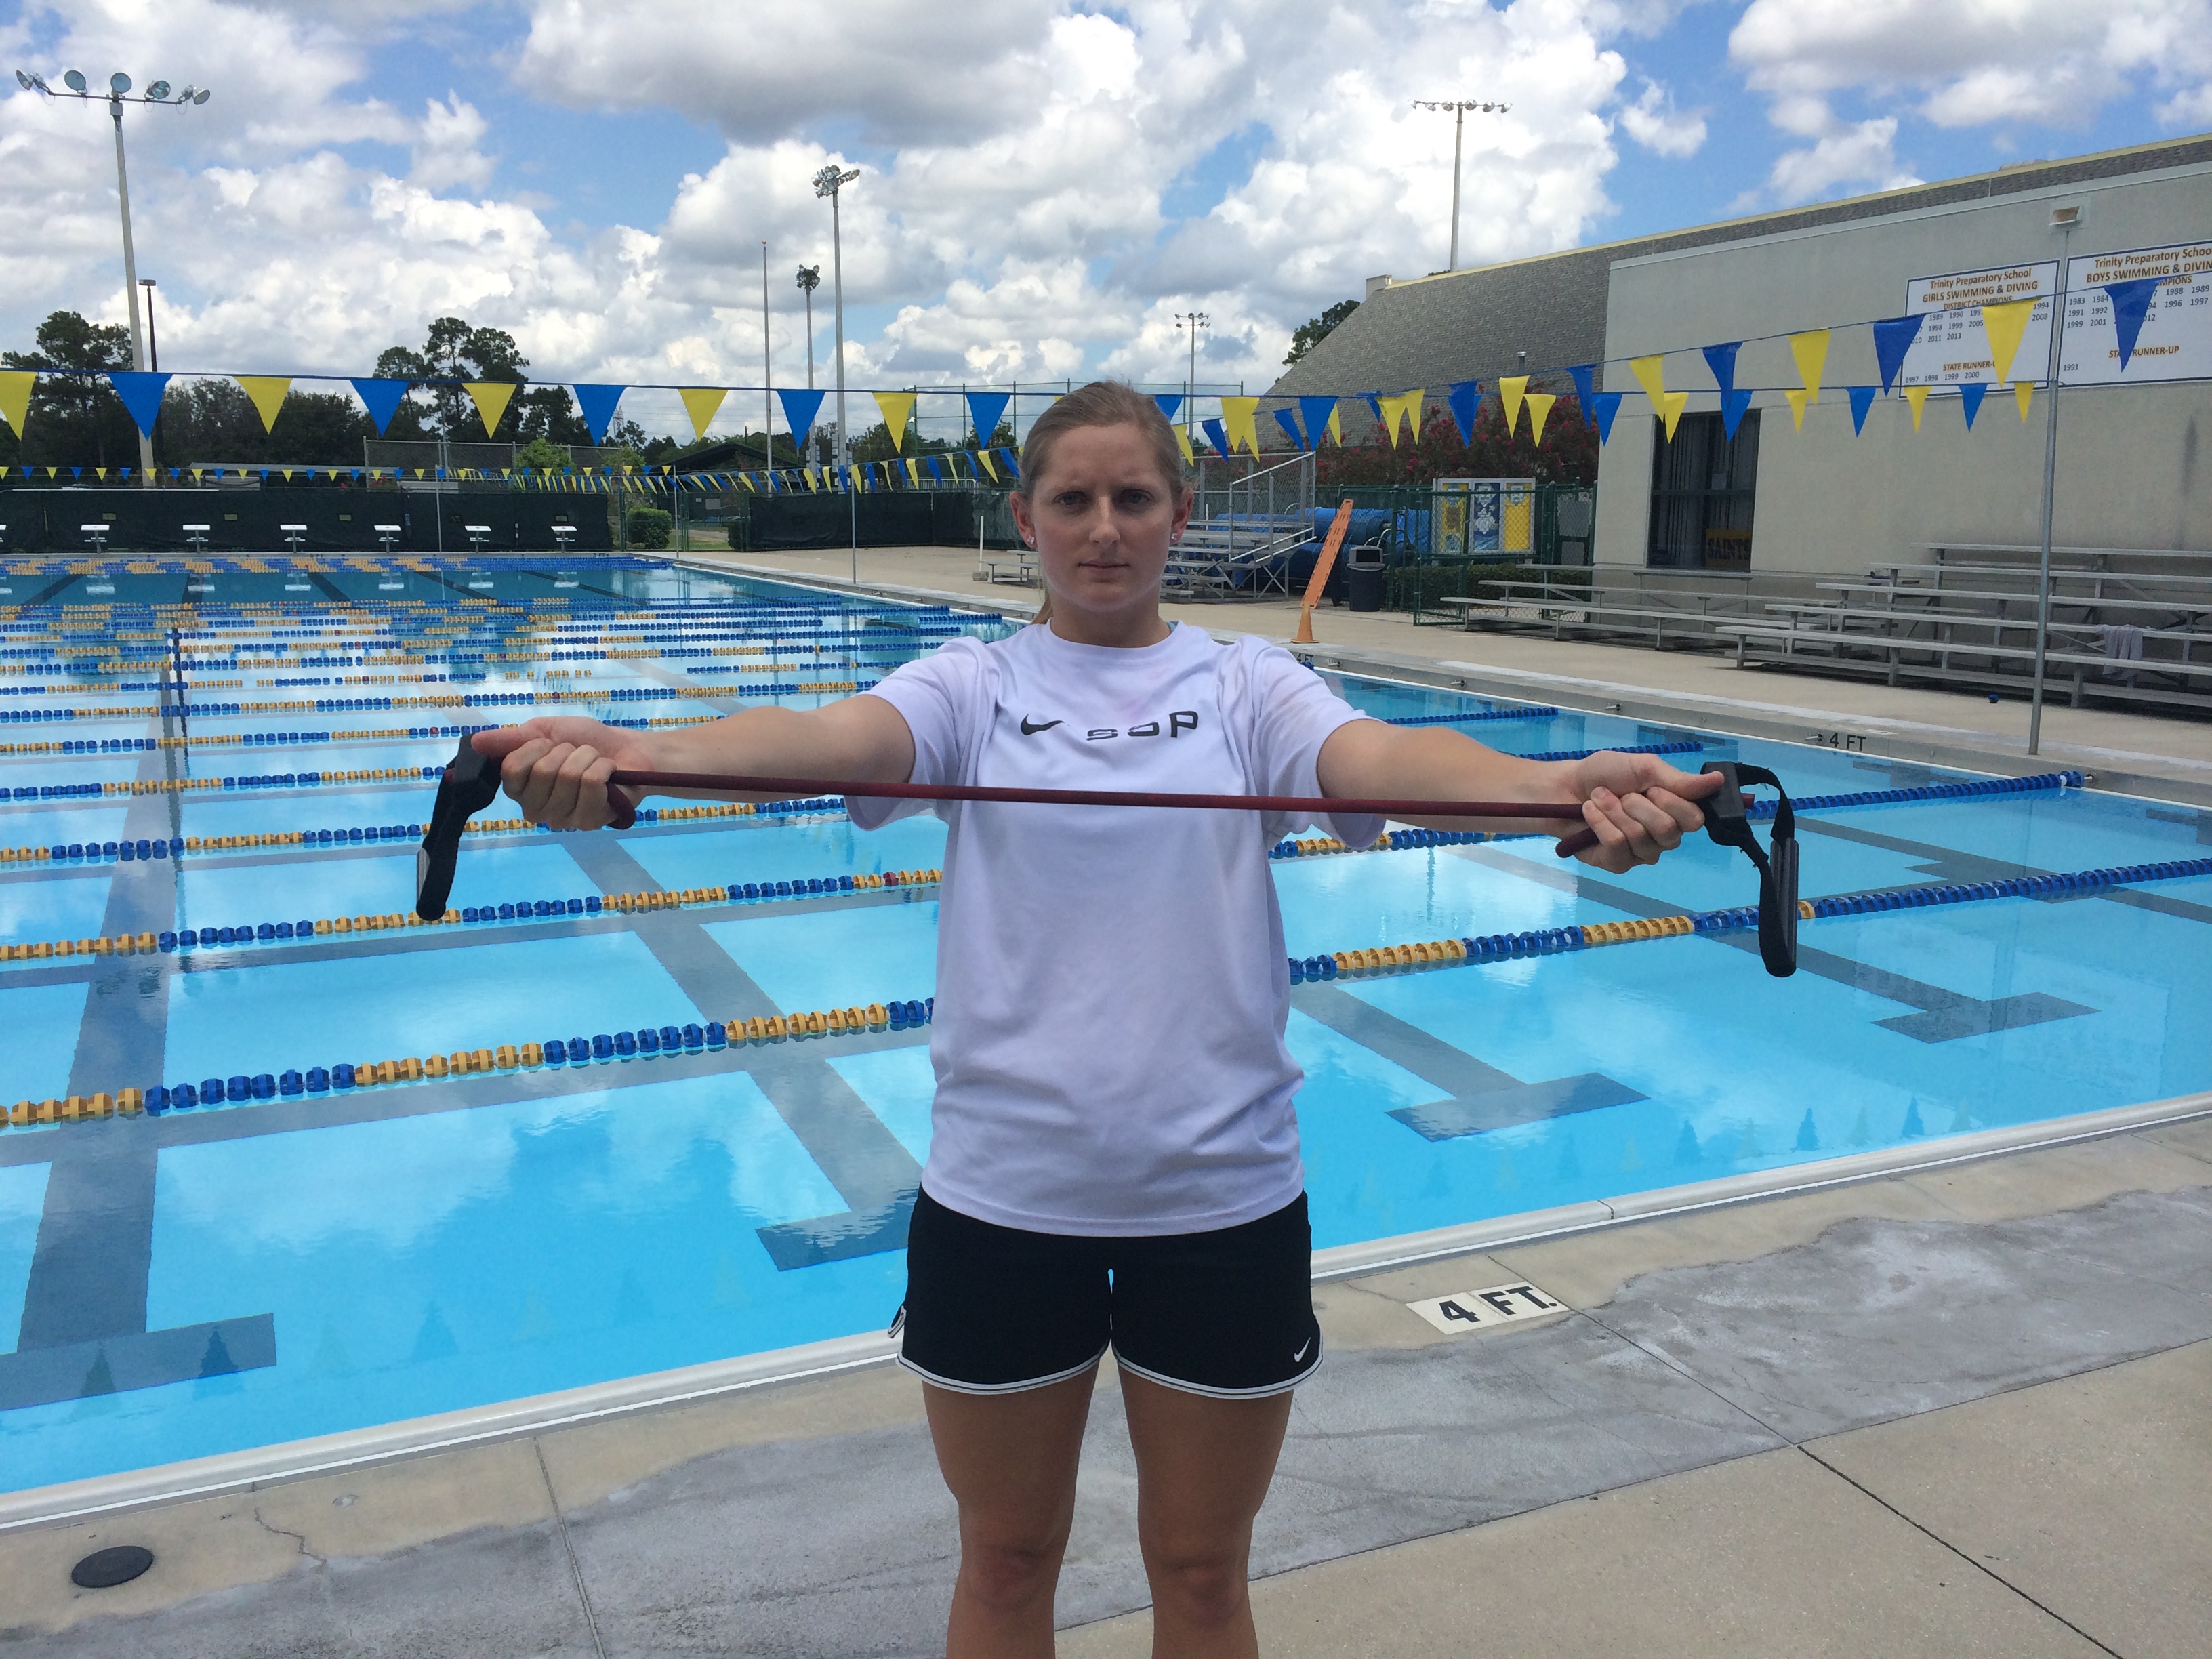
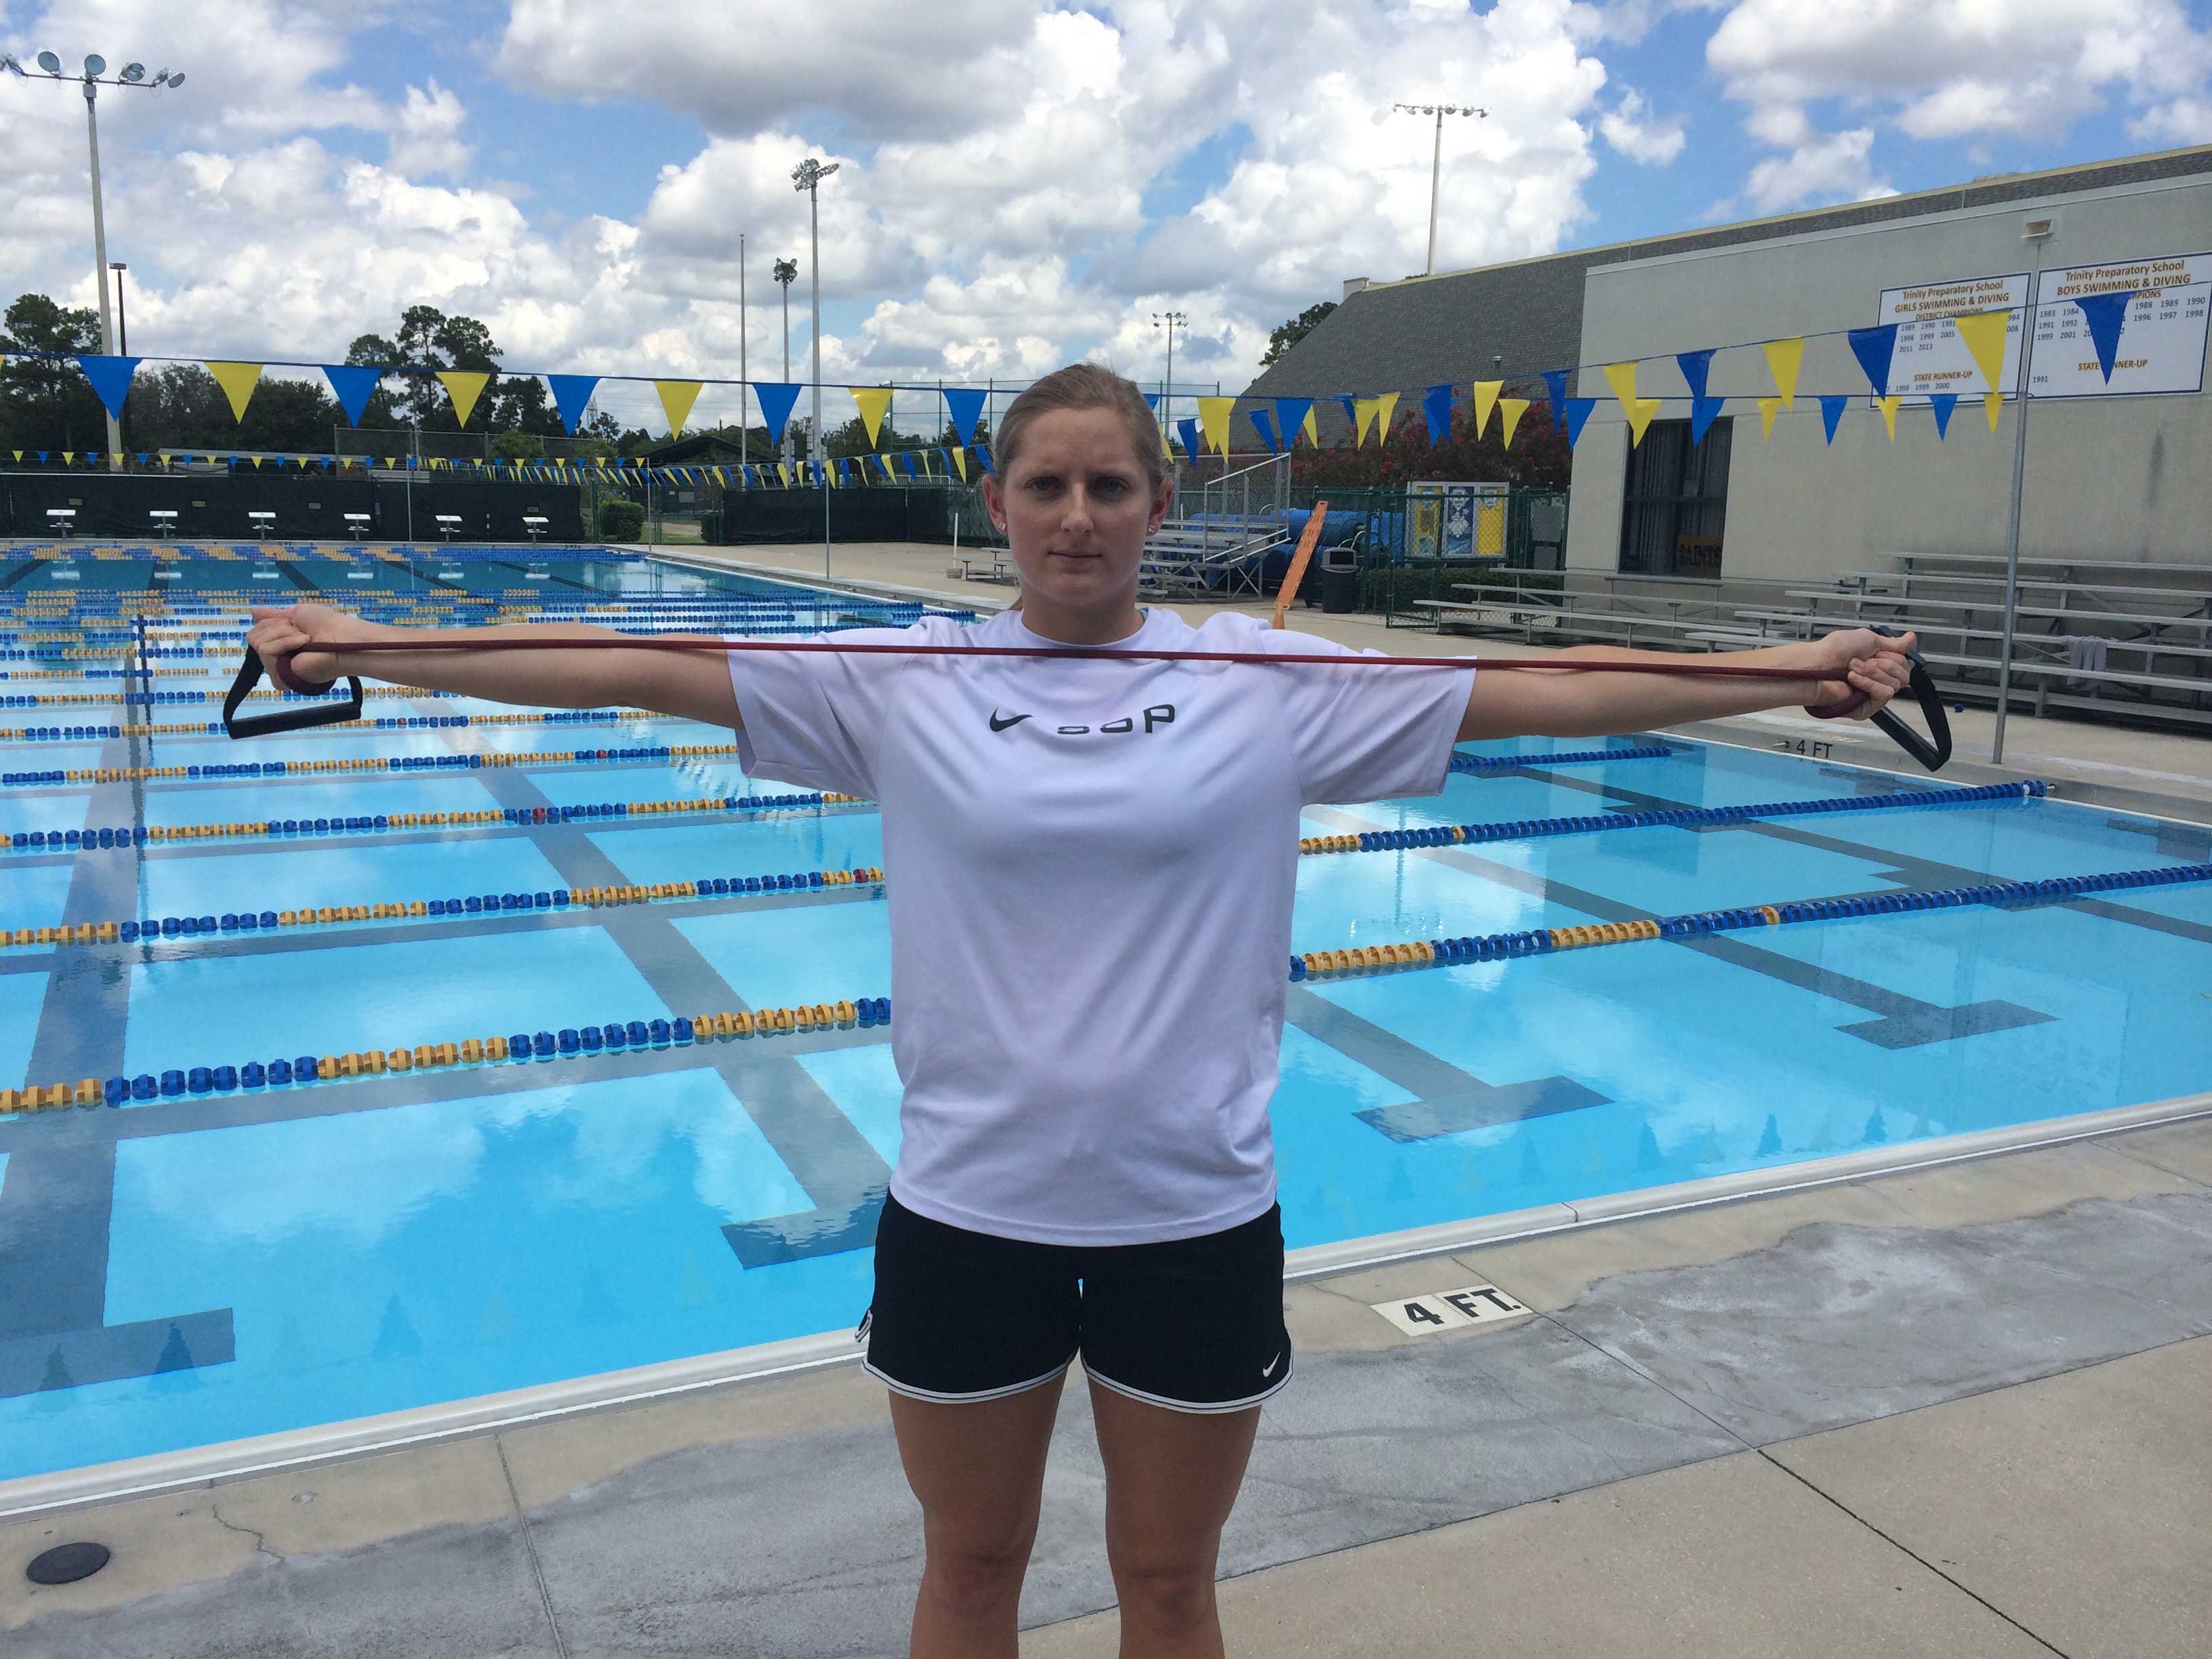
Grab a resistance band with palms facing upward at shoulder width. You can wrap your hand in the band in order to take the excess slack out. Begin the exercise with arms extended straight our in front at shoulder height. Keeping the arms locked out, pull your hands to apart until the band is touching your chest. Return to the start position while continuing to keep your arm completely straight.
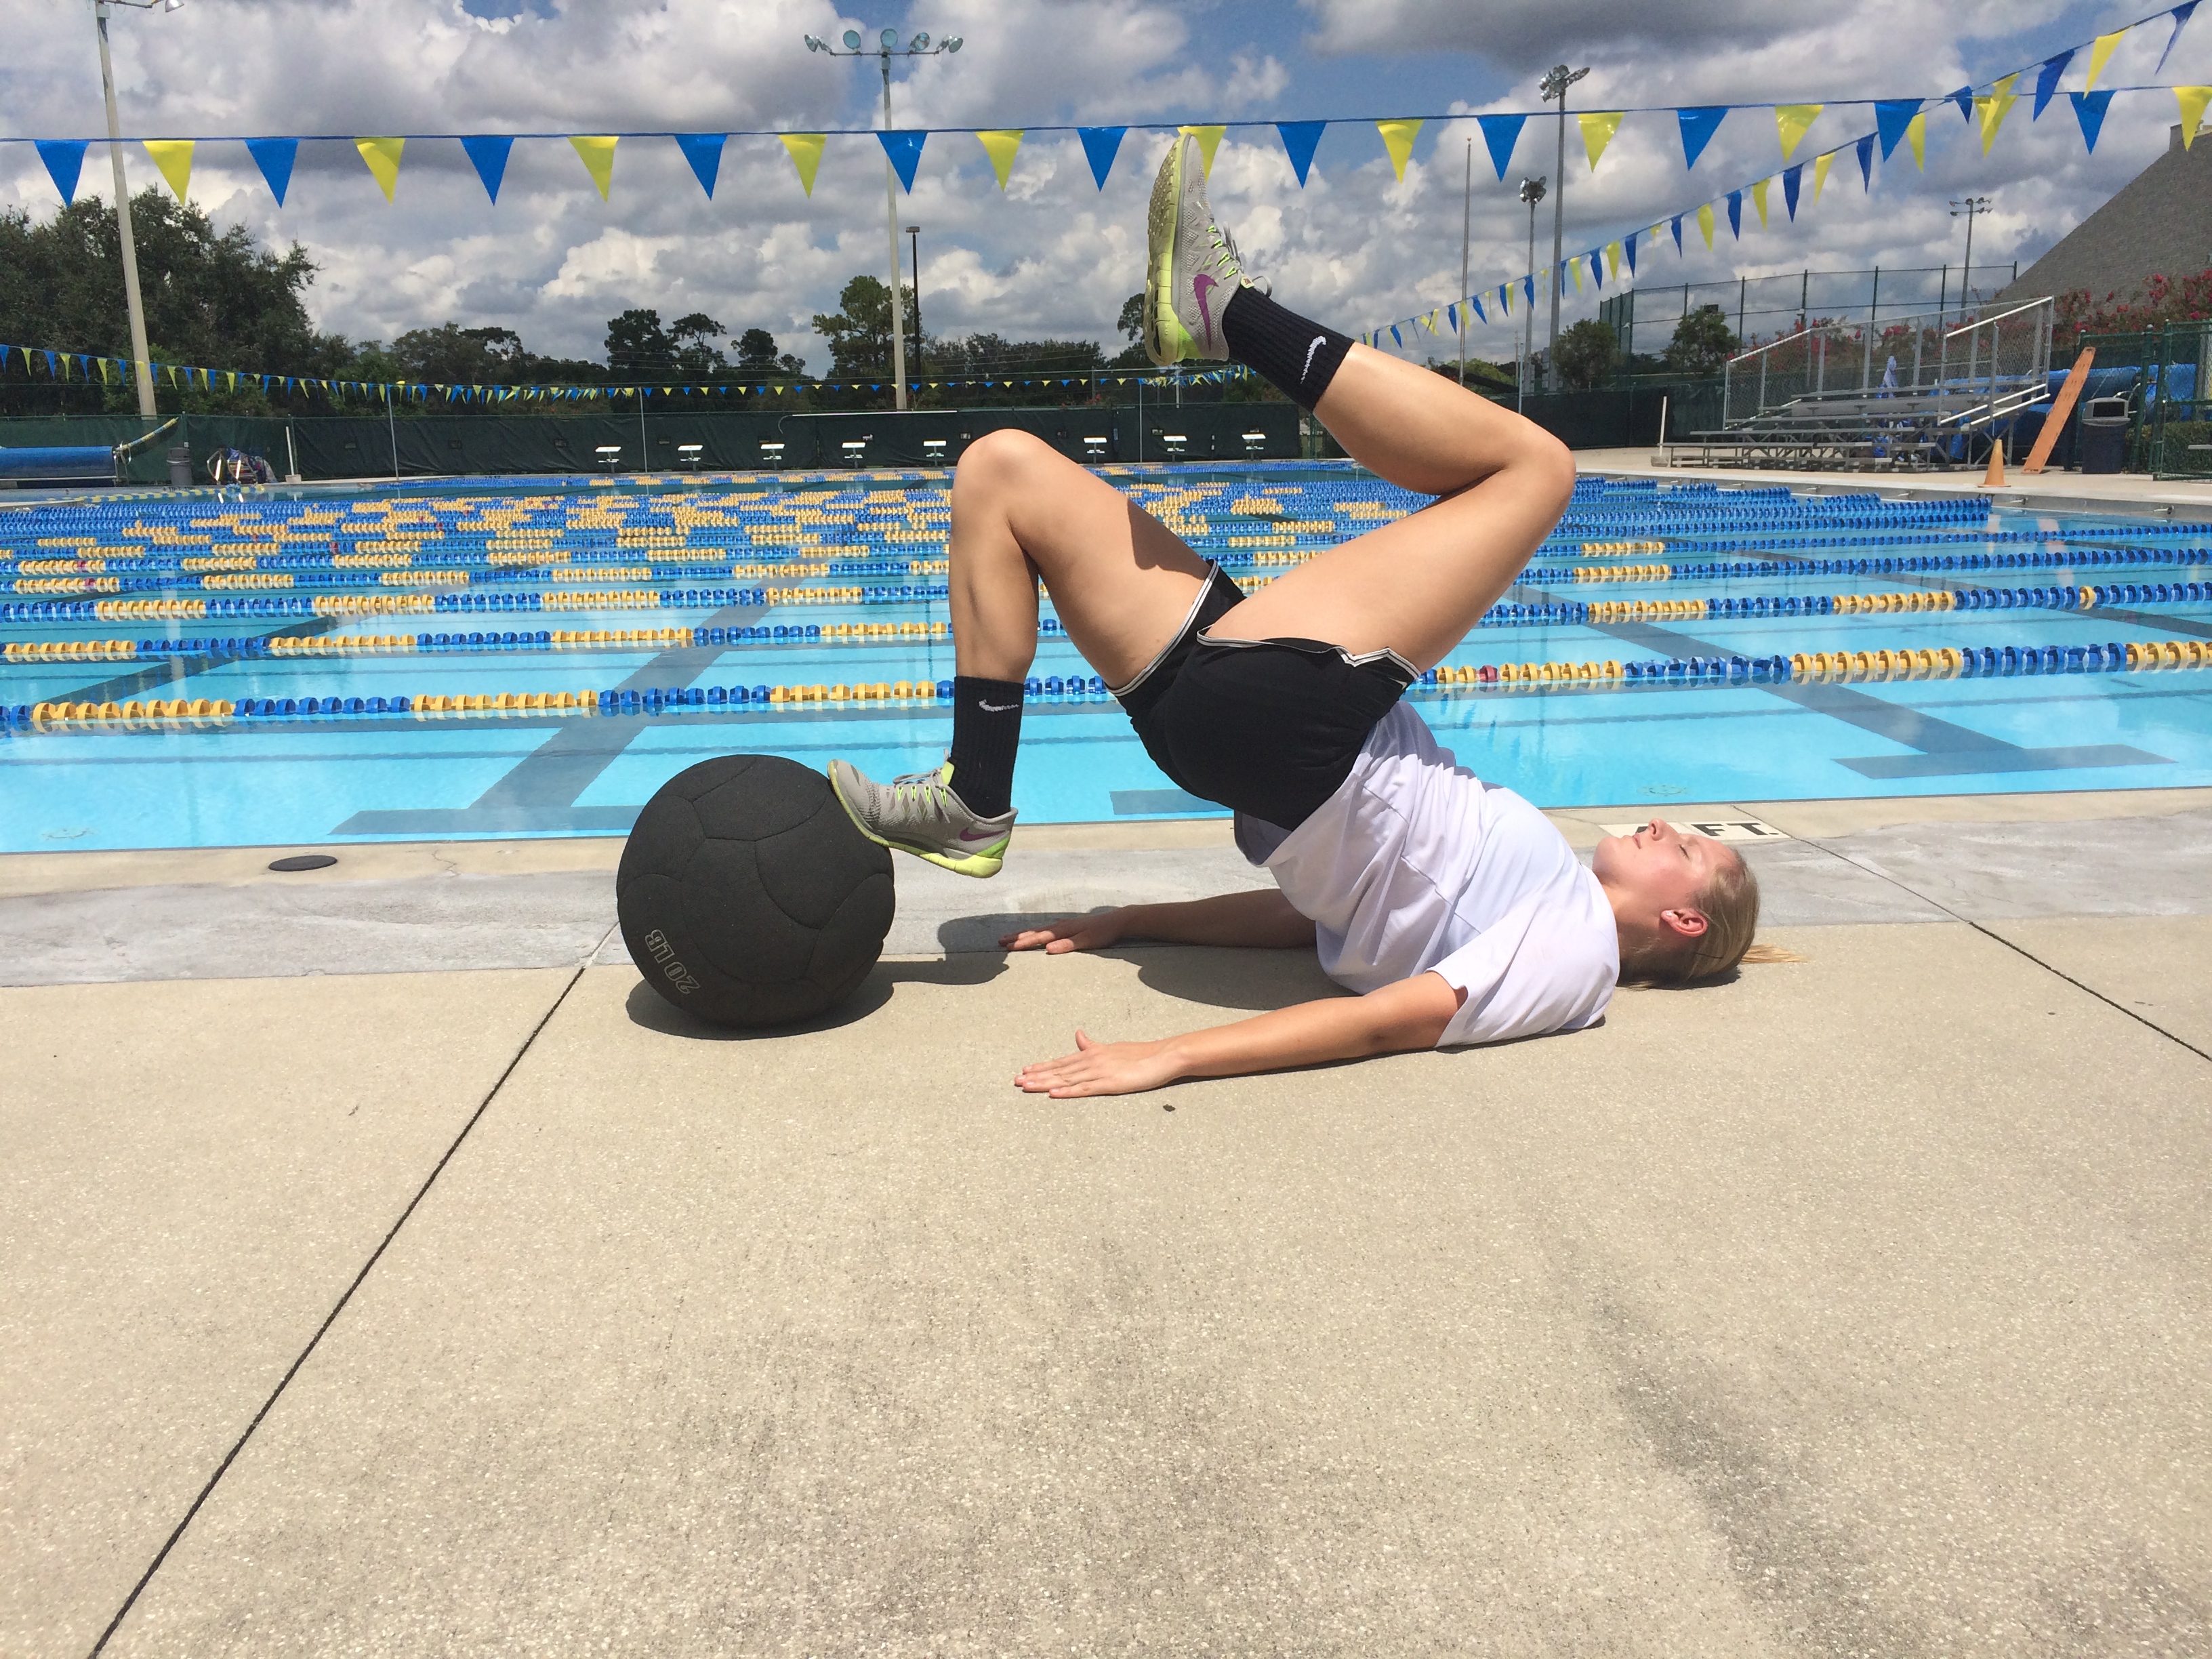
MB Leg Curl: 2 legs

Lay down on your back with your heels on the medicine ball, toes pointed up to the sky. Bridge our hips up as high as you can while maintain a neutral spine, then curl the ball toward your hips. Re-extend your legs back to the start position without ever dropping your hips.
MB Leg Curl: 1 Leg
This variation of the leg curl is exactly the same just performed on one leg. Keep your non-working leg bent with the knee pulled in toward your chest while the working leg performs the same technique as described above.
Falling Hamstrings
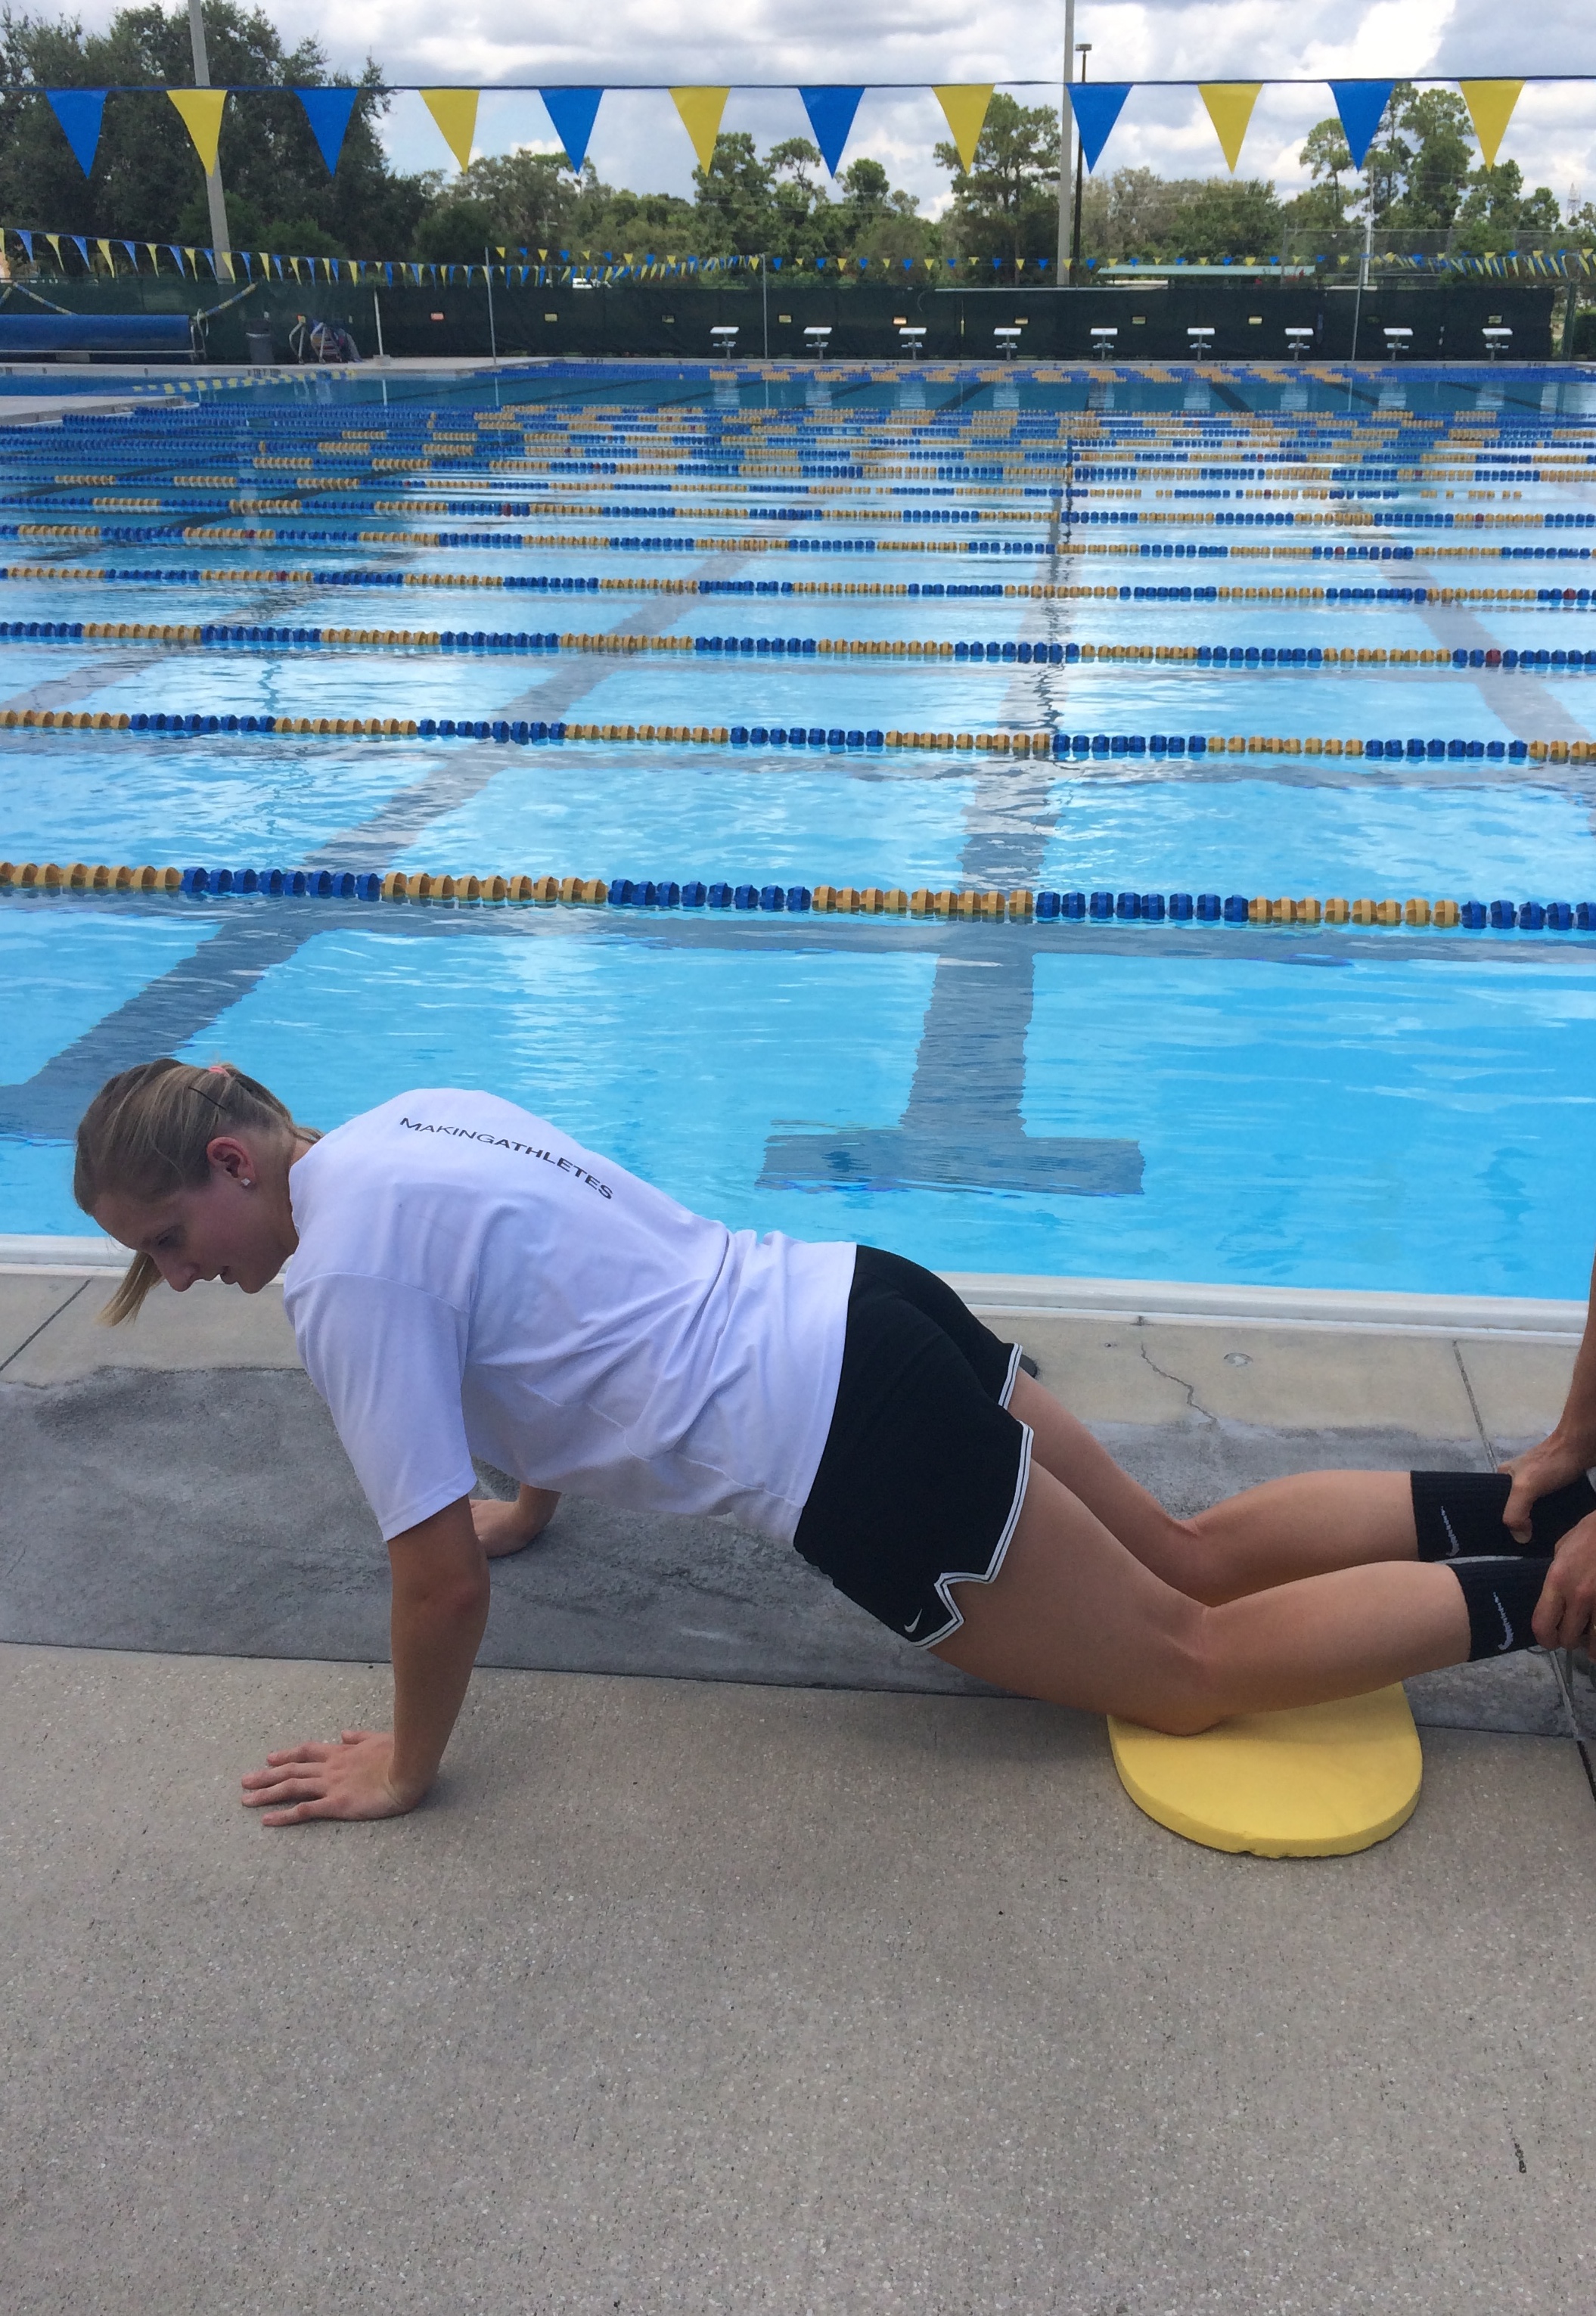
Kneel down on a soft surface such as a soft kickboard. Keep your toes dorsiflexed (the opposite of pointed) and on the floor. Have a partner kneel down behind you and push your heels down in order to hold you in place. Begin with a nice tall posture. Your goal is to lower yourself down to the floor as slowly as possible, pulling with your hamstrings on the way down. Keep your hand ready to catch yourself at the bottom because you’re going to fall. Once at the bottom, use both your arms and your legs to push/pull yourself back up to the starting position. It’s important on this exercise not to break at the hips during the range of motion.
* The falling hamstrings are a very stressful exercise on the calves, hamstrings, and glutes. Your athletes will be sore from this, and if they aren’t properly warmed up they might experience some cramping. Keep this in mind when deciding how to fit this in to your program.RDL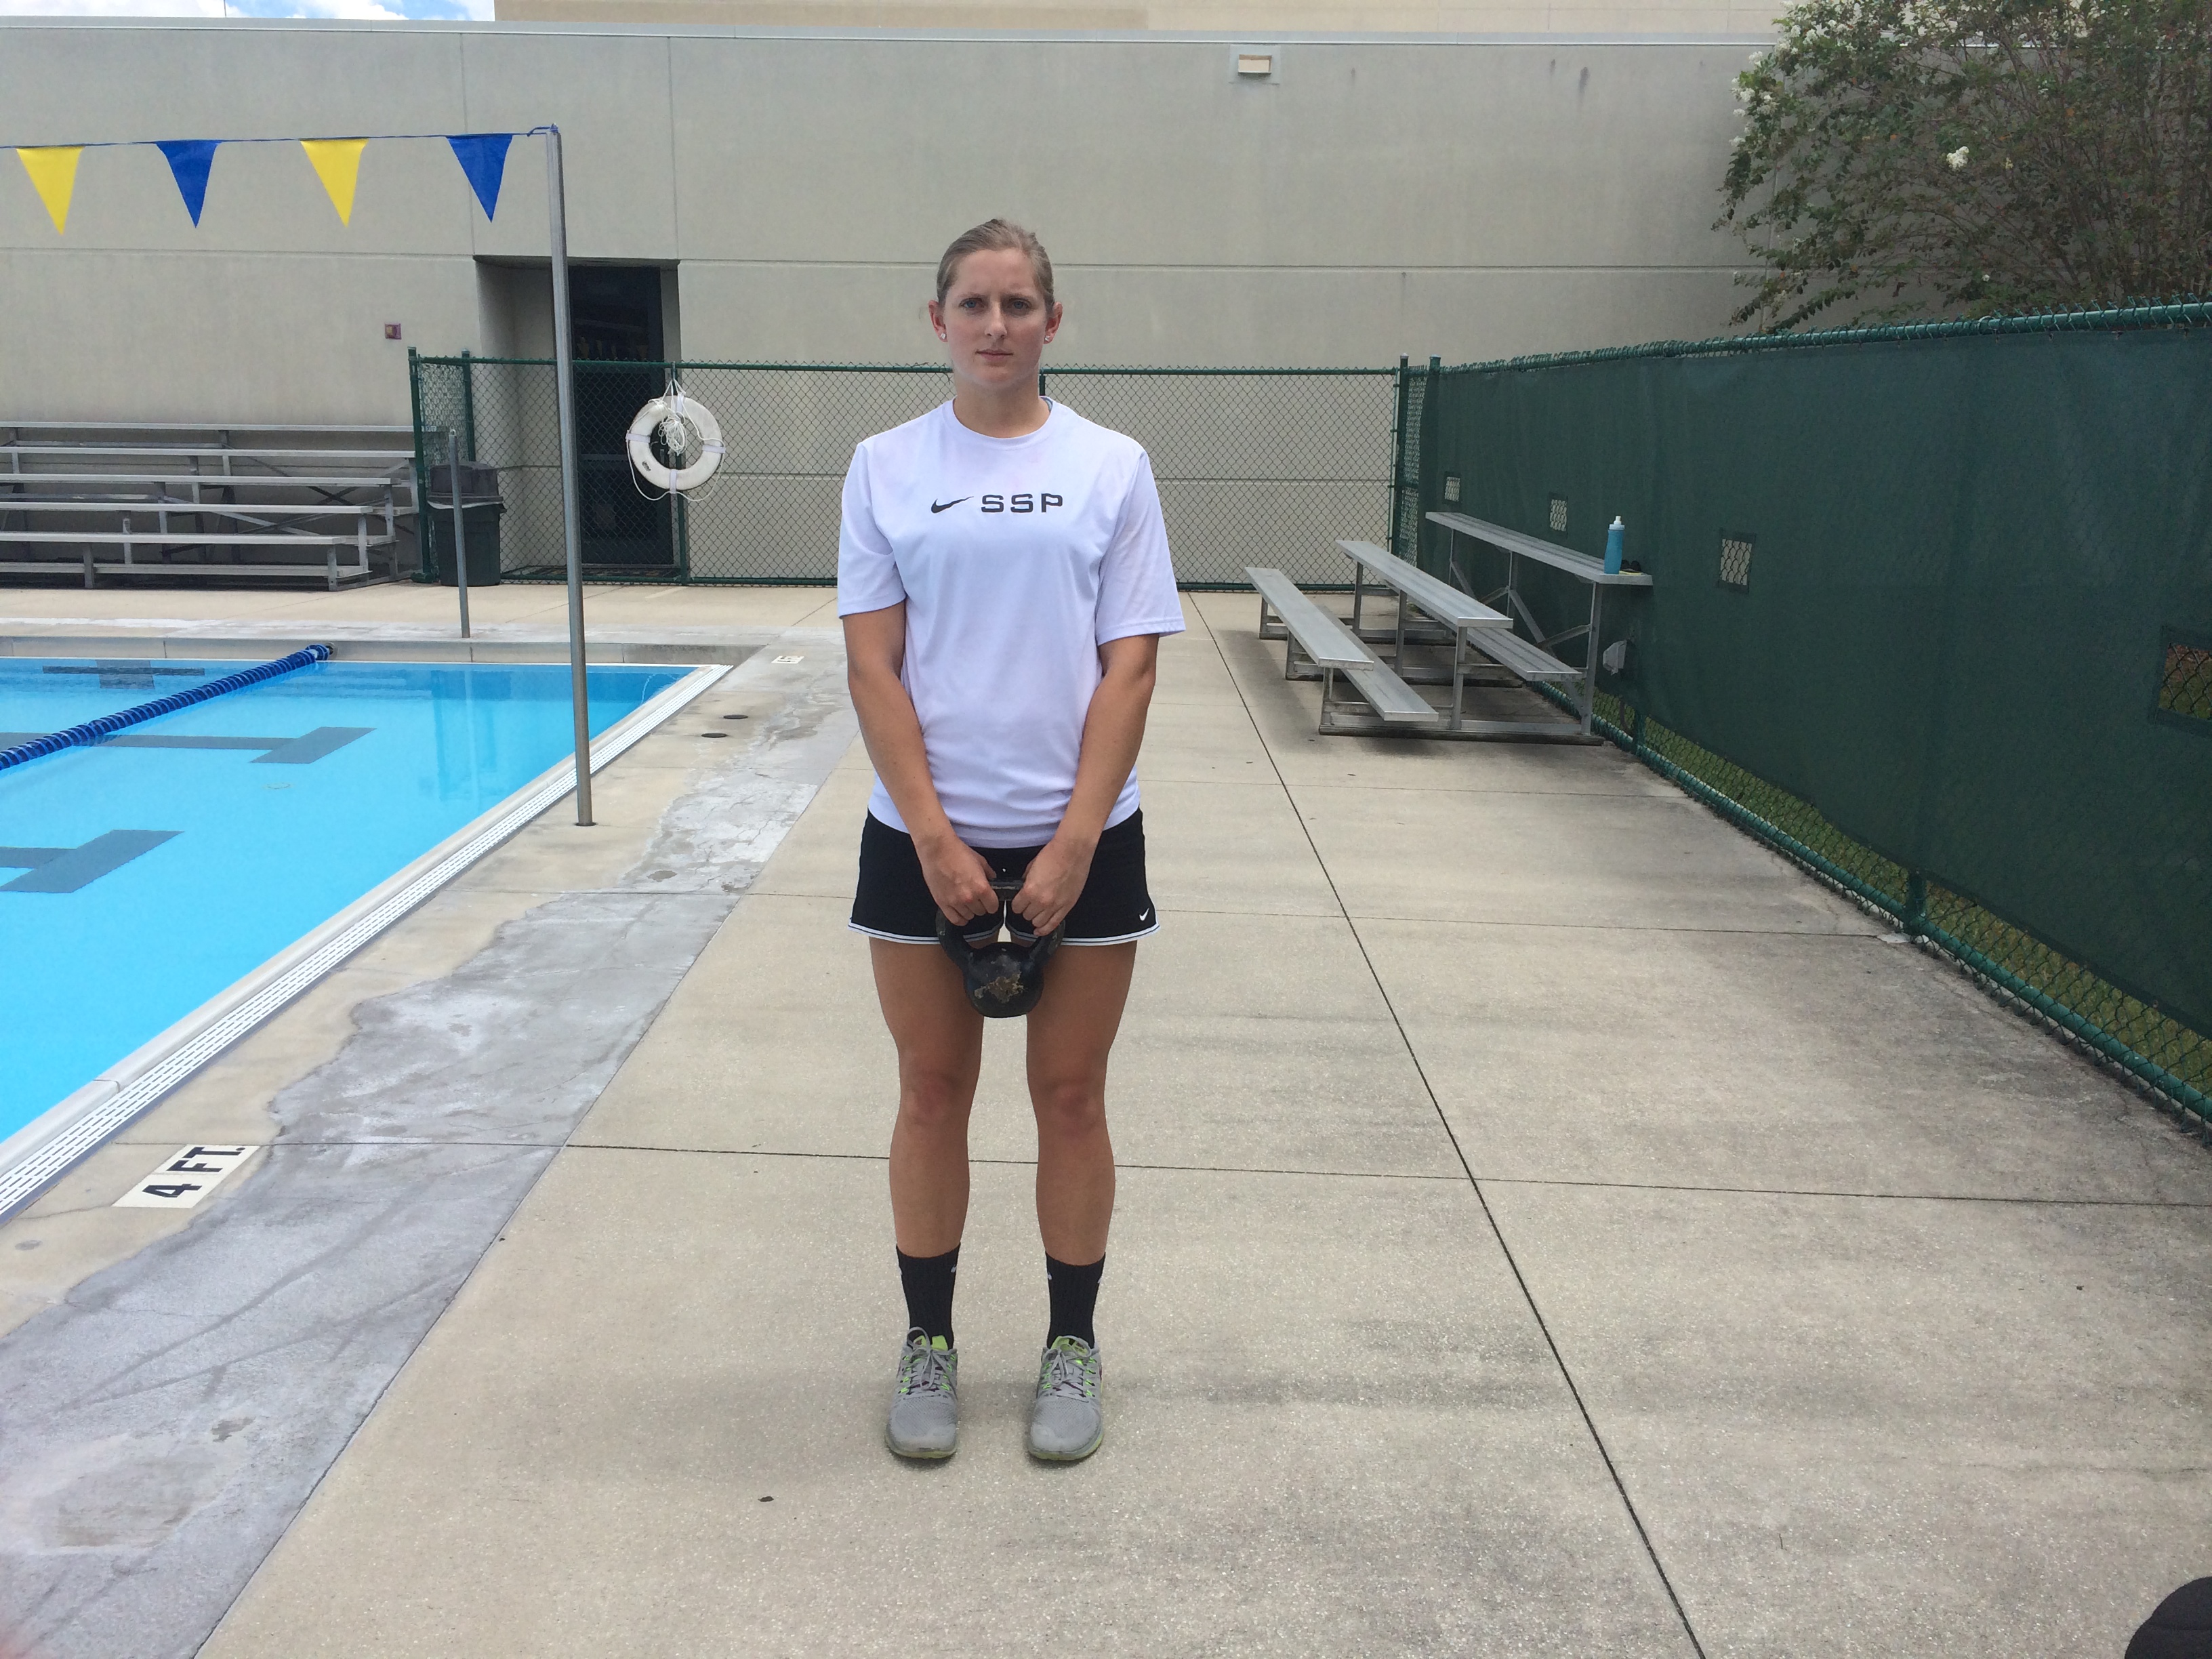

Use one or two kettlebells for the RDL. A stronger athlete will be able to handle a good amount of weight. If they are experienced in the exercise they might need to hold two of them in order to provide enough resistance. Stand up tall holding the handle of the kettlebell with arms straight and slightly bent knees. From here, hinge at the hips maintaining a lordotic spine (arch in the lower back). Think about pushing your hips backward as if reaching to touch your butt to a wall. Your knees should not bend any more than they were from the start position. Keep your shoulders tight and pulled back as you lower down until either the kettlebell reaches below your knees or you can no longer maintain a tight arch in your lower back. Once you have reached full depth, extend your hips so that you are standing up nice and tall back in the start position. While you perform the RDL the kettlebell should move straight down and up, staying close to the midline of your body.
RDL: 1 leg
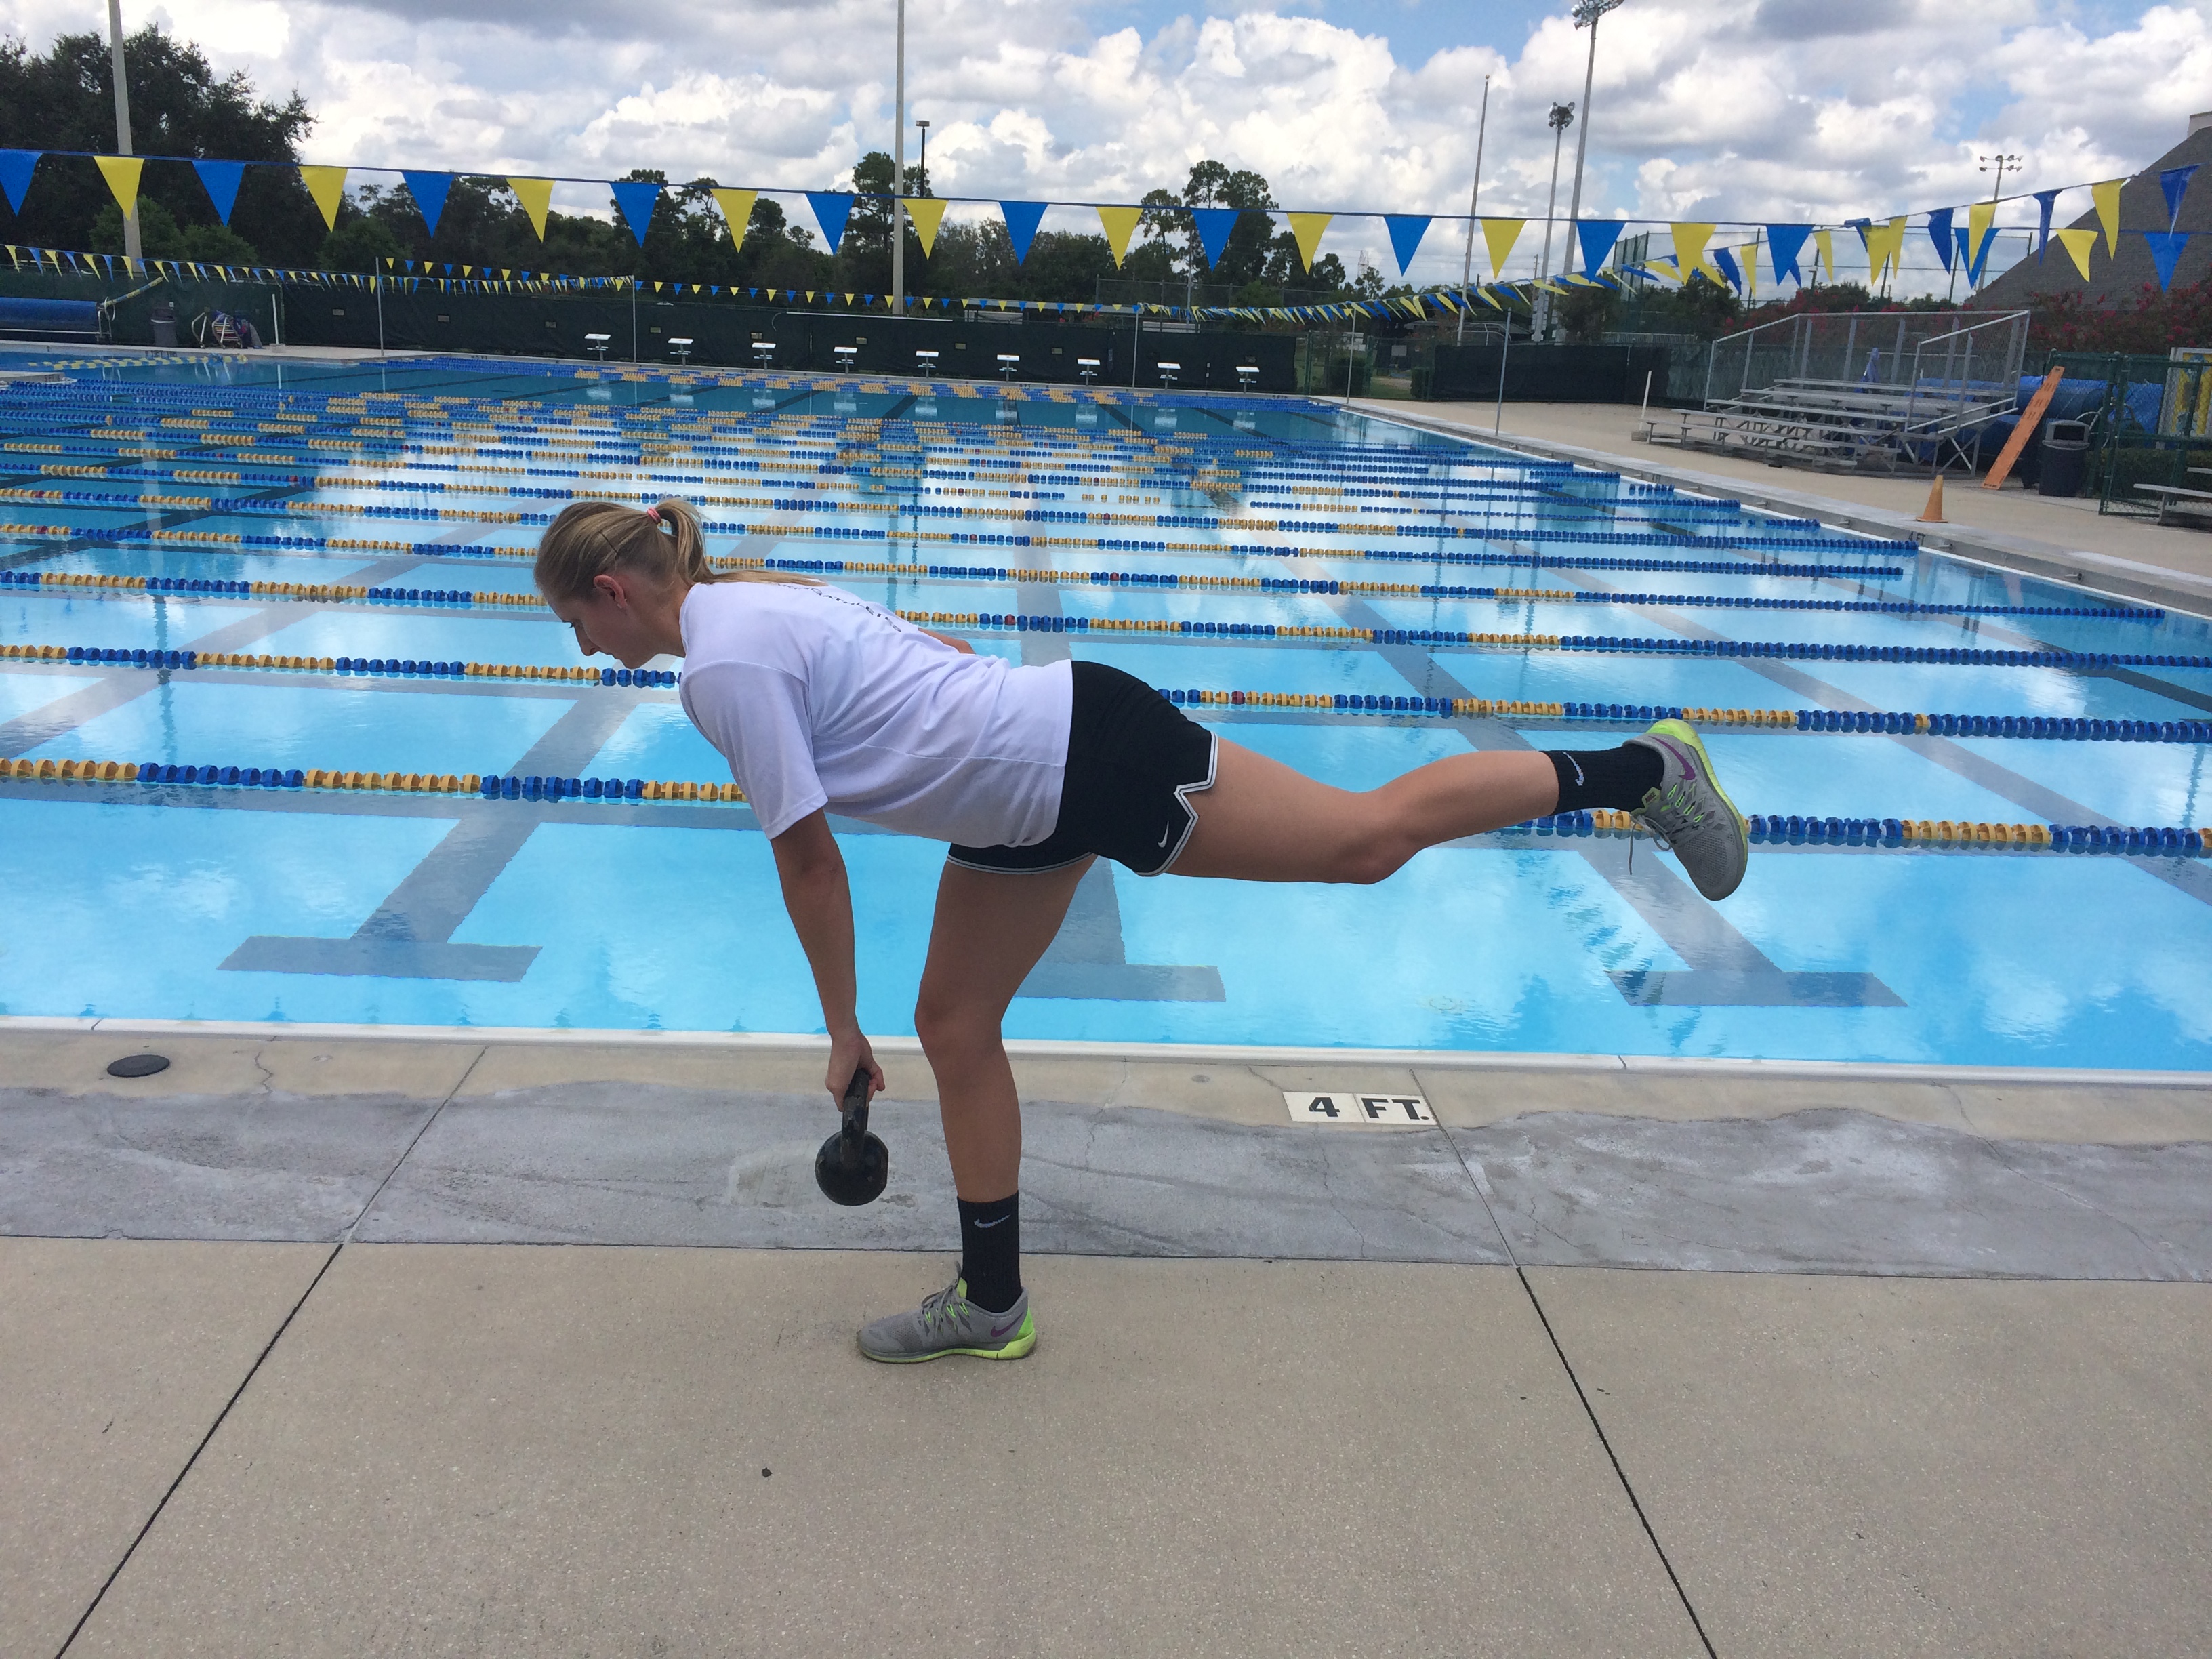
This is the same concept as the RDL but performed on one leg. You only need one kettlebell for this one. Begin by standing on your right leg only with a slight knee bend. Hold the kettlebell in your left hand (opposite of the working leg). Hinge over, keeping the left leg straight as it comes up high off the ground. There should be a straight line from head to left heel. Lower down until you reach just below the knees with the kettlebell then return to the start position. Perform all required reps then switch arm AND leg.
Goblet Squat

Start standing with your feel approximately shoulder width apart. Your toes should either point straight ahead or turned out about 10 degrees (depending on comfort and flexibility). Grip the kettlebell on the outsides of the handles holding it high and close to the chest. Squat down, keeping your chest up and the weight on your heels so that your feet are flat on the ground. Think about pushing your knees outward to allow your elbows to have room to touch on the insides. From a side view, the athlete’s thighs should be parallel to the ground at the bottom position of the squat. Return to the starting position by keeping your chest up and pressing through your heels.
Split Squat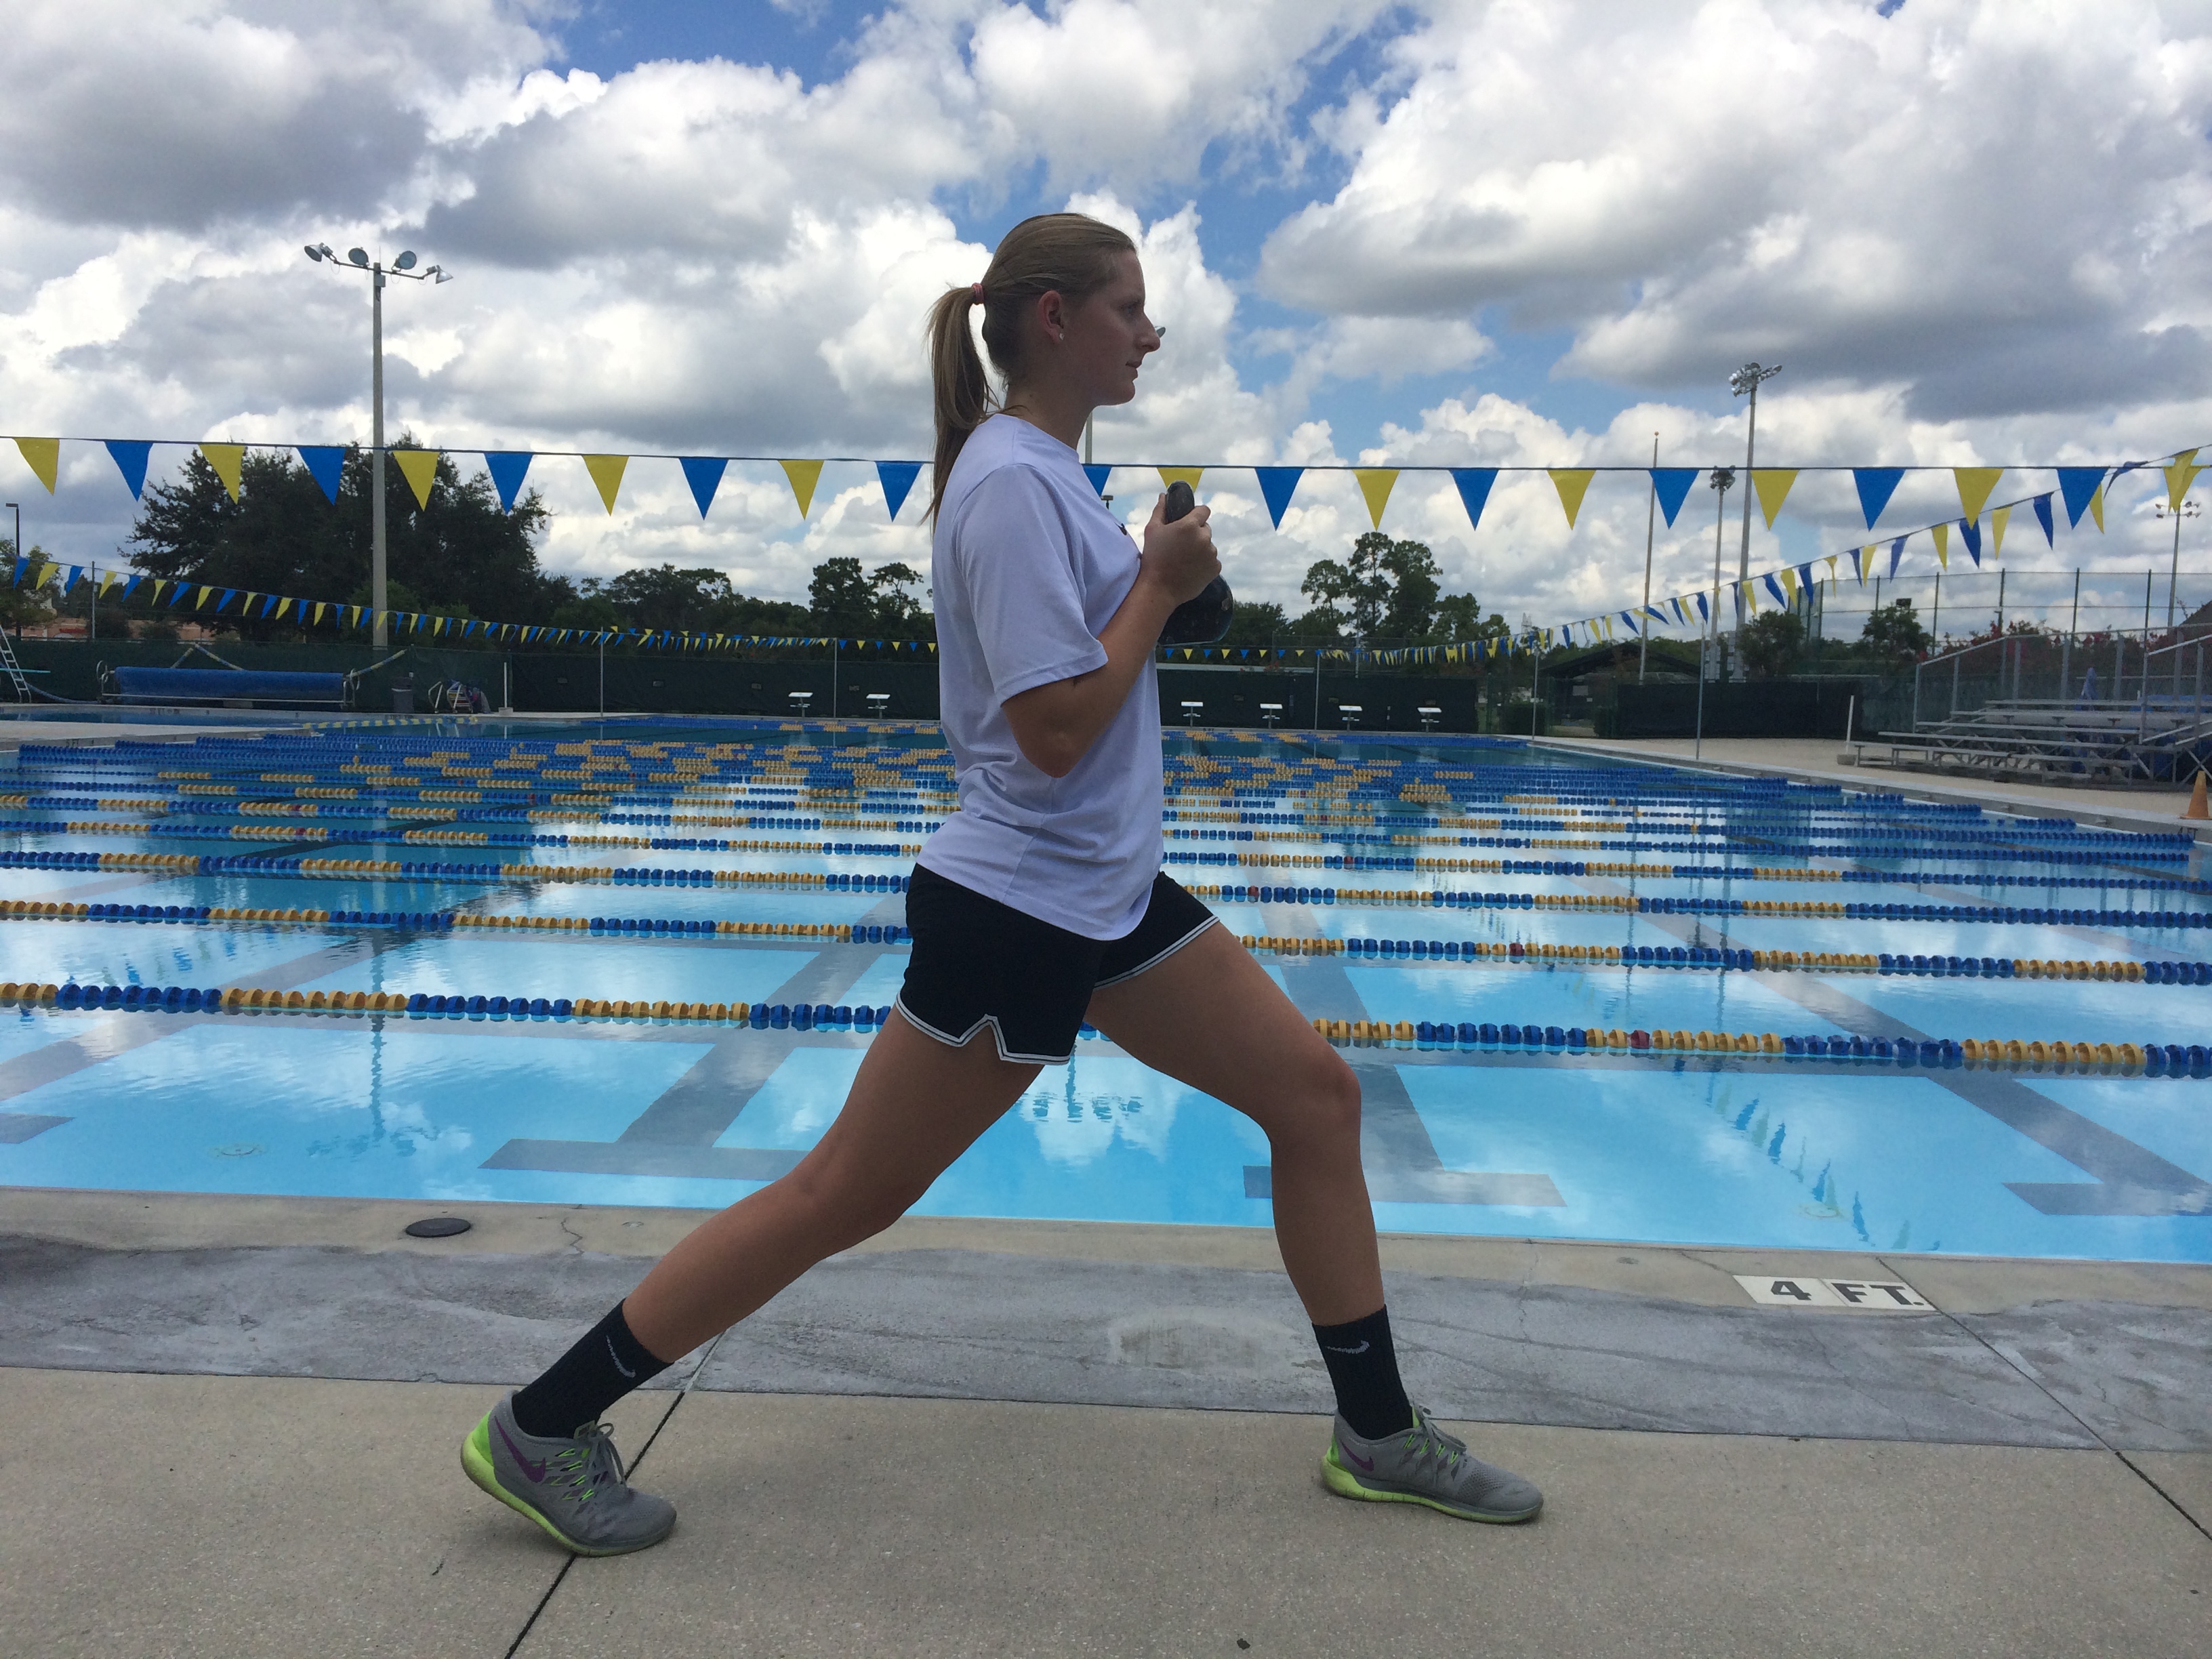
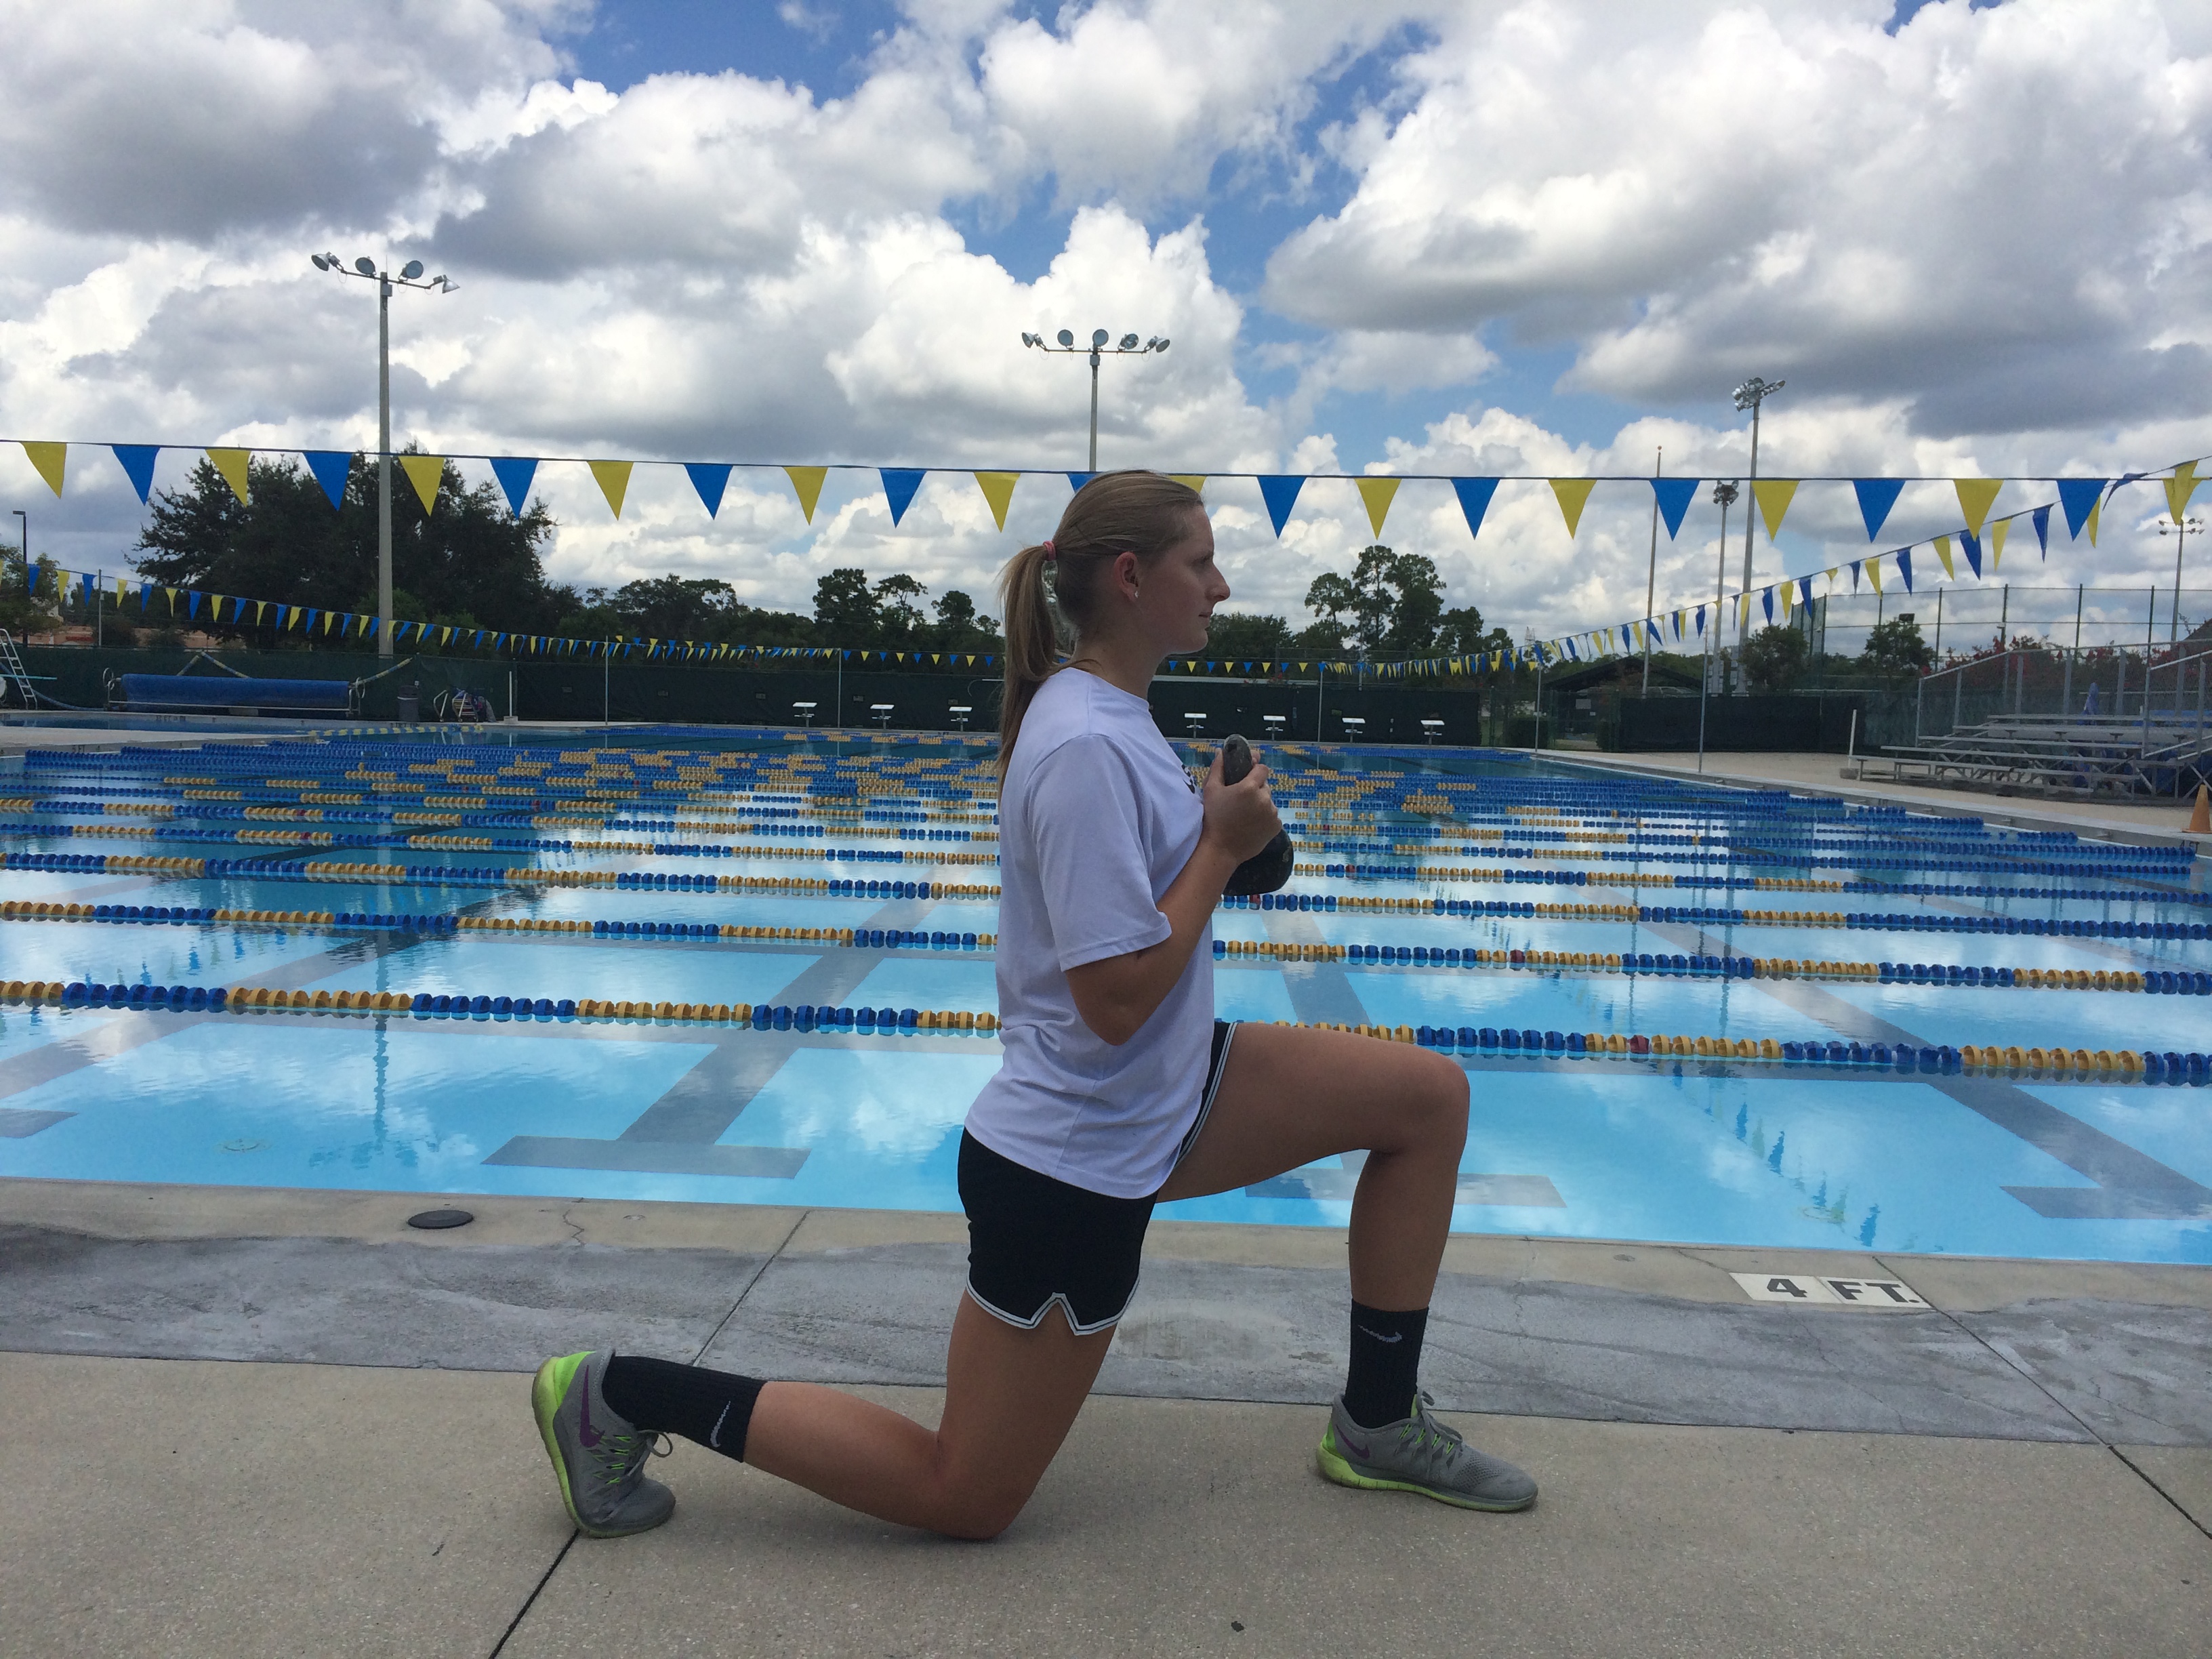
Hold the kettlebell in the goblet squat position at the chest. Split you legs out into a lunge stance. Drop your back knee straight down until it just touches the ground and then stand back up to the start position. Your chest/torso should be vertical the entire time. At the bottom of the split squat, front foot should be flat on the ground and front shin should be vertical. Perform all required reps on the same leg before switching your stance.
Forward Lunge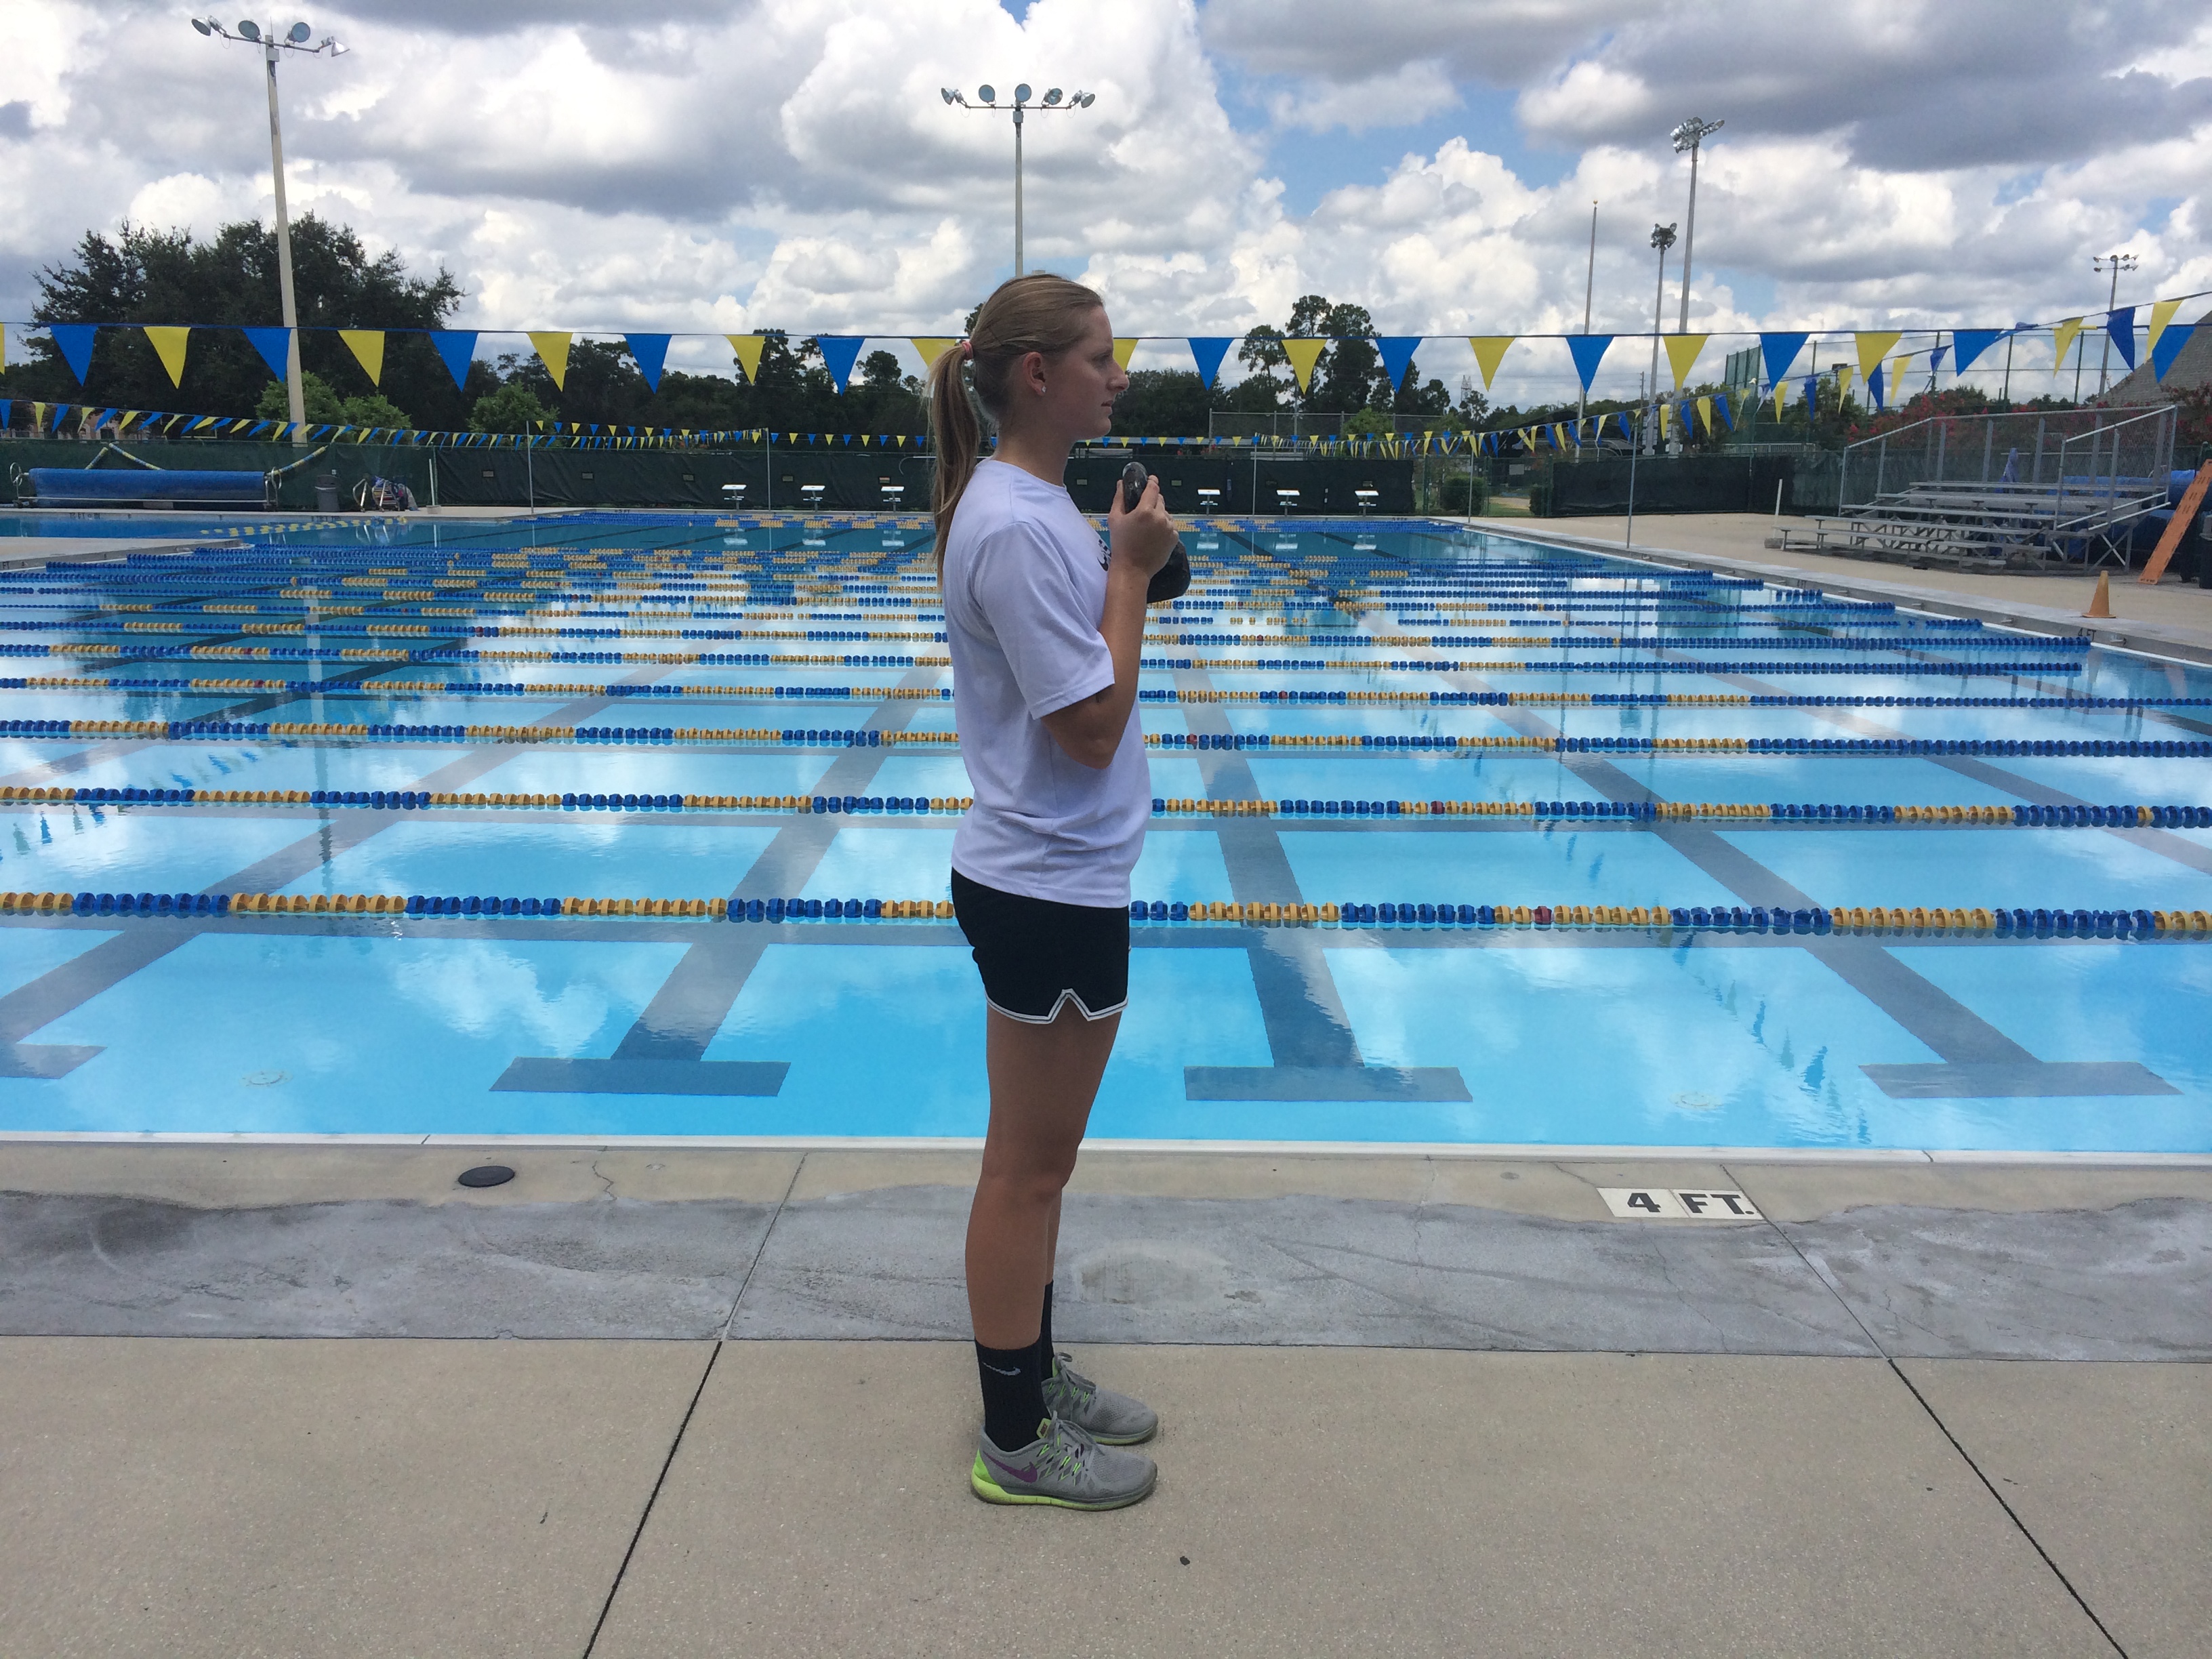
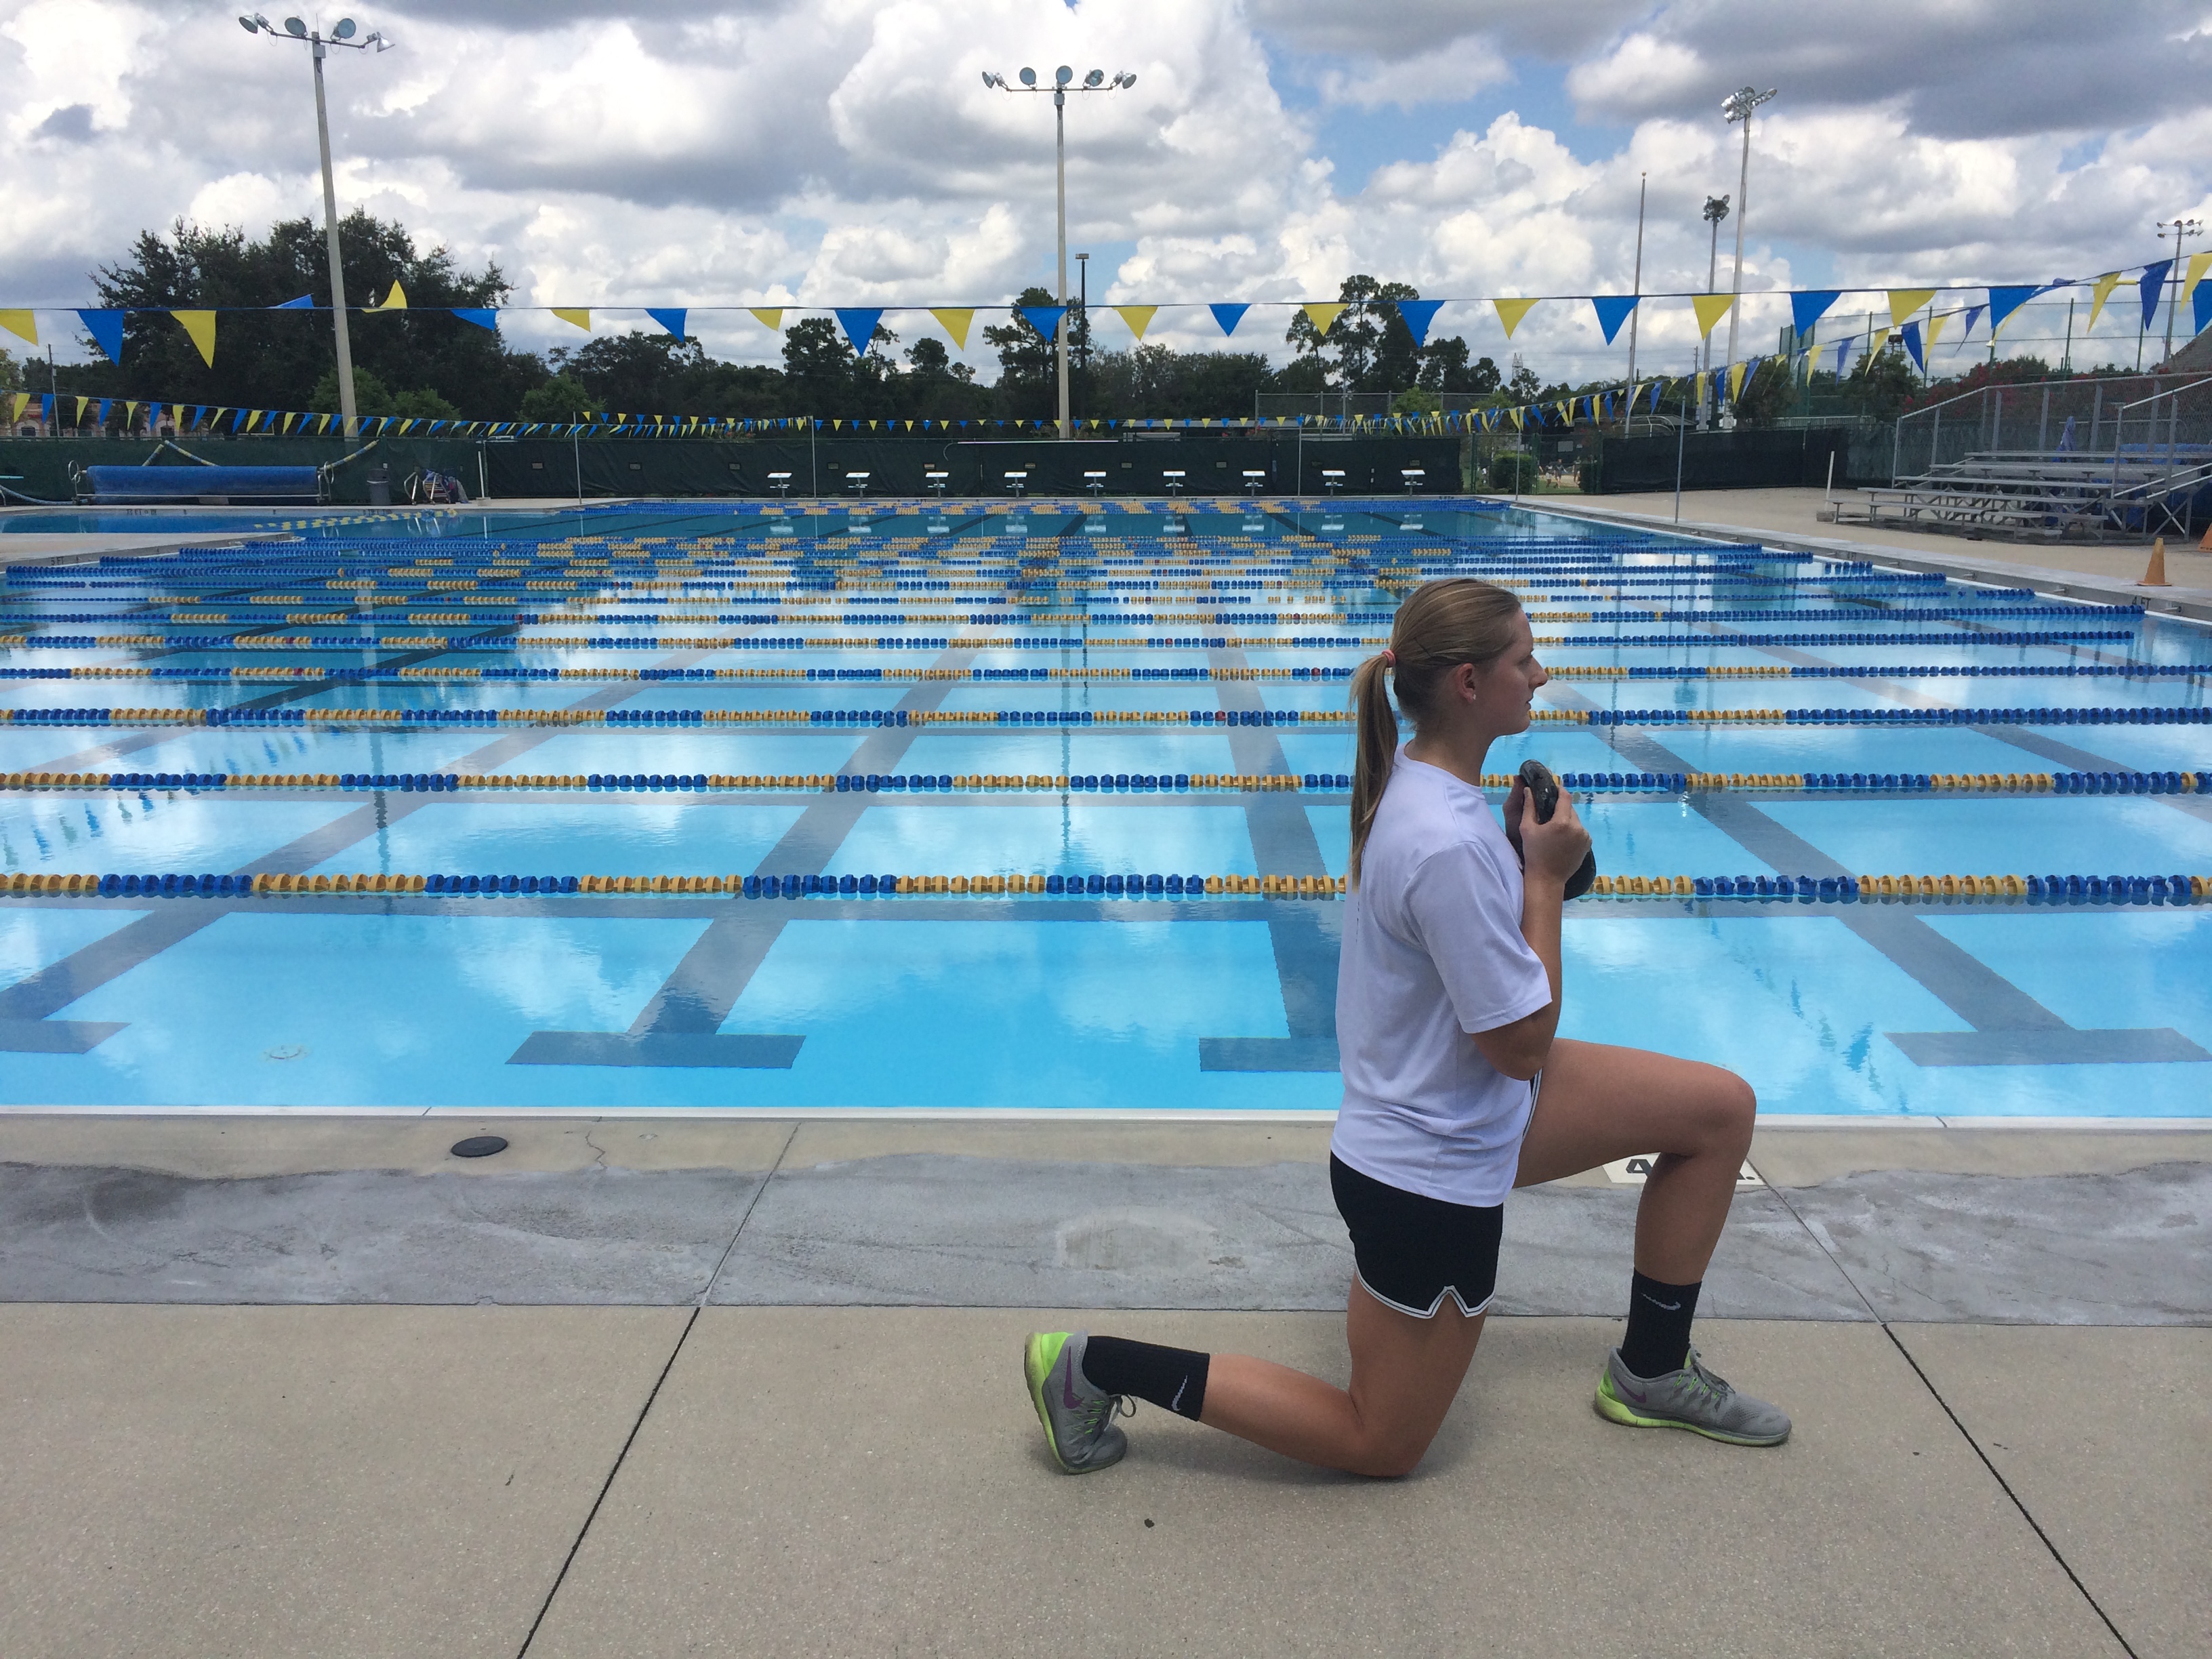
Hold the kettlebell in the goblet squat position at the chest. Begin in an upright stance with feet together. Lunge one leg out in front and drop the back knee straight down to the ground. The position on this should look just like the split squat. As you stand back up you will also push back to the starting position so that you end with feet back together.
Lateral Lunge
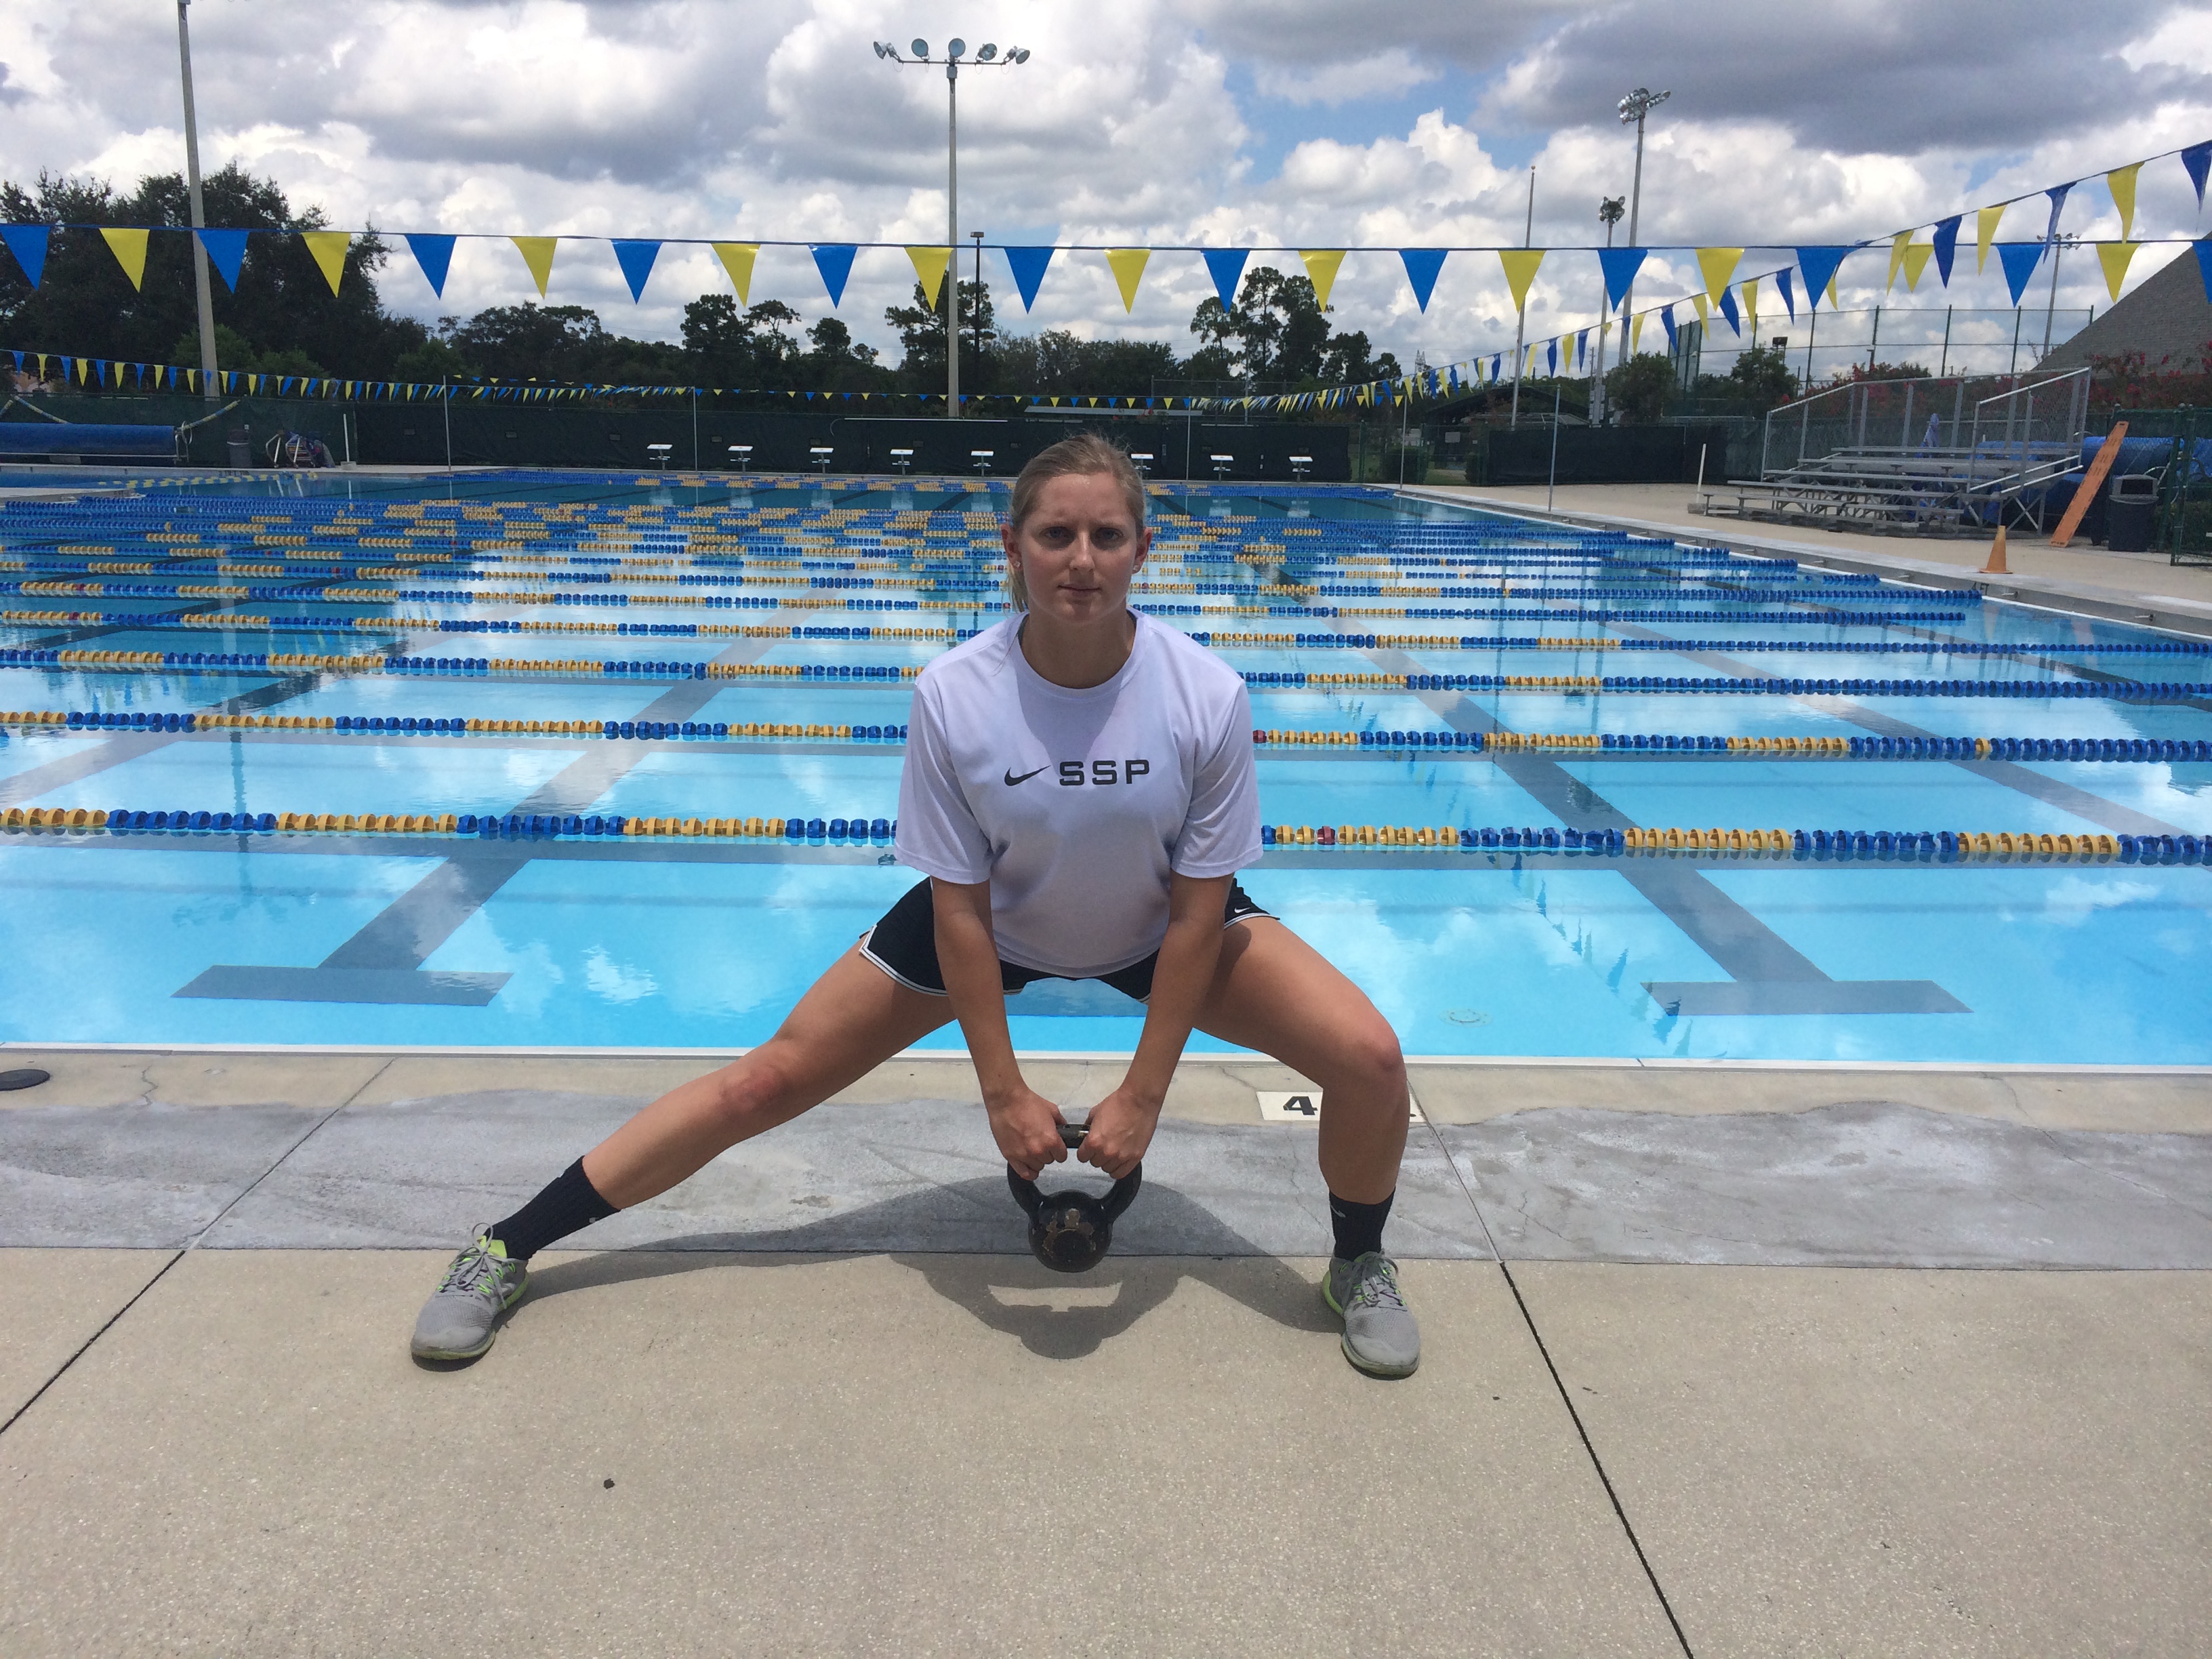
Spread your legs out wide and hold a kettlebell down low with arms extended. Feet should remain flat with toes straight ahead. Lunge to the left side, pushing your hips back as the left knee bends so that your knee doesn’t come forward over your toes. The right leg should be completely straight and your shoulder blades should be pinched together. Stand back up, returning to the start position, then switch sides.
Cossack Squats

This is a more advanced version of the lateral lunge. Assume the same wide foot stance but hold the kettlebell in the goblet squat position at your chest. Lunge down to your right side and pull you left toes up so that you can get as low as possible without dropping your chest. From here, rather standing back up, stay as low as you can and shift to the left side, allowing the right leg to straight and the right toes to come up. Continue your reps alternating sides and staying low to the ground.
Leave a Reply