Core Training for Swimmers
 By: Eric McGinnis, CSCSDirector of SSP Swim
Rollins College Strength & Conditioning Coach
Sports Performance SpecialistSpectrum Sports Performance
A strong core is always a top priority for swimmers. Coaches typically have their athletes perform a very high amount of abdominal work in an effort to accomplish this. Although I’m not going to undermine the importance of strengthening the abdominal muscles specifically, coaches often overlook how the core actually functions as a unit.
What Is The Core?
Your core is essentially your body without limbs. It isn’t simply your abs and lower back. Your core also includes your glutes, the muscles of the pelvic floor, muscles surrounding the spine, and even muscles in your shoulders. All of these muscle groups work together to carry out the necessary functions of sport and human movement.
What Does The Core Do?
Your core is what allows you to effectively transmit force through your body. Muscles do not work in isolation. When a boxer throws a hook, the movement starts with his back leg putting force into the floor. With every action there is a reaction, allowing energy to travel through the fighter’s lower limb, then hips, torso, shoulders, and finishing through the back arm with serious power. The fighter’s core is crucial in effectively transmitting the force from the lower body to the upper body.
The core also allows us to resist and stabilize opposing forces. If you think about the freestyle stroke there is a ton of movement happening. A strong core is what allows us to rapidly and aggressively use both our upper and lower limbs in sequence without zigzagging down the pool. It stabilizes all the movement that is happening and allows us to transmit forces in a way that effectively moves us forward without any excess movement occurring.
Why Not Just Train Abs?
There is certainly value to doing some isolated abdominal training and I’m not saying you need to stop doing it. However, I feel that most swim coaches are already doing plenty of that. That’s why I’m going to offer some exercise progressions that might differ from what you are already doing. All of these exercises teach the athlete how to engage the muscles of their core while also putting less stress on the spine than traditional crunch variations. You don’t need to throw out all of your favorite ab exercises, but try adding these in to your routine.
Equipment:
All you need is a resistance band! Ideally you should have varying thicknesses to accommodate the varying strength levels of the athlete. You will probably want a kick board or a towel to use as a cushion between you and the pool deck for a few of these exercises as well.
Exercise List:
The exercises for this program are split into four categories. Each category has three different progressions listed below in order from easiest to most difficult.
Front Pillar
Front Pillar
Front Pillar with leg lift
Front Pillar with reach
Band Rotation
Band Rotation- tall kneeling
Band Rotation- half kneeling
Pallof Press
Lateral Pillar
Lateral Pillar
Lateral Pillar with rotation
Lateral Pillar Row
Deadbug
Deadbug
Band Resisted Deadbug
Lateral Band Resisted Deadbug
The Program:
This core program will be done twice per week. If you followed my In-Season Program article, these core sessions can either be added to those strength training sessions or they can be done on the off days in between. The training split is very simple and will look as follows:
Day 1
Front Pillar variation
Band Rotation variation
Day 2
Lateral Pillar variation
Deadbug variation
Progressing the Program:
I’ve designed this program to align with my In-Season Programming template, meaning that it will progress in three-week cycles. Athletes will begin on the simplest training variations and increase volume each week for three weeks. After three weeks, the volume will drop back down and the athletes will progress to the next training variation.
Sample Program:Day 1: Week 1,2,3
Front Pillar – 3x :15-:30, 3x :20-:35, 3x :25-40
Band Rotation- tall kneeling – 3x8e, 3x10e, 3x12e
Day 2: Week 1,2,3
Lateral Pillar – 3x :15-:30e, 3x :20-:35e, 3x :25-40e
Deadbug – 3x :05e, 3x :10e, 3x :15e
Day 1: Week 4,5,6
Front Pillar with leg lift – 3x4e, 3x5e, 3x6e
Band Rotation- half kneeling – 3x8e, 3x10e, 3x12e
Day 2: Week 4,5,6
Lateral Pillar with rotation – 3x8e, 3x10e, 3x12e
Band Resisted Deadbug – 3x:10e, 3x :15e, 3x :20e
Day 1: Week 7,8,9
Front Pillar with reach – 3x4e, 3x5e, 3x6e
Pallof Press – 3x8e, 3x10e, 3x12e
Day 2: Week 7,8,9
Lateral Pillar Row – 3x8e, 3x10e, 3x12e
Lateral Band Resisted Deadbug – 3x :05e, 3x :10e, 3x :15e
* “e” stands for each, meaning that the prescribed reps should be performed on each side or in each position of the exercise. Ex: Lateral Pillar Row – 3x8e means 3 sets of 8 reps on each side.
** I left a range of time for the pillars. The actual amount of time given to the athletes should depend on their level of strength and how quickly they are progressing.
EXERCISE DESCRIPTIONS:Front Pillar
Lie down on your stomach then bridge up so that your weight is supported on your feet and forearms. From this position there are a lot of small details that need to be done correctly. Head position should be neutral, eyes looking straight down at the ground. Your spine should be flat so that there is no arch in the lower back (hips are not sagging). Contract your abdominal muscles, glutes, and even your lats by trying to pull the ground back behind you with your elbows. This creates tension through the entire body and creates the foundation for stability.
Front Pillar with Leg Lift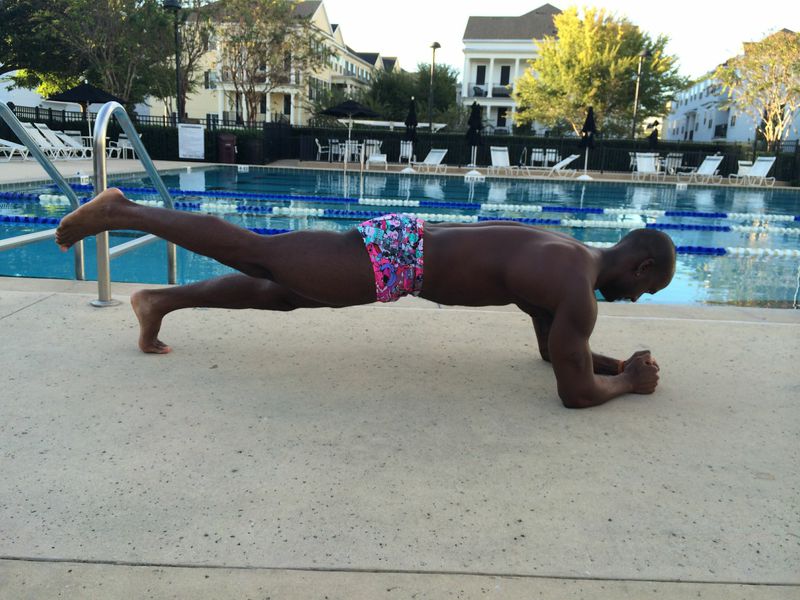
From the front pillar position, simply lift your right leg off the ground, keeping it completely straight and letting your right glute do the work. Then place your right foot back on the ground and switch sides. Perform alternating leg lifts at a controlled cadence. The most important part is that body position never changes when a leg is lifted.
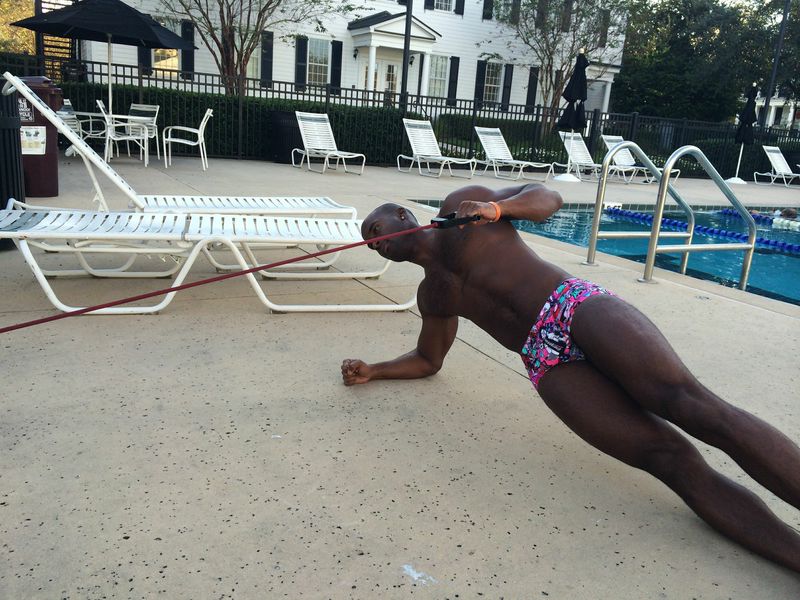
Front Pillar with Reach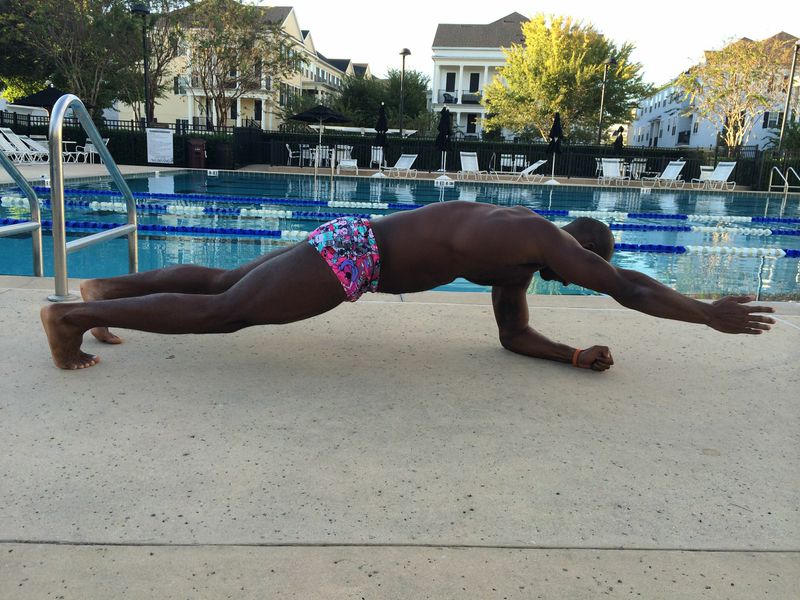
From the front pillar position, spread your feet out wide for a more stable base. From here, extend your right arm out in front, reaching for full extension without moving the rest of your body. Then place your right arm back on the ground and switch sides. Perform alternating arm reaches at a controlled tempo. When you reach your arm out, your body will naturally want to lift that side to compensate. The goal is to keep your torso parallel to the ground. Wider foot placement makes the exercise easier. If the prescribed reps are not challenging enough, simply narrow the stance.
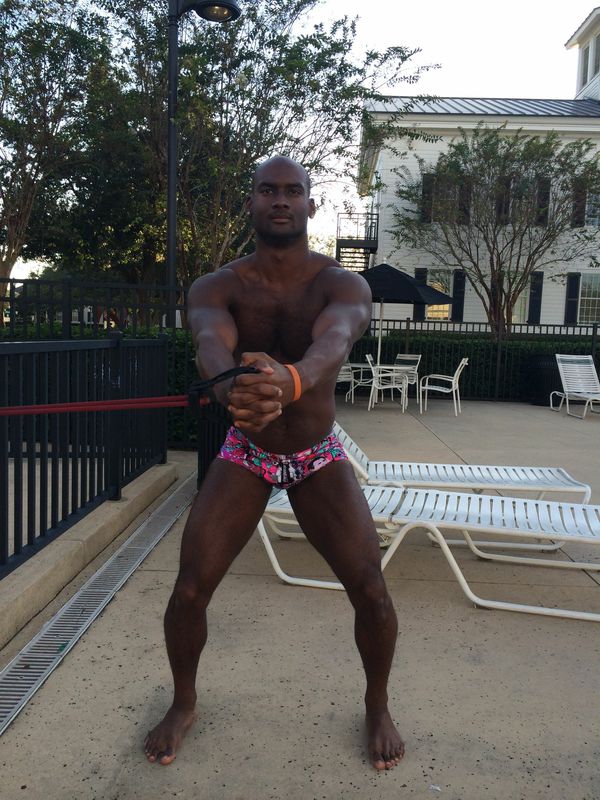
Band Rotation – Tall Kneeling

Kneel down on the floor and attach a band to something sturdy at chest height. Turn so that the band is running perpendicular to the direction you are facing. From here, extend nice and tall, engaging your core muscles the same way described for the front pillar. Holding on to the band, extend your arms out in front so that the band is directly in front of your closest shoulder. There should be tension in the band at the start. Keeping the arms extended, pull the band until it is now in-line with your furthest shoulder. Continue controlled reps from shoulder to shoulder without moving your hips or torso. After performing all repetitions, turn around and continue on the other side.
Band Rotation – Half Kneeling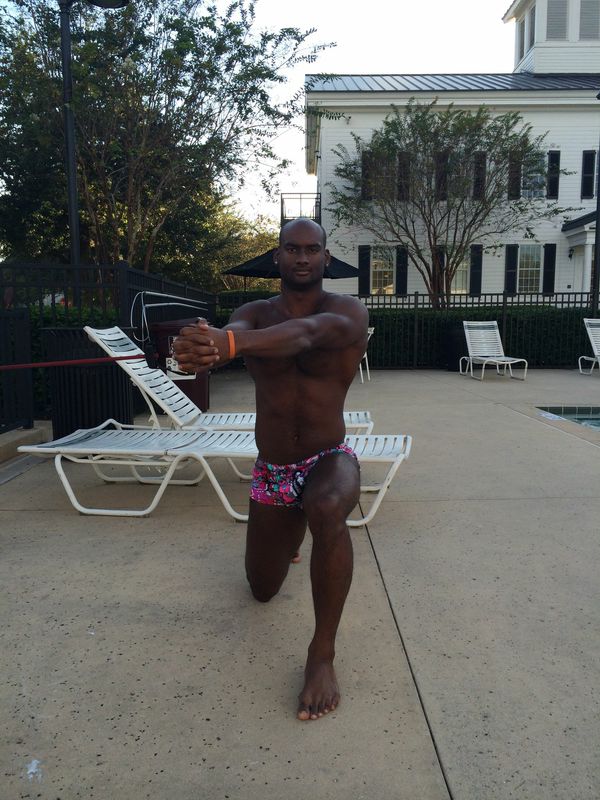

The half kneeling band rotation has the exact same setup as the tall kneeling rotation except you need to place one foot out in front so that you are only kneeling on one knee. This half kneeling stance should be narrow, feet in-line with your hips. Perform half of the reps with one leg out in front, then half of the reps with the other leg in front. Complete the necessary repetitions and then repeat on the other side.
Pallof Press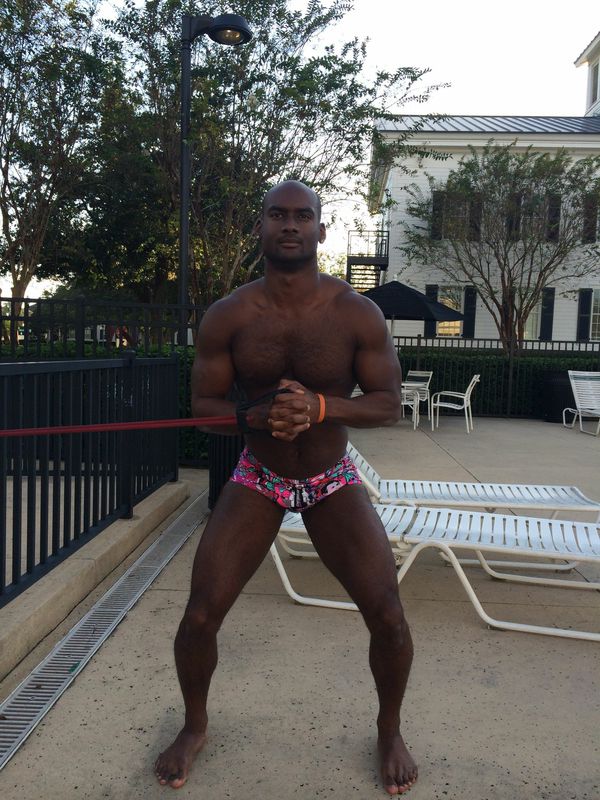

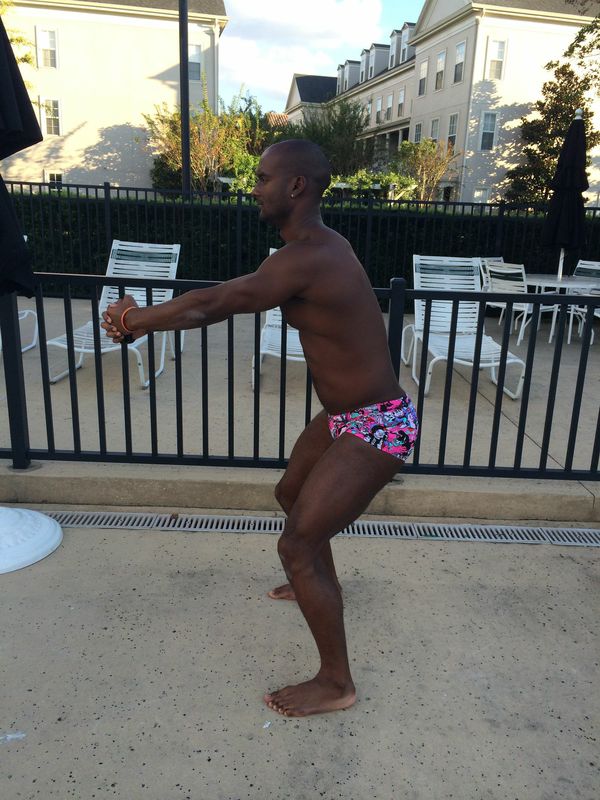
The pallof press is performed standing and will require more band tension than the band rotations. Double up you band so that you can hold both handles together. The band should be chest height and you should be facing perpendicular to the direction on the band. Step out far enough to get tension and start with your hands holding the band in at your chest. You should be in a good athletic stance. From here, extend your arms straight out in front, resisting the force of the band trying to pull your hands to the inside. Once fully extended, return to the starting position. Perform all repetitions under control and then switch sides.
Lateral Pillar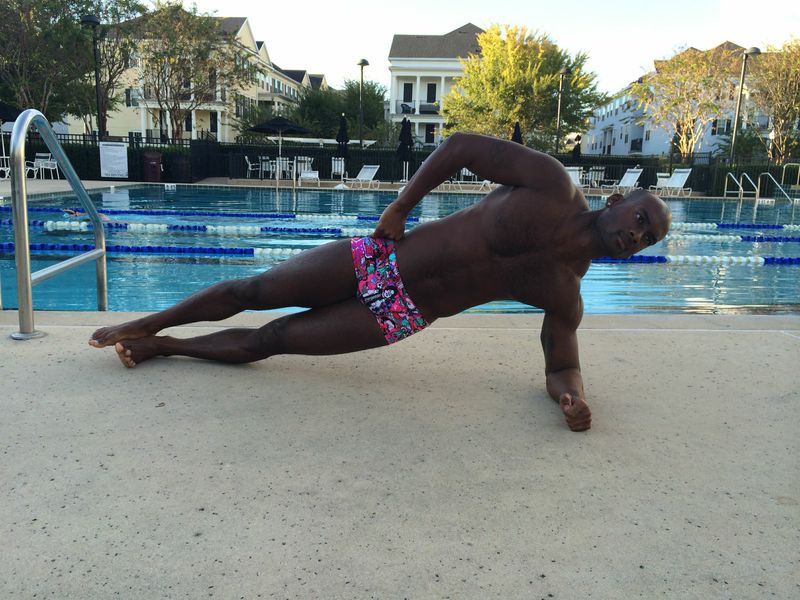
Lay on the ground on your right side. Bridge up onto your right forearm with your feet stacked on top of each other. Just like the front pillar, perfection is the goal for this simple exercise. Push your left hip toward the ceiling and extend your hips forward so that your body is in a perfectly straight line. Keep your left hand resting on your hip and pinch your shoulder blades together. Maintain this straight line for the duration of the exercise and then repeat on the other side.
Lateral Pillar with Rotation

Begin in a right side lateral pillar position. Extend the left arm toward the ceiling. From here, you will rotate and reach your left arm underneath yourself. Act like you are trying to grab something behind you. Then simple extend back to the starting position. Your hips and torso should move on this but the hips should stay high off of the ground throughout the repetitions. Repeat on the opposite side.
Lateral Pillar Row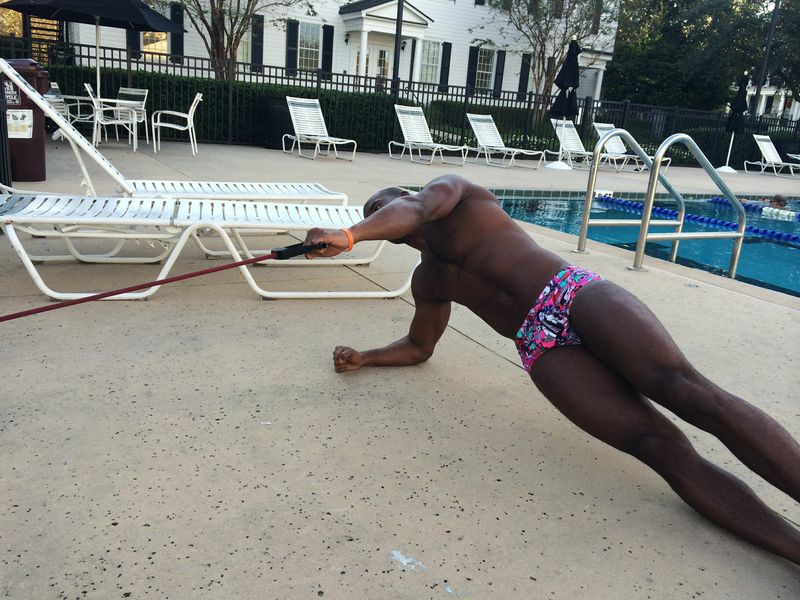
Start in a right side lateral pillar. You will need to have a band attached to something sturdy even with your left shoulder in this position. Face the band and begin by holding the band in your left hand with arm extended. There should be tension in the band in this position. Next, perform a row by driving your elbow back, keeping it close to your side. Body position should not change during the rows. Perform all repetitions and then switch to a left pillar where you will row with your right arm.
Deadbug
Lie on your back and extend both your arm and legs straight up into the air. From this position you need to push you lower back to the floor so that there is no space between you and the ground. You should feel your abs contract when you do this. Maintaining this flat back position, lower your right arm and right leg down until they’re hovering just off of the ground. Hold here for the prescribed amount of time then return to the start position. Next, perform the same movement with your left arm and left leg and hold. Repeat again with your right arm and left leg, and finally with your left arm and right leg. At no point should the lower back break contact with the floor.
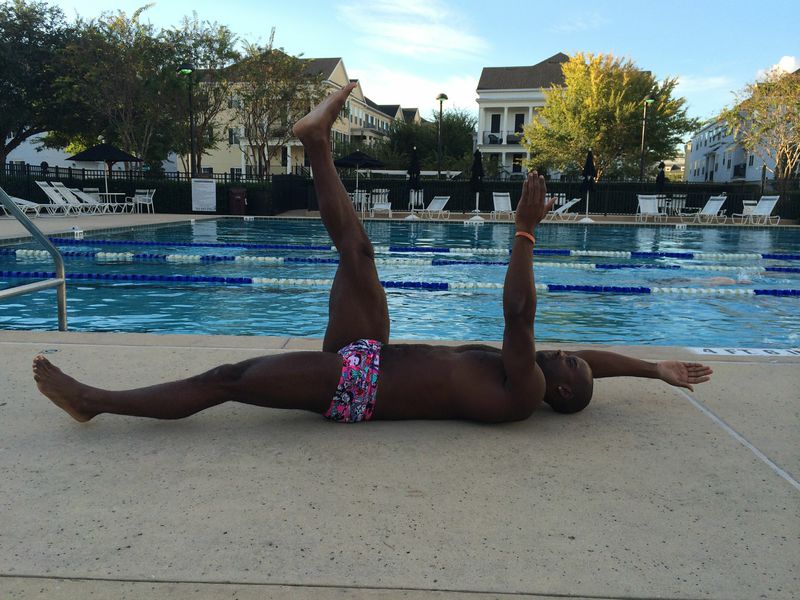
Band Resisted Deadbug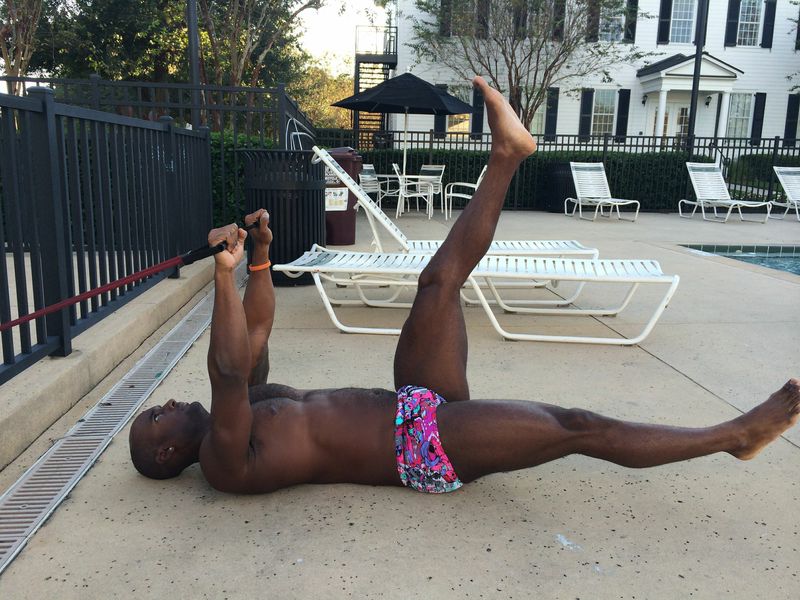
Loop a band around something sturdy so that you are able to hold both handles, one in each hand. Lie on your back, head closest to where the band is attached. Holding onto the handles, setup into the deadbug position with tension in the band. Arms and legs are extended straight overhead. Your lats should now be engaged because of the band tension. From this position, lower your right leg down until it is hovering and hold for the prescribed amount of time. Then repeat with the left leg. Your arms will not move in this variation of the exercise.
Lateral Band Resisted Deadbug
Tie a band around something sturdy at the same height you used for the band resisted deadbug. For this variation, you will only want to hold one handle, using less band tension. Lay in the deadbug position but this time you will line your body up perpendicular to the direction of the band. From here, hold the handle in both of your hands directly over your shoulders. Next, lower your right leg down until it is hovering and hold for the prescribed amount of time. Then repeat with the left leg. Like the band resisted deadbug, arms will not move in this variation.
I love these exercises. I would also recommend replacing the band with our isokinetics so you get accommodating resistance at full speed. Bands snap back on the eccentric contraction which isn't something swimmers need and is where any injury occurs. Also band get harder as you go through your range of motion where, in reality you need more resistance where you are stronger — when your extremities are closer to your core. We invent, sell, and service isokientics (Minigym, etc. — the ones used by Spitz, Evan, Phelps, etc. world wide) from small wall mounted ones to rotating swim benches and Leapers, etc. I've used them in coaching for generations and can tell you they are vastly superior to bands. We are woking on isos that connect to your iPhone — keep watching for that and helping with ideas at CompetitiveSwimmer.com. There's a blog at the top and of course you can comment here or call me. Thanks so much Eric! Great post.